background image

DCF-S-0126-2A (06.04) 


Japan Aviation Electronics Industry, Ltd. 


Connector Div. Production Engineering Dept.

                日本航空電子工業株式会社コネクタ事業部生産技術部

Number 

番号

T700416 

Page 

2

10 

JAE Connector Div. Proprietary. 
Copyright (C) 2016, Japan Aviation Electronics Industry, Ltd.

はじめにお読みください

Read In the Beginning 

絵表示について

Caution symbols 

この取扱説明書及び製品への表示では、製品を安
全に正しくお使いいただき、あなたや他の人々への
危険や財産への損害を未然に防止するために、
色々な絵表示を記載しています。その表示と意味は
次のようになっています。内容を良く理解してから本
文をお読みください。

In this manual and on our products as well, the 
following caution symbols are used to show 
important information and warnings for correct use 
of our products. This is to avoid possible personal 
injury and property damage.    Be sure to read and 
understand these special instructions before 
proceeding to the procedural details. 

危険

DANGER 

この表示を無視して誤った取り扱いをすると、人が死亡または重傷を負う危険が差し迫っ

て生じることが想定される内容を示しています。

A danger indicates an operation that results in serious personal injury or fatal 

wound if precautions are not followed. 

警告

WARNING

この表示を無視して誤った取り扱いをすると、人が死亡または重傷を負う可能性が想定さ

れる内容を示しています。

A warning indicates an operation that could cause serious personal injury or 

fatal wound if precautions are not followed. 

注意

CAUTION

この表示を無視して誤った取り扱いをすると、人が傷害を負う可能性が想定される内容
及び物的損害のみの発生が想定される内容を示しています。

A caution indicates an operation that could cause personal injury or 
equipment damage if precautions are not followed. 

絵表示の例

Examples of caution symbols

△記号は注意(危険、警告を含む)を促す内容が
あることを告げるものです。
図の中に具体的な注意内容(左図の場合は感電
注意)が描かれています。

An equilateral triangle 

  serves the same as 

CAUTION (or DANGER and WARNING). It 
contains a specific warning information inside (the 
lightning flash with arrowhead symbol shown left 
means a risk of electric shock to persons). 

    記号は禁止の行為であることを告げるもので
す。図の中や近傍に具体的な禁止内容(左図の場
合は分解禁止)が描かれています

A no entry mark        indicates an action that must 
be prohibited.    Inside or near it is indicated a 
special instruction (the label shown left means 
prohibition of disassembly). 

●記号は行為を強制したり、指示する内容を告げ
るものです。図の中に具体的な指示内容(左図の
場合は差し込みプラグをコンセントから抜いてくだ
さい)が描かれています。

A black circle 

  indicates a required action that 

must be proceeded without failure.    It contains 
specific instructions inside (the label shown left 
means required disconnection of a plug from an 
outlet). 

2/10

Summary of Contents for CT170-21J-KN01

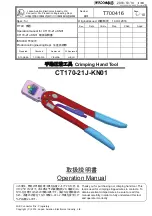
Page 1: ...proved D TANAKA T OOKAWA Y ISHIDA H ISHII JAE Connector Div Proprietary Copyright C 2016 Japan Aviation Electronics Industry Ltd 手 手動圧着工具 Crimping Hand Tool CT170 21J KN01 取扱説明書 Operation Manual この度は 弊社の手動圧着工具をお買い上げいただき あ りがとうございます 本工具は予め被覆を剥いた電線とコン タクトを圧着するための手動工具です 良好な圧着結線の ため 本書の内容を十分に理解し 正しい作業を安全に行 うようお願いします Thank you for purchasing our crimping hand tool This tool is used for crimping strippe...

Page 2: ...死亡または重傷を負う可能性が想定さ れる内容を示しています A warning indicates an operation that could cause serious personal injury or fatal wound if precautions are not followed 注意 CAUTION この表示を無視して誤った取り扱いをすると 人が傷害を負う可能性が想定される内容 及び物的損害のみの発生が想定される内容を示しています A caution indicates an operation that could cause personal injury or equipment damage if precautions are not followed 絵表示の例 Examples of caution symbols 記号は注意 危険 警告を含む を促す内...

Page 3: ...ます Please work while getting enough rest when you use this tool for a long time Injury might be caused for the body 注意 CAUTION クリンパが開閉します クリンパとアンビルの間 の隙間に指を入れないで下さい 怪我の原因とな ります Crimper and anvil can pinch the fingers Never put the fingers into space between crimper and anvil 指定された適合コンタクト及び適合電線以外の ものを圧着しないで下さい Do not crimp other than specified applicable contacts and applicable wires ハンドルは圧着完了位置でラチ...

Page 4: ...業 5 Crimping 6 5 1 ハンドルの開放 5 1 Handles opening 6 5 2 コンタクトのセット 5 2 Contact setting 6 5 3 電線のセット 5 3 Wire Setting 7 5 4 圧着 5 4 Crimping 7 5 5 コンタクトの取り出し 5 5 Contact removal 7 6 製品チェック 6 Check of Crimped Contacts 8 7 保守 点検とトラブル時の対応 7 Maintenance Trouble Shooting 9 8 圧着条件 8 Crimping Condition 10 8 1 適用電線とコンタクト 8 1 Applicable wire contacts 10 8 2 圧着詳細 8 2 Crimping data 10 1 1 仕様 1 Specification 工具型式 M...

Page 5: ...hange of crimper クリンパは上下に4種類の圧着部があります 適切な電線 端子に合わせてセットして下さ い The crimper has four kinds of crimp cavities up and down sides Set it up according to the applicable wire and contact クリンパ保持ピンを引き抜くとクリンパを取り外 すことができます クリンパ正面に電線サイズ が表示してあるので 圧着したい電線サイズを 下にしてヘッドにセットしてください You can pull the crimper retaining pin and remove the crimper Since the wire size is shown on the front of the crimper set the head down...

Page 6: ... handles until ratchet released 注意 CAUTION アンビルが開閉します 怪我の原因となりますので クリンパとアンビルの間の隙間に指を入れないで下さ い The crimper moves OPEN CLOSE Never put fingers into opening between the crimper and anvil 5 2 コンタクトのセット 5 2 Contact setting 圧着するコンタクトを図のような向きにして正 面から挿入して下さい The direction of a contact to be crimped is shown in the fig Below and the direction of the insertion is from front face ターミナルガイドに沿ってコンタクトを挿入し コンタクトの...

Page 7: ...wire to the hand tool Match the position of the wires visually Set the wire so as to satisfy the conditions of Section 6 5 4 圧着 5 4 Crimping 電線とコンタクトをセット状態に保持し ずれな いように注意しながらハンドルを徐々に握り締 めてください While holding the wire and contact position as set close the handles gradually with being careful not to misaligned until the ratchet is released In this stage crimping is completed 注意 CAUTION アンビルが開閉します 怪我の...

Page 8: ...ていること 2 Wire strands tip is extended from the wire barrel 3 芯線バレル内に被覆が喰い込んでいないこと 3 Wire insulation does not intrude into the wire barrel 4 芯線がバレルからはみだしていないこと 4 Wire strands do not protrude between the wire barrel and the insulation barrel 5 被覆バレル内に被覆が巻かれていること 5 Wire insulation is wrapped in the insulation barrel 6 ベルマウス 芯線未圧着部 があること 6 Bell mouth not crimped part is formed 7 圧着面が過度に荒れていないこと 7 Crimp...

Page 9: ... not the maintenance of the customer oneself of our hand tool resolve and oil it wears out Crimper and the Anvil etc if the tool is used for a long term and causes defective crimping We will at least recommend our company to send it to the check once a year 4 トラブル時の対応 4 Trouble shooting 工具に異常がある場合は まず下記の表をご参 照の上 対処ください それでも解決されない場 合は 工具を分解等せず 弊社サポートセンタ ー 支社 または購入された販売店までご連絡 下さい Please deal after f...

Page 10: ...ight Range 3 被覆巻き高さ 4 Insulation height 4 圧着強度 Crimp strength CT170 21J KN01 C1 12 1 KN01P15HGP1 KN01S15HGP1 AWG 12 C1 14 KN01P15HGP1 UL1015 AWG 14 41本 φ0 26 1 65 1 75mm 4 1mm 222 5N KN01S15HGP1 UL1015 AWG 14 41本 φ0 26 1 65 1 75mm C2 14 KN01P15HGP2 AWG 14 434本 φ0 08 1 68 1 78mm 3 2mm 222 5N KN01S15HGP2 AWG 14 434本 φ0 08 1 68 1 78mm 3 2mm C2 16 KN01S15HGP2 UL1015 AWG 16 54本 φ0 18 1 43 1 53mm 3 3mm ...

Page 11: ...Mouser Electronics Authorized Distributor Click to View Pricing Inventory Delivery Lifecycle Information JAE Electronics C2777 CT170 21J KN01 ...

Reviews: