3
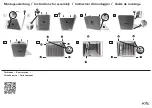
INSTALL VALVE BODIES and HANDLES
INSTALL HANDLES
HOSE CONNECTIONS
1-3/4''
(44mm) MAX.
STOP RING
GROOVE
Insert VALVE BODY
(2)
through mounting hole from underside
of tub deck or mounting surface.
Note: VALVE BODY marked Hot is installed in the left Mtg. hole,
VALVE BODY marked Cold in the right when facing front of fitting.
Maximum mounting surface thickness is 1-3/4".
Install STOP RING
(6)
onto VALVE BODY
(2)
if not in place. Install
O-RING
(7)
into groove in FLANGE
(8)
.
Thread FLANGE
(8)
flush against STOP RING
(6)
. Thread
ROSETTE
(9)
onto VALVE BODY
(2)
until tight against it's
internal stop.
Align VALVE BODY
(2)
and from below tighten LOCKNUT
(1)
to secure VALVE BODY
(2)
.
Turn VALVES to off position. Align HANDLES
(10)
as shown or
as desired and install onto HANDLE ADAPTER
(11)
. Tighten SET
SCREW
(12)
with HEX WRENCH
(13)
supplied. Push PLUG
BUTTON
(14)
into place.
Insert FIBER WASHERS
(15)
into COUPLING NUTS
(16)
of
SUPPLY HOSES
(17)
and tighten making water tight connection.
Important: Loop SUPPLY HOSES
(17)
as illustrated so they do not kink.
1
2
16
HOT
COLD
15
17
5
16
3
4
7
8
12
14
13
6
11
9
10
JADO
HOT
Thread LOCKNUT
(1)
to bottom of VALVE BODY
(2)
. Make sure
SPACER
(3)
, BRASS WASHER
(4)
and RUBBER WASHER
(5)
are
installed.
Unpack valve assembly and remove HANDLE
(10)
by unthreading
SET SCREW
(12)
. Unthread ROSETTE
(9)
and FLANGE
(8)
removing them from VALVE BODY
(2)
.
Roman Tub Filler with Hand Shower
16
19
10
2
2A
TEE AND HOSE ASSEMBLY
HAND SHOWER ASSEMBLY
Note: Back flow prevention and 2.2 GPM
flow restrictions are included with all
Roman tub sets with hand shower
Push one RING WASHER
(1)
and one 0-RING
(2)
onto end of SPOUT SHANK
(3)
.
Slide the TEE
(4)
onto SPOUT SHANK
(3)
until it makes contact with the
0-RING
(2)
. Push the other 0-RING
(2)
and RING WASHER
(1)
onto the
SPOUT SHANK
(3)
. Make sure both 0-RINGS
(2)
are seated into
grooves of TEE
(4)
.
Thread LOCK NUT
(5)
onto SHANK
(3)
. Rotate TEE
(4)
about
10 degrees from center and tighten LOCK NUT
(5)
securely.
Insert FIBER WASHERS
(6)
into COUPLING NUTS
(7)
of SUPPLY
HOSES
(8)
and tighten COUPLING NUTS
(7)
.
Thread HOSE ADAPTER
(9)
onto end of SPOUT SHANK
(3)
.
Drop SPRAY HOLDER
(10)
through and into the fourth
hole of the tub ledge (12" max from SPOUT center)
directed towards tub center. Be sure O-RING
(12)
is
properly seated in SPRAY HOLDER
(10)
. Install RUBBER
WASHER
(13)
, FIBER WASHER
(14)
and LOCKNUT
(15)
from underside of mounting ledge. Secure SPRAY
HOLDER
(10)
by tightening LOCKNUT
(15)
.
Add SEAL WASHER
(16)
and connect COUPLING NUT
(17)
of BRAIDED HOSE to outlet nipple at the bottom
of BACKFLOW PREVENTER
(9)
. Tighten firmly.
Slip SHOWER HOSE
(18)
with HOSE NIPPLE
(20)
through SPRAY HOLDER
(10)
.
Install SEAL
(21)
into COUPLING NUT
(19)
. Connect
COUPLING NUT
(19)
to HOSE NIPPLE
(20)
and tighten.
INSTALL second SEAL
(16)
and connect HAND
SHOWER
(22)
to SPRAY HOSE END
(11)
. Hand tighten.
2
2
1
5
6
6
1
3
4
9
16
21
17
GROOVE
IN TEE
GROOVE IN TEE
BRAIDED
HOSE
10˚
7
7
8
8
FRONT
13
14
15
12
20
18
19
22
11
H 9 6 5 5 4 6 A


