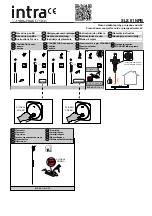
Provide an opening in the subfloor no less than 5" x 5" square. This opening should be located on the center lines
of the shower base drain hole (See Product Chart).
The opening is to accommodate a 2" waste pipe. The waste pipe should be 1/4" to 1/2" above the surface of the
subfloor.
Prepare una abertura en el contrapiso no menor que 5"x5". Esta abertura dede estar ubicada en las líneas centrales
del agujero del desagüe de la base de ducha (vea el Cuadro de Producto).
La abertura es necesaria para acomodor una tubería de desagüe de 2" de diámetro. La tubería de desagüe debe
estar de 1/4" a 1/2" por encima de la superficie del contrapiso.
Remove the stainless steel strainer from the drain
assembly. Disassemble the locknut and two gaskets
from the back of the drain assembly. Apply a 1/4" bead
of caulking (silicone) to the drain hole and insert the drain
assembly. Replace the rubber washer, fiber washer,
and lock nut in that order. Hand tighten the locknut.
Remove excess sealant from finished side.
Apply a lubricant (common household liquid soap
works well) to the inside of the rubber seal of the drain
assembly.
Retire el filtro de acero inoxidable del conjunto de
desagüe. Saque la tuerca de presión y las juntas de la
parte posterior de conjunto de desagüe. Aplique un
reborde de calafate o recalque (silicona) de 1/4" al
agujero e inserte el conjunto de desagüe. Vuelva a
colocar la arandela de goma, la arandela de fibra y la
tuerca de presión, en ese orden. Apriete la tuerca con a
mano y retire cualquier exceso del sellador de silocona
que haya quedado en la lado acabado.
Aplique un libricante (el jabón líquido usado
comúnmente en la casa trabaja bien) a la parte interior
del sello de goma del conjunto de desagüe.
STRAINER
FILTRO
DRAIN
ASSEMBLY
CONJUNTO DE
DESAGÜE
SILICONE
SEALANT
SELLADOR
DE SILICONA
SHOWER BASE
BASE DE DUCHA
RUBBER WASHER
ARANDELA DE GOMA
FIBER WASHER
ARANDELA DE FIBRA
NUT
TUERCA
APPLY LUBRICANT
APLIQUE LUBRICANTE
5


