Last updated April 9, 2013 10:30 AM
4
© 2009 DAHON, BPSA • 2009.09.DS.EN
Your headset should be checked
periodically. If there is play
or looseness in the fork or
handlepost, the headset may
need to be adjusted. A properly
adjusted headset eliminates play
or looseness while allowing the
handlebars to be turned easily.
The following instructions explain
how to adjust the headset.
WARNING: If you are in
any way unsure of how to
make these adjustments, take
your bike to a qualified bicycle
technician for professional
adjustment.
WARNING: Failure to
appropriately tighten the
headset can lead to damage to
the bicycle or injury to the rider.
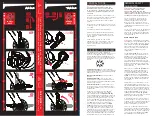
Step 1 - First open the handlepost
clamp. Loosen the clamp screw
with a 6 mm Allen key by turning it
counter-clockwise as indicated by
the arrow.
Step 4 - After the adjustment and
before you tighten the clamp screw
again please check again to make
sure that the handlepost and
handlebar are in correct alignment,
and that they are perpendicular
to the front wheel as shown in the
picture above.
Step 2 - Tighten the headset screw
with a 10 mm Allen key. Turn
the headset screw clockwise as
indicated by the arrow. Tighten the
screw with a torque of 6.8~11.3
Nm.
Step 5 - Tighten the clamp screw
by turning it clockwise as indicated
by the arrow. Tighten the screw
with a torque of 11.3 Nm.
Step 3 - Occasionally apply some
Loctite 222 (Loctite 242 is also
acceptable) to the clamp screw.
In this case take out the clamp
screw and place a small drop of
Loctite 222 (or Loctite 242) on the
threads of this screw. Then replace
the clamp screw.
Headset
17
© 2009 DAHON, BPSA • 2009.09.DS.EN
The frame hinge is the most
important part of a folding bicycle.
Care should be taken to check
that the hinge is adjusted correctly
before each ride.
Your frame hinge will need periodic
adjustment. If there is play or
looseness in the frame it may need
to be adjusted. A properly adjusted
hinge eliminates play or looseness
and a correctly tightened hinge will
close with a strong seal, and the
frame will feel solid.
WARNING: If you are in
any way unsure of how to
make these adjustments
yourself, take your bike to a
qualified technician for
professional adjustment.
WARNING: Failure to
appropriately tighten the
frame latch can lead to damage
to the bicycle or injury to the
rider. Do NOT cycle with a loose
frame hinge.
Dahon uses a variety of frame
hinges on its bikes. Please check
your bike to see which of the
following instructions is applicable.
The ViseGrip™ Hinge (also
applies to the Eco frame’s
hinge)
Use a 6mm wrench (if you do not
have the right sized wrench you
can also use an adjustable wrench
or small pliers) to tighten or loosen
the hinge.
Adjust the hinge bolt so that the
hinge opens and closes with the
correct amount of force which is
49~59 N for aluminum frames and
29~59 N for steel frames.
NOTE:
Adjust in 1/16-turn
increments only, otherwise you will
quickly over-tighten or over-loosen
the hinge.
Tools Needed:
• 10 mm wrench
• 6 mm Allen key
TIGHTEN:
Turn the hinge latch
bolt downwards (facing the hinge
head on) as indicated by the
arrow.
LOOSEN:
Turn the hinge latch bolt
upwards (facing the hinge head
on) as indicated by the arrow.
FRAME HINGE CLOSED
FRAME HINGE OPEN
Frame Latch
18
The instructions on the following pages are reproduced from printed materials created and copyrighted by Dahon.
Always double-check the Phillips-head screw at the end
of the hinge latch bolt. It should be fully tightened. Apply
threadlocker if needed to avoid loosening over time.


