HU
EN
2-3 Connect the wire feeder
1. The long axis of the wire feeder lock the wire roller that specific wire. Make sure that the
wire roller is suitable for the wire used!
2. Wire should roll down clock wise, then cut the line, off-stage, it is only after pinning it on!
3. Tighten the hold-down screws on the wire, put the wire into the wire feed guide wheel and
thread the wire to the welding torch.
4. Press the button on the wire feeder to the welding torch into the wire.
2-4. Checking
1. Whether the machine is connected to standard to earth.
2. Whether all the connections are well-connected. (esp. that between the earth clamp
and the work piece)
3. Whether the output of the electrode holder and earth cable is short-circuited.
4. Whether the pole of the output is correct.
5. The
welding splash may cause fire, so make sure there is no flammable materials nearby.
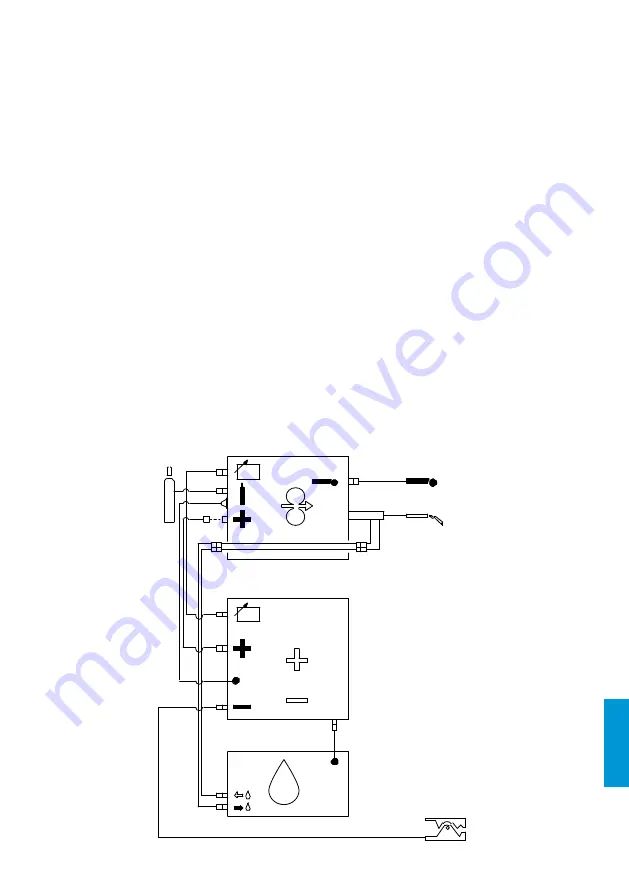
2-2. Connection of output wires
1. Connect the welder’s terminal plug(-) to the work piece by work lead
2. Connect the welder’s terminal plug(+) to the wire feeder by welding cable
3. Connect the welder’s control cable socket to the wire feeder by control cable.
4. Connect feeder’s gas hose to the regulator
5. Connect the regulator’s heater cable to the welder’s “gas heater power ”cable socket.
(on the rear panel)
6. Connect the welder’s power cable to the disconnection switchboard, while grounds the
lead safely.
7. Reset the circuit breaker on the welder’s rear panel.
7


