7
REMOTE CONTROL UNIT
You may operate the apparatus in a distance with the remote control. Within
the
effecti
ve range, point the remote control towards the front panel of the
apparatus.
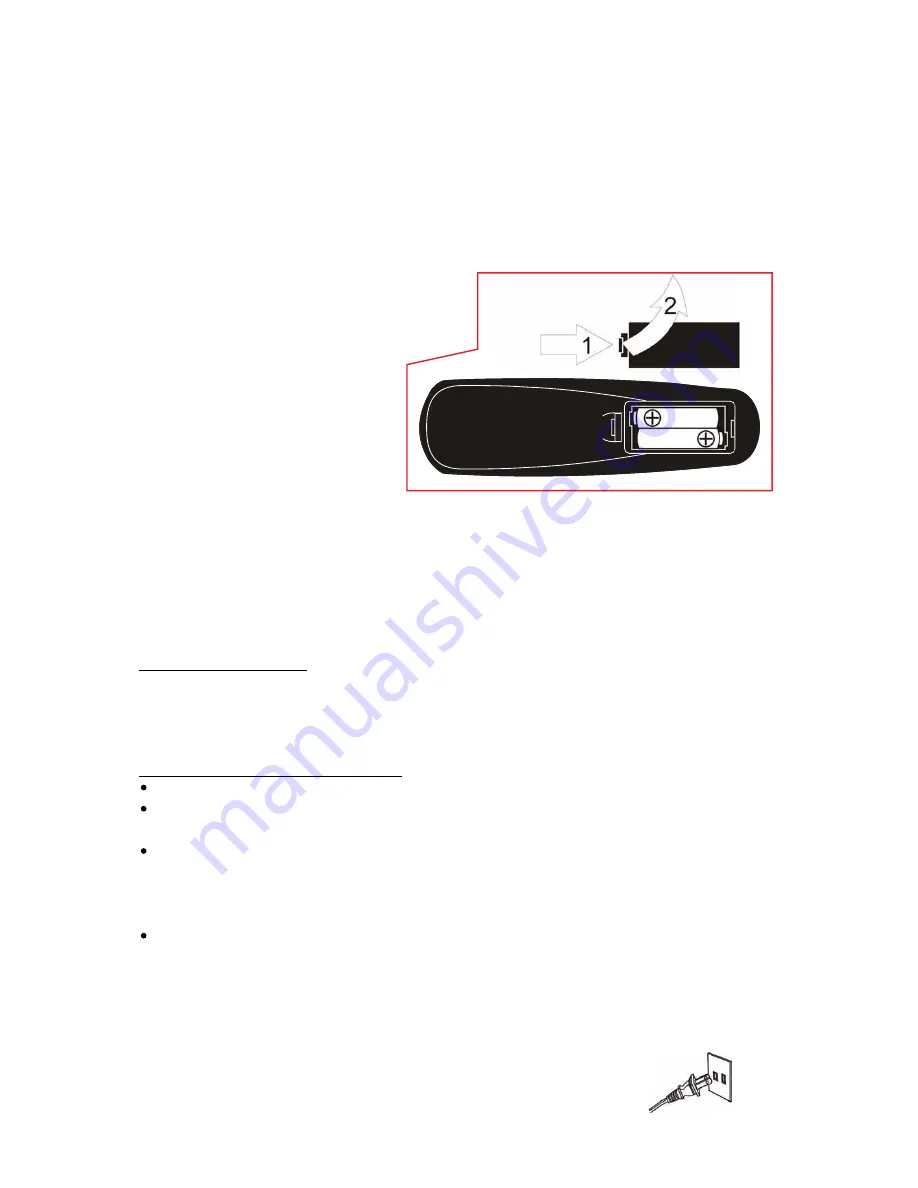
BATTERY INSTALLATION
1. Remove the ba
tt
ery
compartment cover.
2. Insert two “AAA” size ba
tt
eries
(not included). Install the
ba
tt
eries properly.
3. Close the cover.
NOTE:
If the remote control fails to work, check the following
possibili
ti
es:
-the ba
tt
eries in the remote control are drained;
-there is an obstacle between the remote control unit and the apparatus;
-another appliance which generates infrared rays is being used nearby.
Ba
tt
ery Replacement
If the distance required between the remote control unit and main unit
decreases, the ba
tt
eries are exhausted. In this case, please replace the ba
tt
eries
with new ones.
Precau
ti
ons concerning ba
tt
eries
Be sure to insert ba
tt
eries with correct
polariti
es.
Rechargeable and non-re-chargeable ba
tt
eries can be used. Refer to the
precau
ti
ons on their labels.
When the remote control unit will not be used for a long
time
(more than a
month), remove the ba
tt
eries from the remote control unit to prevent them
from leaking. If they leak, wipe away the liquid inside the ba
tt
ery
compartment and replace the dead ba
tt
eries with new ones.
Do not heat or disassemble ba
tt
eries and never dispose of old ba
tt
eries by
throwing them in a
fi
re.
CONNECT TO A MAINS
Plug the power cord into a standard 120V
~
60Hz outlet.


