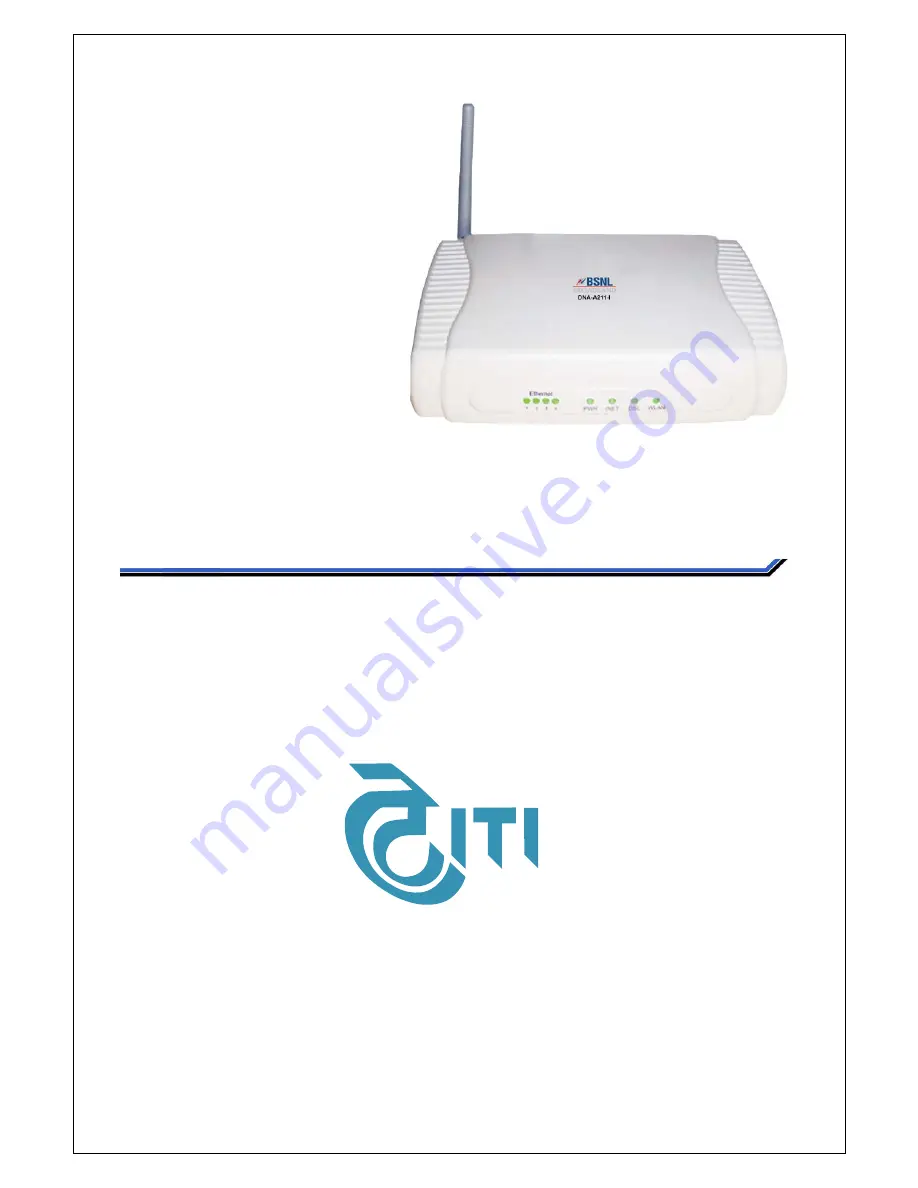
DNA-A211-I ADSL 2+ Modem/Router (4Et 1Wi-Fi)
User Manual
© 2008 by ITI Limited.
All Rights Reserved
Confidential and Proprietary
Page 1: ...DNA A211 I ADSL 2 Modem Router 4Ethernet 1Wi Fi User Manual 2008 by ITI Limited All Rights Reserved Confidential and Proprietary...
Page 2: ...mited ITI Limited shall not be liable for errors contained herein or for incidental or consequential damages in connection with the furnishing performance or use of this material The information conta...
Page 3: ...Hardware Installation 15 1 4 1 If Connecting to the Splitter 15 1 4 2 If not connected to the Splitter 16 1 5 Management 17 1 5 1 Local Ethernet Port Telnet 17 1 5 2 Local Ethernet Port Web browser 1...
Page 4: ...ces 37 3 6 2 RFC 2684 Bridge 42 3 6 3 IP over ATM IPoA 44 3 6 4 MAC Encapsulation Routing MER 47 3 6 5 Point to Point over Ethernet PPPoE 50 3 6 6 PPP over ATM PPPoA 52 3 7 LAN Services 54 3 8 Wireles...
Page 5: ...pdate 85 Restore default 86 3 11 2 System Log 87 3 11 3 SNMP Agent 88 3 11 4 TR 069 Client 89 3 11 5 Internet Time 89 3 11 6 Access control 90 Services 90 IP Address 90 Password 91 3 11 7 Update Softw...
Page 6: ...8 by ITI Limited Page 6 of 103 All Rights Reserved Confidential Proprietary List of Figures Figure 1 Front panel 14 Figure 2 Rear panel 15 Figure 3 Modem connected to a splitter 16 Figure 4 Modem not...
Page 7: ...DNA A211 I User Manual 2008 by ITI Limited Page 7 of 103 All Rights Reserved Confidential Proprietary List of Table Table 1 Front panel LED description 15 Table 2 Rear panel Interface description 15...
Page 8: ...o use as a user reference manual for the people using this system The user of this document is expected to have a minimum and introductory understanding of the following 9 Telecommunications network 9...
Page 9: ...ocument Icon Description Information that contains important features or instructions but is not hazard related Information to alert of potential damage to a program data system or device If not avoid...
Page 10: ...DNA A211 I User Manual 2008 by ITI Limited Page 10 of 103 All Rights Reserved Confidential Proprietary PART 1 GETTING STARTED...
Page 11: ...s multiple protocols such as PPP RFC 2364 IP RFC 2225 RFC 1577 and RFC 2684 over ATM over ADSL and PPP RFC 2516 over Ethernet DNA A211 I offers convenient configuration and management locally by telne...
Page 12: ...configuration as per DSL forum TR 064 9 Supports CPE WAN management protocol TR 069 9 Second IP address can be configured on LAN interfaces 9 Compatible with virtually all standard Internet applicati...
Page 13: ...service provider The upstream downstream values mentioned above are maximum values which the standard supports Distance between Service Provider to Customer Premises gauge quality of the wire are the...
Page 14: ...inking Green Ethernet is Up and transmitting or receiving data 1 Ethernet Uni color Green Solid Green Ethernet link is UP Solid Green Indicates Power ON 2 PWR Uni color Green Off Indicates Power OFF S...
Page 15: ...for connecting to ADSL Line Ethernet LAN interface for connecting to computer or Switch Reset Press Modem Reset button to perform a hard reset Holding the reset button for up to 15 seconds will take y...
Page 16: ...ur ADSL Modem Plug the other end of the Ethernet cable into your computer s Ethernet port of Ethernet Network Interface Card NIC Plug the telephone cable into the DSL of your ADSL Modem Plug the other...
Page 17: ...end of the telephone cable into Wall port as shown in the figure below Figure 4 Modem not connected to a splitter 1 5 Management The DNA A211 I ADSL 2 modem can be managed with the following 1 5 1 Lo...
Page 18: ...ortant to take note of the following default settings of your ADSL Modem Management IP Address 192 168 1 1 Subnet Mask 255 255 255 0 Username admin Password admin 1 6 1 Static configuration Please fol...
Page 19: ...it and go to Properties Select Internet Protocol TCP IP and then click on Properties button Select Obtain an IP address automatically and then click on OK button Click on OK button of the Local Area C...
Page 20: ...al Proprietary If the connection has been established you will receive reply from your ADSL Modem as shown in the figure below If you receive Request timed out as shown in the figure below then it mea...
Page 21: ...DNA A211 I User Manual 2008 by ITI Limited Page 21 of 103 All Rights Reserved Confidential Proprietary PART 2 COMMAND LINE INTERFACE...
Page 22: ...mands 2 2 1 help or Type or help to get help on the list of all possible commands 2 2 2 show This command is used to view the details of the interfaces parameters and configurations made in the system...
Page 23: ...and is used to erase all the configurations made by user and restore the modem back to the factory default configuration Once this command is executed modem reboots automatically with default configur...
Page 24: ...o reboot the modem Command reboot 2 2 9 sysInfo This command is used to display the number of processes in the system system time system uptime the average system load in the past 1 5 and 15 minutes a...
Page 25: ...guration show show the configuration data of the primary and secondary interfaces help display usage config Under config there are two sub options 1 lan config ipaddr primary secondary IP address subn...
Page 26: ...primary LAN interface Command lan config ipaddr primary 192 168 1 1 255 255 255 0 delete lan delete ipaddr primary secondary ipaddr primary secondary primary secondary specify which LAN interface will...
Page 27: ...DNA A211 I User Manual 2008 by ITI Limited Page 27 of 103 All Rights Reserved Confidential Proprietary PART 3 WEB MANAGEMENT INTERFACE...
Page 28: ...1 I modem 9 You should configure your PC to the same IP subnet as the DNA A211 I Example DNA A211 I 192 168 1 1 255 255 255 0 Your PC 192 168 1 x 255 255 255 0 the range for x is from 2 to 254 9 Conne...
Page 29: ...up The Quick Setup option will be available only when there is no PVC configured in the modem After login preparation is done and you type http 192 168 1 1 in the web browser the following window appe...
Page 30: ...er Manual 2008 by ITI Limited Page 30 of 103 All Rights Reserved Confidential Proprietary Step 2 By default the connection type is Bridging Click Next Step 3 Edit the Service Name if required and clic...
Page 31: ...Page 31 of 103 All Rights Reserved Confidential Proprietary Step 4 By default the device IP Address is 192 168 1 1 to modify edit the IP Address and Subnet Mask Click Next button Step 5 Edit the SSID...
Page 32: ...button The following window appears and the modem will reboot Refresh your window browser to view the Device Info 3 5 Device Info 3 5 1 Summary To know the overall summary of the system go to Device I...
Page 33: ...f 103 All Rights Reserved Confidential Proprietary 3 5 2 WAN To know the WAN connection details go to Device Info menu and click on the WAN button The following screen appears which gives the details...
Page 34: ...e Statistics of the LAN WAN ATM ADSL go to Device Info menu and click on the Statistics button Choose from the list to view their corresponding statistics LAN To view the LAN statistics click on the L...
Page 35: ...d Page 35 of 103 All Rights Reserved Confidential Proprietary ATM To view the ATM statistics click on the ATM button and the following screen appears ADSL To view the ADSL statistics click on the ADSL...
Page 36: ...103 All Rights Reserved Confidential Proprietary 3 5 4 Route To view the routing information go to Device Info and click on the Route button 3 5 5 ARP To view the ARP details go to Device Info menu an...
Page 37: ...rom the default configuration are removed prior to description of WAN configuration This is for explanatory purpose 3 6 1 To configure the WAN services Step1 Go to the Advanced Setup menu and click on...
Page 38: ...Step 2B VCI Enter the VCI value in the box Step 2C Service category Select the service category from the pull down menu Enter the VPI VCI details provided by your service provider If the service cate...
Page 39: ...Reserved Confidential Proprietary Enter the Peak Cell Rate in the range 1 255000 specified by your service provider If the service category is selected as CBR the following screen appears Enter the Pe...
Page 40: ...owing screen appears Enter the Peak Cell Rate in the range 1 255000 specified by your service provider Enter the Sustainable Cell Rate in the range 1 255000 specified by your service provider Enter th...
Page 41: ...vice provider Enter the Maximum Burst Size in the range 1 1000000 specified by your service provider Step 2D Enable Quality of service Enable the check box if you want to enable the QoS Enter the valu...
Page 42: ...6 2 RFC 2684 Bridge To configure the RFC 2684 Bridge configuration follow the steps 1 to 3 detailed in the above section 3 6 1 Step 1 Select the Encapsulation Mode from the pull down menu Click the N...
Page 43: ...Rights Reserved Confidential Proprietary Step 3 The following screen appears which details the summary of the configuration made Click the Save button to save the setting Click the Back button to make...
Page 44: ...n select the check box and click on the Remove button Step 5 To save the configuration click on the Save Reboot button The Save Reboot button will reboot the Modem This operation may take 2 minutes 3...
Page 45: ...3 All Rights Reserved Confidential Proprietary Step 2 Enter the information provided by your service provider and click the Next button Step 3 The following screen appears Enable NAT and Firewall if s...
Page 46: ...Rights Reserved Confidential Proprietary Step 4 The following screen appears which details the summary of the configuration made Click the Save button to save the setting Click the Back button to make...
Page 47: ...ct the check box and click on the Remove button Step 6 To save the configuration click on the Save Reboot button The Save Reboot button will reboot the Modem This operation may take 2 minutes 3 6 4 MA...
Page 48: ...our service provider and click the Next button Step 3 The following screen appears Enable NAT and Firewall if suggested by your service provider Click the Next button Step 4 The following screen appea...
Page 49: ...n Save the following screen appears To edit the configuration click on the Edit button To remove the configuration select the check box and click on the Remove button Step 6 To save the configuration...
Page 50: ...ed in the section 3 6 1 Step 1 Select the Encapsulation Mode from the pull down menu Click the Next button Step 2 Enter the Username Password and other information provided by your service provider an...
Page 51: ...Rights Reserved Confidential Proprietary Step 4 The following screen appears which details the summary of the configuration made Click the Save button to save the setting Click the Back button to make...
Page 52: ...To save the configuration click on the Save Reboot button The Save Reboot button will reboot the Modem This operation may take 2 minutes 3 6 6 PPP over ATM PPPoA To configure the PPPoA follow the ste...
Page 53: ...een appears Ensure the WAN services check box is selected and enable IGMP Multicasting as per your service provider information Click the Next button Step 4 The following screen appears which details...
Page 54: ...the Edit button To remove the configuration select the check box and click on the Remove button Step 6 To save the configuration click on the Save Reboot button The Save Reboot button will reboot the...
Page 55: ...P Address and Subnet Mask DHCP Server is by default enabled The IP pool is 192 168 1 2 to 192 168 1 254 To modify edit the DHCP IP section To disable DHCP server check the Disable DHCP Server radio bu...
Page 56: ...Page 56 of 103 All Rights Reserved Confidential Proprietary DHCP Relay To enable the DHCP Relay option click on the radio button Enable DHCP Server Relay and type the Server IP Address Click on Save R...
Page 57: ...eb management allows the user to configure the wireless setting like security bridge QoS etc The detailed description is given below 3 8 1 Basic This window allows the user to configure the basic feat...
Page 58: ...he main menu and click on the Security button from the list The following window appears Step 2 Select the required SSID and Network Authentication Enable WEP Encryption using the pull down menu The f...
Page 59: ...tication from the pull down menu if you desire to use the security as WPA PSK method of security Enter the pre shared key value in the WPA Pre Shared Key field Click on Save Apply button Step 3 To vie...
Page 60: ...gning the MAC addresses filter Step 1 Go to Wireless in the main menu and click on the MAC Filter button from the list The following window appears Step 2 Click on the ADD button to add the MAC addres...
Page 61: ...dge features of the wireless LAN interface User can select the wireless bridge to disable access point functionality Step 1 Go to Wireless in the main menu and click on the Wireless Bridge button from...
Page 62: ...s window allows the user to configure the advanced features of the wireless LAN interface User can select a particular channel on which to operate force the transmission rate to a particular speed set...
Page 63: ...This window allows the user to see the authenticated wireless stations and their status Step 1 Go to Wireless in the main menu and click on the Station Info button from the list The following window a...
Page 64: ...odem comes up with the following advanced features 3 10 1 NAT The ADSL2 modem comes with the NAT feature To configure these options follow the steps given below Virtual Server Virtual server allows yo...
Page 65: ...prietary Step 2 Select a service or choose the custom option and enter the port number fields as required Enter the Server IP Address Click on the Save Apply button Step 3 To add more entries click on...
Page 66: ...he virtual severs table to the DMZ host computer To enable this feature follow the steps mentioned below Step 1 Go to Advanced Setup NAT DMZ Enter the IP address of the DMZ host and click on the Save...
Page 67: ...o Advanced Setup Security IP filtering and click on the Outgoing option Click on the Add button Step 2 Enter the filter name and the rules for the filter Click on the Save Apply button to save the rul...
Page 68: ...c from the WAN is blocked when the firewall is enabled However some IP traffic can be accepted by setting up filters Step 1 Go to Advanced Setup Security IP filtering and click on the Incoming button...
Page 69: ...k the check box and click on the Remove button App Filtering The ADSL2 modem comes with the application filtering option By default all the application traffic from the LAN side is allowed But setting...
Page 70: ...he window select the application from the Application Name pull down menu and click on Save Apply Step 3 The following window appears To add more applications click on Add and follow step 1 and step 2...
Page 71: ...onfigure these setting follow the steps below Step 1 Go to Advanced Setup in the main menu and click on the Security button The following screen appears Select the Mac Filtering option Click on the Ad...
Page 72: ...ging from one global policy to another will cause all defined rules to be REMOVED AUTOMATICALLY You will need to create new rules for the new policy MAC Filtering is only effective on ATM PVCs configu...
Page 73: ...nnection type are covered in the WAN Services section of this document After Save Reboot the Quality of service menu item will be added into the Advanced setup tree in the left column of the modem GUI...
Page 74: ...roprietary Queue Config To configure the Queues follow the steps below Step 1 Go to Queue Config following window appears Click on Add button Step 2 Make the Queue Configuration Status Enable from the...
Page 75: ...tary Step 3 The following window appears To add more entries click on the Add button To remove a queue select the respective check box and click on the Remove button Click on Save Reboot to make the c...
Page 76: ...upstream traffic assign queue which defines the precedence and the interface and optionally overwrite the IP header DSCP byte The rule must contain a class name and a condition Also Assign the ATM pri...
Page 77: ...d Default Gateway option Enter the IP Address and click on the Save Apply button to save the settings Static routing To add static route go to Advanced Setup menu and click on the Routing button Selec...
Page 78: ...ting and click on the RIP button Select the required options in the screen below and click the Save Apply button to save the configuration 3 10 5 DNS DNS Server Go to Advanced Setup DNS DNS Server in...
Page 79: ...NA A211 I modem router comes with the IPv6 feature To enable this feature go to Advanced Setup and click on the IPv6 button Enable the IPv6 feature and click Save Reboot button to enable the feature 3...
Page 80: ...erved Confidential Proprietary Make necessary modifications and click on the Save Apply button To make any additional setting click on the Advanced Settings button The following window appears Click o...
Page 81: ...to PVC and bridging groups Each group will perform as an independent network To support this feature you must create mapping groups with appropriate LAN and WAN interface using the Add button To remov...
Page 82: ...3 All Rights Reserved Confidential Proprietary Step 2 Enable the Enable virtual ports on eth0 option check box Wait for the Modem web page to refresh The following window appears Step 3 Click on the A...
Page 83: ...ve Apply button to save and apply the configuration Step 5 To add more entries click on the Add button To remove enable check mark against the item and click on the Save Apply button To edit select th...
Page 84: ...ement The ADSL 2 Modem management section helps to manage the modem This section helps to make necessary settings for backup update restoring to defaults access controls and software updates etc 3 11...
Page 85: ...ary Step 2 Click on the Backup Settings button and the following window appears Step 3 Select the path from the window and click on the Save button Update To update the setting follow the procedure be...
Page 86: ...lick on the Browse button and select the configuration file from the PC Click on the Open button Step 3 Click the Update Setting button to update your router settings Restore default To restore the Mo...
Page 87: ...ed and set to factory default settings Ensure to make the backup of configuration if necessary 3 11 2 System Log The System Log window allows the user to view the system log details and also configure...
Page 88: ...System Log button to modify the options of the system log The following window appears Step 4 Click on the Save Apply button to save the modifications 3 11 3 SNMP Agent The SNMP Agent window allows th...
Page 89: ...n to save the configuration 3 11 4 TR 069 Client To configure the TR 069 go to Management TR 069 Enter the desired values and click on the Save Apply button to save the configuration 3 11 5 Internet T...
Page 90: ...nu and click on the Access control button From the list select the Services button The following window appears Step 2 Select from the list the services you intended to allow access and click on the S...
Page 91: ...k on the Add button to add an IP address you intended to permit Password This part of the setup ensures the control of access to the Modem by assigning a password Go to Management section in the main...
Page 92: ...ostics user this account has access to view configure update software settings of the router Make necessary changes and click on the Save Apply button to save the modifications 3 11 7 Update Software...
Page 93: ...the Update Software button to update the new software 3 11 8 Save Reboot This option allows the user to manually save the configuration and reboot the router Go to Management section in the main menu...
Page 94: ...DNA A211 I User Manual 2008 by ITI Limited Page 94 of 103 All Rights Reserved Confidential Proprietary PART 4 APENDIX...
Page 95: ...9 10M Base T Ethernet or above 9 Ethernet Network Interface Card or Wireless Interface card 9 WIN9X WIN2000 WINXP WINME WINNT Please collect the following information from your ADSL service provider...
Page 96: ...nts of Linux steps may vary 4 2 1 Ethernet Configuration Below are the steps to configure Modem in Linux using Ethernet as connecting media Step 1 Connect the Modem as detailed in section 1 4Hardware...
Page 97: ...window displayed select the same network adaptor and click on Activate as shown below Step 6 Open Mozilla web browser and enter http 192 168 1 1 in the address bar and press Enter key In the displaye...
Page 98: ...e personnel working with or near voltages which may cause damage or injury Knowledge on using tools and instruments for installation and testing is recommended to avoid damage or injury to both person...
Page 99: ...anual 2008 by ITI Limited Page 99 of 103 All Rights Reserved Confidential Proprietary Do not place any heavy objects on top of this unit Do not use liquid cleaners or aerosol cleaners Use a soft dry c...
Page 100: ...4 4 Packaging The packaging consists of the following items Incase of missing components please contact the supplier Item Description Quantity ADSL 2 Wireless Modem Router 1 Unit ADSL Splitter 1 Unit...
Page 101: ...08 by ITI Limited Page 101 of 103 All Rights Reserved Confidential Proprietary Quick Start Guide 1 Unit Objects pictures depicted in this manual are subjected to change without any notice for improvem...
Page 102: ...DNA A211 I User Manual 2008 by ITI Limited Page 102 of 103 All Rights Reserved Confidential Proprietary PART 5 ACRONYMS...
Page 103: ...rnet Protocol Security ISP Internet Service Provider LAN Local Area Network LED Light Emitting Diode LLC Logical Link Control NIC Network Interface Card PPPoE Point to Point Protocol over Ethernet PPT...