


How to Install IrDa under Windows NT (quick steps)
Windows NT 4.0 or earlier does not provide IR support. Windows NT 5.0 does, but has
been renamed to Windows 2000.
File Transfer
When there are 2 or more machines close enough to communicate, there will be a little
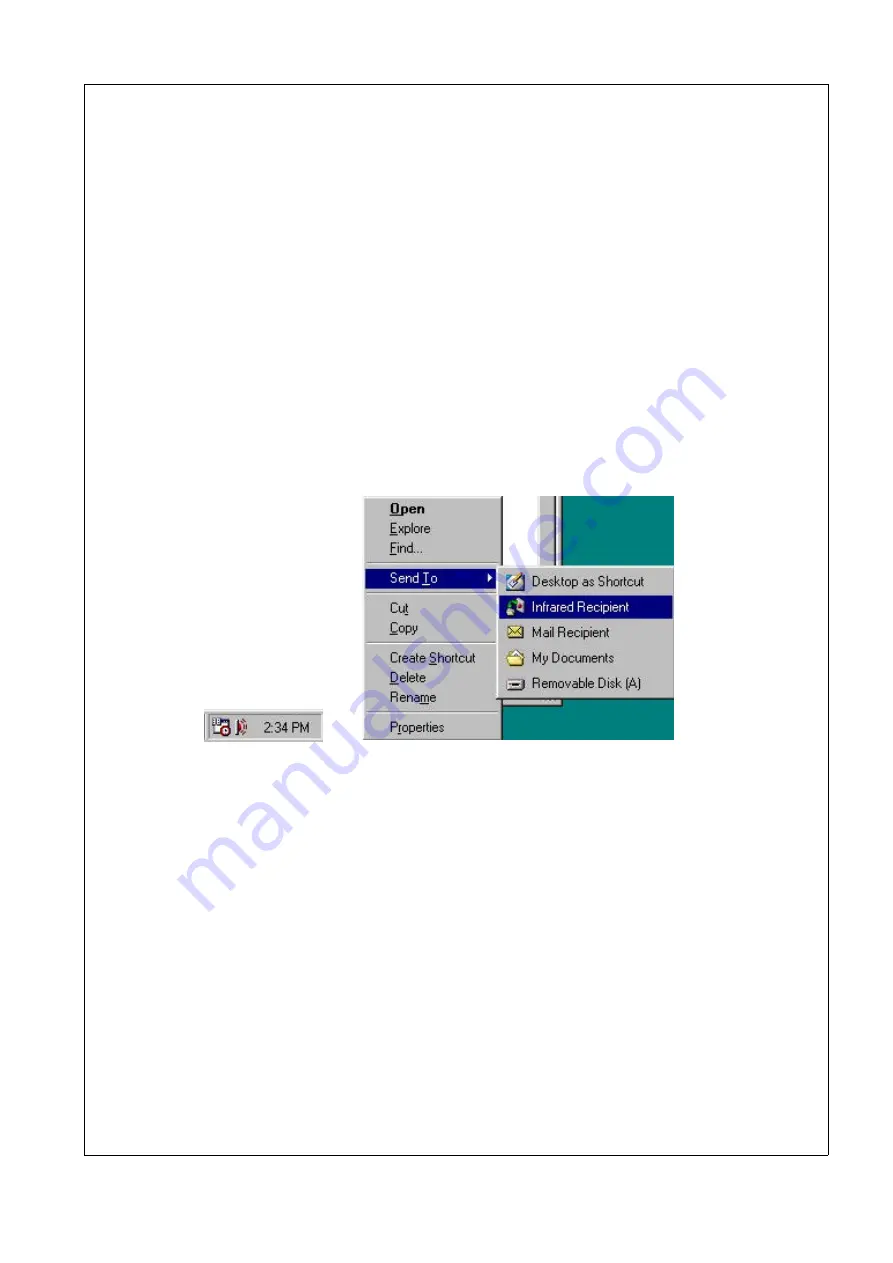
icon in the taskbar next to the clock (fig. 1). To transfer files, right click on the file(s)/fold-
er(s) you want to transfer. In the popup menu choose
Send To
and then
Infrared recipient
(fig. 2). You can watch how good the transfer is if you double click on the icon in the
taskbar.
The range you can communicate depends on the conditions, the angle between the
machines and how long they stand from each other. The maximal communications range is
15° in all directions and 4 meters in a angle of 0°. This is measured between two PCI6000
but a lot of IrDA devices will have pour specification.
Fig. 1
Fig. 2.
Port Setting
The IrDA hardware is installed on COM4, address 2E8 and utilises shared IRQ3. As Win-
dows 2000 use IRQ for IrDa communication and can't handle shared interrupt, utilisation of
IrDA will occupy COM2 as this uses the same interrupt.
124 Part 5
PCI6000 Electrical Details
Released
Summary of Contents for PCI6000
Page 2: ...This page is intentionally left blank Released...
Page 4: ...This page is intentionally left blank Released...
Page 12: ...This page is intentionally left blank Released...
Page 16: ...This page is intentionally left blank Released...
Page 18: ...2 2 External PCI6000 keyboards 6 Part 1 PCI6000 Features Keyboard Tabletop Wall mount Released...
Page 22: ...This page is intentionally left blank Released...
Page 24: ...This page is intentionally left blank Released...
Page 32: ...This page is intentionally left blank Released...
Page 36: ...This page is intentionally left blank Released...
Page 38: ...This page is intentionally left blank Released...
Page 40: ...7 1 Outside View Front 1 Front connector FH 96 28 Part 3 PCI6000 Mechanical Details Released...
Page 45: ...PCI6000 User s Manual Chapter 7 Level 1 33 Service Zone Released...
Page 46: ...This page is intentionally left blank Released...
Page 50: ...Top 38 Part 3 PCI6000 Mechanical Details Released...
Page 56: ...44 Part 3 PCI6000 Mechanical Details Top Released...
Page 60: ...48 Part 3 PCI6000 Mechanical Details Mounting Instructions Released...
Page 64: ...52 Part 3 PCI6000 Mechanical Details Top 1 M4 x 16 mm threaded studs Released...
Page 68: ...This page is intentionally left blank Released...
Page 72: ...60 Part 3 PCI6000 Mechanical Details Top 1 M4 x 16 mm threaded studs Released...
Page 76: ...This page is intentionally left blank Released...
Page 78: ...This page is intentionally left blank Released...
Page 80: ...This page is intentionally left blank Released...
Page 86: ...This page is intentionally left blank Released...
Page 92: ...This page is intentionally left blank Released...
Page 98: ...This page is intentionally left blank Released...
Page 100: ...This page is intentionally left blank Released...
Page 102: ...This page is intentionally left blank Released...
Page 104: ...This page is intentionally left blank Released...
Page 107: ...Part 4 PCI6000 Software Details Describes Software Details Released...
Page 108: ...This page is intentionally left blank Released...
Page 124: ...This page is intentionally left blank Released...
Page 126: ...This page is intentionally left blank Released...
Page 134: ...This page is intentionally left blank Released...
Page 144: ...This page is intentionally left blank Released...
Page 156: ...This page is intentionally left blank Released...
Page 157: ...Part 6 PCI6000 Accessories Describes Functionallity and Data for Accessories Released...
Page 158: ...This page is intentionally left blank Released...
Page 168: ...This page is intentionally left blank Released...


