

LATCH INSTALL
Attach latch and striker to post and gate at preferred height using self tapping screws.
CUTTING PANELS
When you reach an area that is shorter than 72” wide, you can cut the panels using a hand saw or reciprocating
saw to the desired width. Measure the distance between the two posts to get the size for the short panel. The
panel must be cut in 1-7/8” increments ending with a vertical wire.
Once panel has been cut, touch up ends with exterior quality black paint to help prevent rusting. Once the paint
has dried, continue with installation.
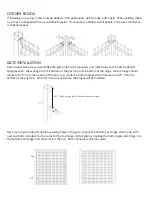
INSTALLING AT ACUTE OR OBTUSE ANGLES
If you want to install a corner that is less or greater than 90°, you will mount the panel in the same fashion, however
the holes will have to be drilled depending on the angle desired.
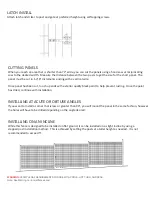
INSTALLING ON AN INCLINE
While this fence is designed to be installed on flat ground, it can be installed on a slight incline by using a
stepped post installation method. This is achieved by setting the posts at a taller height as needed. It is not
recommended to exceed 5”.
No more than 5”
WARNING:
VERIFY LEGAL REQUIREMENTS FOR USE WITH POOLS, HOT TUBS, AND SPAS.
Note: See Warning on ironcraftfences.com


