9
TPI-8 / TPI-12 Touch Panel
Owner’s manual
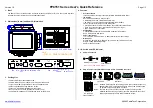
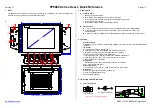
2.2 Mounting and Initial Operation
1. Wall Mounting Box
Use the box for wall recessing WM TPI-8 (WM TPI-12) when mounting the
TPI-8 (TPI-12) in a wall. Please mind the documentation included in the
shipment.
2. Remove the pre-mounted aluminium cover frame from the touch
panel’s front panel.
3. Ethernet and Power Supply Connection
A 24 V DC power supply unit is needed for power supply. The TPI-8’s (TPI-
12’s) power consumption is 0,7 A (0,9 A), using the power supply pack Part
No. D121789 is recommended.
4. Use four screws to fix the touch panel in the wall-mounting box
or rack shelf blind
Do not cover the ventilation louvers on the panel’s top and bottom plates.
The touch panel’s ambient temperature is not allowed to exceed 40° C.
5. Turn on the touch panel’s power supply
During the first starting procedure of the Touch Panel operating system
messages can refer to finding new hardware, please confirm all messages
by pressing
Yes
or
OK
button.
6. Re-install the touch panel’s aluminium cover frame
NOTE:
Make sure that the power supply has been deactivated.
Summary of Contents for TPI-12
Page 1: ...OWNER S MANUAL BEDIENUNGSANLEITUNG MODE D EMPLOI TPI 8 TPI 12 8 4 12 1 Touch Panels ...
Page 20: ...20 TPI 8 TPI 12 Touch Panel Owner s manual TPI 8 TPI 12 ...
Page 24: ...24 TPI 8 TPI 12 Touch Panel Owner s manual ...
Page 25: ...BEDIENUNGSANLEITUNG TPI 8 TPI 12 8 4 12 1 Touch Panels ...
Page 48: ...48 TPI 8 TPI 12 Touch Panel Bedienungsanleitung ...
Page 49: ...MODE D EMPLOI TPI 8 TPI 12 8 4 12 1 Touch Panels ...
Page 72: ...72 TPI 8 TPI 12 Touch Panel 4 1 Dimensions TPI 8 ...


