Series eWAVE
Page 7
LT286 April 09, 2020
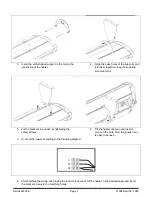
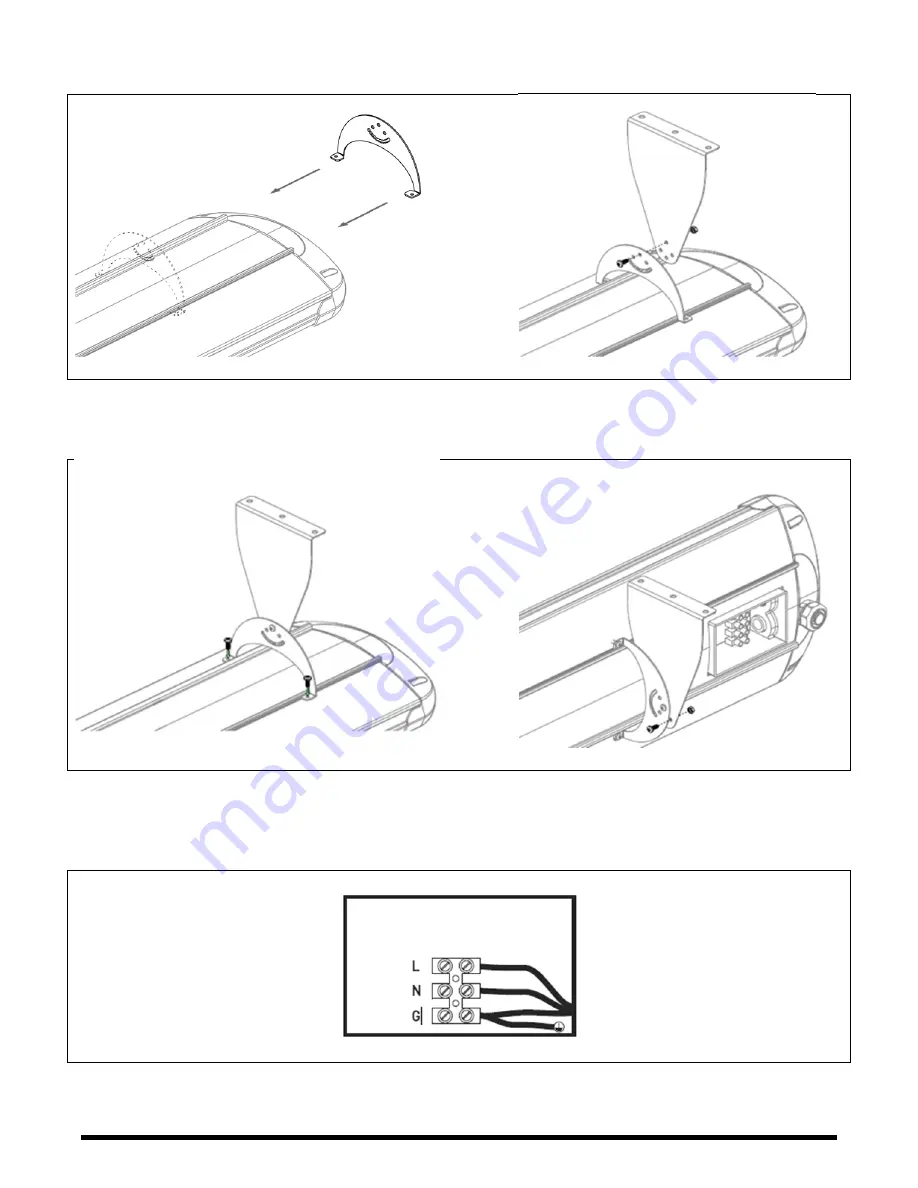
3. Insert the arch-shaped support in the rail on the
upper side of the heater.
4. Align the base holes of the supports and
join them together using the supplied
screw and bolt.
5. Fix the brackets in position by tightening the
safety screws.
6. Tilt the heater until you can insert a
screw in the hole. Now the junction box
is easy to access.
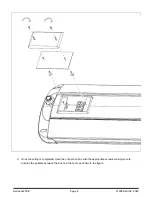
7. Connect the power according to the following diagram
8. After finishing the wiring and closing the junction box cover, tilt the heater in the desired angle and insert
the bracket screws in the matching holes.


