Iqinvision Alliance-mx Installation And Operating Instructions Manual Download Page 7

7

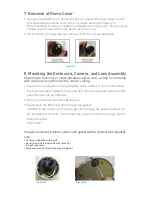
4.  To ensure the gasket is sealed gently pull back on the Ethernet cable as shown 

in Figure 8.3 before mounting the enclosure to the wall or ceiling.

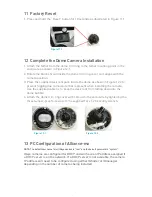
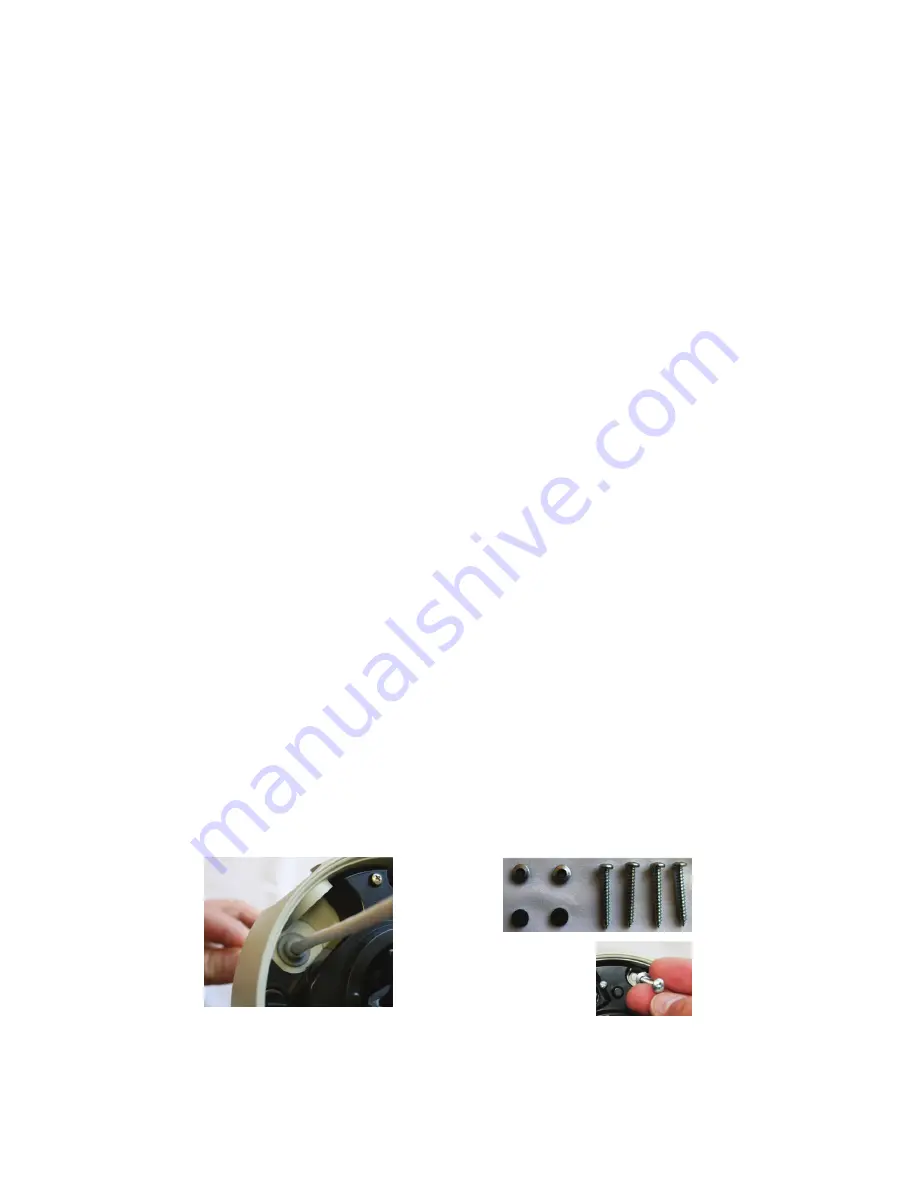
5.  Attach the enclosure to the wall or ceiling by tightening the four screws with 

sealing washers (Figure 8.4).  
 

NOTE: Be sure to use the supplied screws and sealing washers. Alternative washers will not seal the 

enclosure from moisture. Extra sealing washers are supplied.

Mounting to masonry or other durable surface wall, ceiling or overhang with 

cables routing along the wall or ceiling for side conduit installation.

1.  Position the supplied mounting template on the surface in the location where 

the camera will be installed. Trace and drill the mounting holes and the cable 

pass through hole as indicated. 

2.  Remove the conduit plug from the enclosure. Install a ½” (12.7mm) threaded 

conduit connector (not supplied) into the conduit hole on the enclosure. 

NOTE: To ensure proper weatherization on the conduit entry, properly seal the conduit threads with silicon.

3.  Pull the Ethernet cable through the conduit and then through the enclosure.  

Pull enough cable through the conduit to attach an RJ-45 network connector, 

and to allow the network connector to plug into the Ethernet socket.

4.  Attach the enclosure to the wall or ceiling by tightening the four screws with 

sealing washers.  


NOTE: Be sure to use the supplied screws and sealing washers. Alternative washers will not seal the 

enclosure from moisture. Extra sealing washers are supplied. 


NOTE: When installing the Alliance-mx onto a ceiling tile, use hardware designed to secure the camera 

assembly to this surface, and ensure the ceiling tile material is secure. 

In addition, follow local regulations and laws that may have specific requirements 

governing the installation of security equipment on a ceiling tile surface.  

IQinVision also strongly recommends the use of a ceiling tile brace and other 

mounting hardware designed to secure the Alliance-mx to the ceiling frame 

infrastructure.

Figure 8.3

Figure 8.4

Summary of Contents for Alliance-mx

Page 1: ...1 IQeye Alliance mx Vandal Resistant IP Camera Installation and Operating Instructions...

Page 2: ...List 4 6 Mounting Options 5 7 Removal of Dome Cover 6 8 Mounting the Enclosure Camera and Lens Assembly 6 9 Connect Camera 8 10 Camera Positioning Field of View Set up and Focus 8 11 Factory Reset 9 1...

Page 3: ...ench NPT Plug installed in the side NPT mount of the enclosure Mounting Hardware Mounting Template IQtools CD ROM 2 Service If the unit needs repair service or parts the customer should contact IQinVi...

Page 4: ...nd switches from color to monochrome maintaining coverage in the most challenging lighting conditions Made from cast aluminum and polycarbonate bubble the Alliance mx is IP66 NEMA 4 rated The included...

Page 5: ...uidance on mounting the Alliance mx to the wall mount adapter consult the wall mount adapter manual WARNING When installing the Alliance mx dome camera outdoors the camera should not be mounted direct...

Page 6: ...ceiling 1 Position the supplied mounting template on the surface in the location where the camera will be installed Trace and drill the mounting holes and the cable pass through hole as indicated 2 R...

Page 7: ...e proper weatherization on the conduit entry properly seal the conduit threads with silicon 3 Pull the Ethernet cable through the conduit and then through the enclosure Pull enough cable through the c...

Page 8: ...io connectors 10 Camera Positioning Field of View Set up and Focus 1 Set the field of view using the 3 axis gimbal Determine camera pan direction by gripping the camera assembly and carefully pivot th...

Page 9: ...the camera Use the supplied cable tie to keep the desiccant from falling down into the dome bubble 4 Attach the dome trim ring cover with shroud to the enclosure by tightening the three tamper proof s...

Page 10: ...camera to reboot 4 To view a camera double click a camera entry or highlight a camera in the list and click the Web Page button Figure 13 3 The Live page will be displayed through the default browser...

Page 11: ...11 For product warranty additional documentation and technical information please visit www iqeye com support...

Page 12: ...12 33122 Valle Road San Juan Capistrano CA 92675 4853 USA phone 1 949 369 8100 fax 1 949 369 8105 www iqeye com 901 0243 Rev F...

Reviews: