

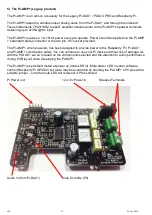

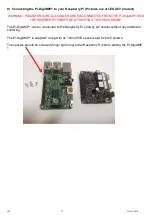


8) Connecting the Pi-DAC+ to your Raspberry Pi
WARNING: PLEASE ENSURE ALL CABLES ARE DISCONNECTED FROM THE Pi-DAC+ AND THE
RASPBERRY PI BEFORE ATTEMPTING THIS PROCEDURE.
The Pi-DAC+ can be connected to the Raspberry Pi’s 40way pin header without any additional
soldering.
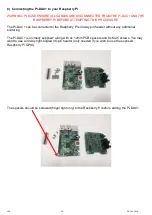
The Pi-DAC+ is normally supplied* along with 4x 12mm PCB spacers and 8x M2.5 screws. You may
want to use a 30way right-angled I/O pin header (only needed if you wish to use the exposed
Raspberry Pi GPIO).
!
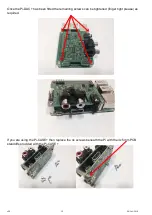
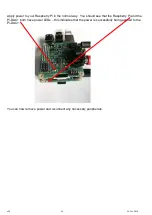
The spacers should be screwed (finger tight only) to the Raspberry Pi before adding the Pi-DAC+.
!
v28
=
24-Oct–2018
14


