background image


Page | 127 
 

It also enables you to set display parameters which include 


Cue marker position 


Clock position 


Interline spacing 


Blanking 

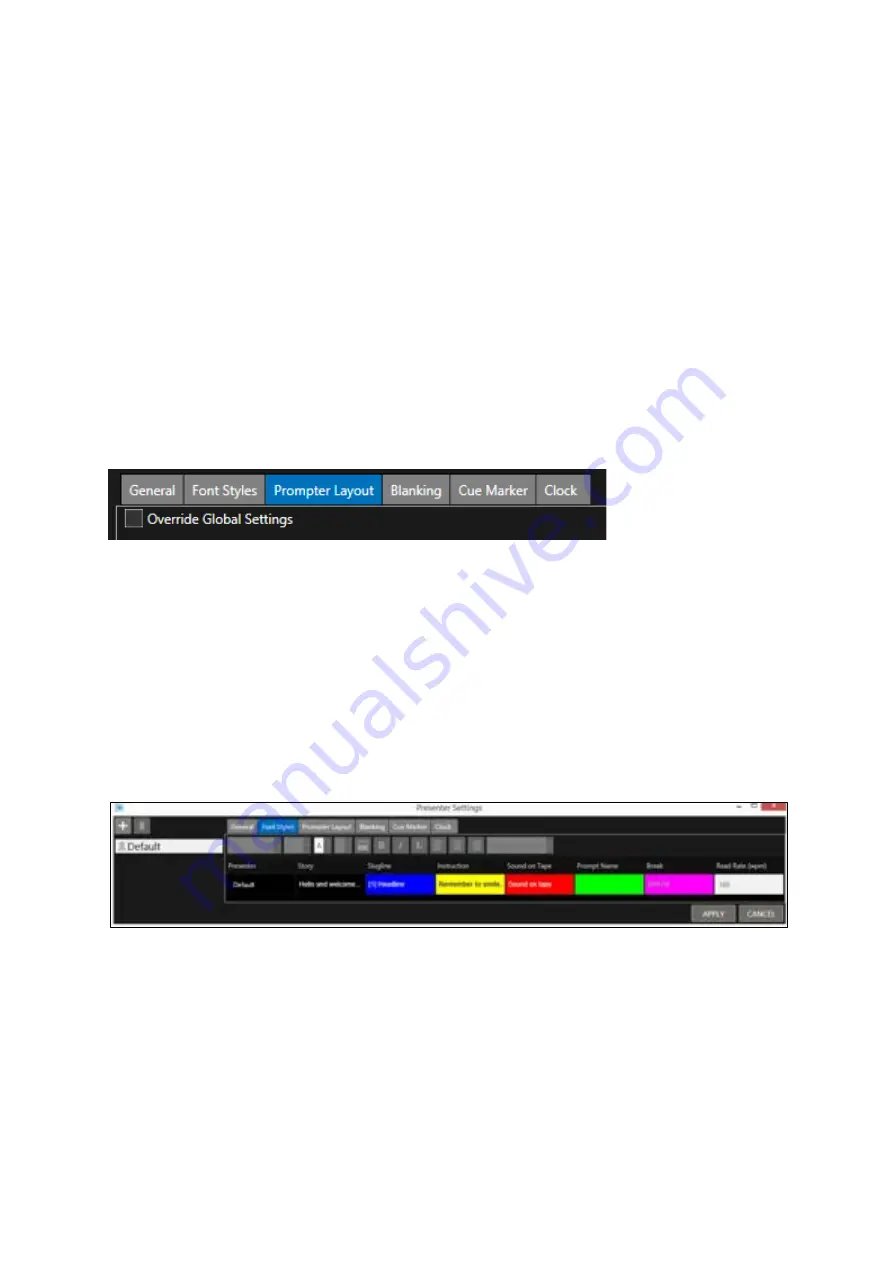
There are several tabs enabling the configuration of settings for each presenter. 

Within the tabs: 


Prompter Layout 


Blanking 


Cue Marker 


Clock 

there is an option to Override Global Settings (see below the global settings option under the 
Prompter Layout tab): 


Click on each of the boxes under these headings to edit the parameter for that Presenter. E.g.  


Font 


Text Size 


Foreground (text) colour 


Background colour 


Bold/Italics/Underline 


Text justification 
 

A Default presenter profile is already loaded. 


Summary of Contents for autoscript WinPlus-IP

Page 1: ...WinPlus IP Software Installation Operation Guide S W Ver 1 12 0 144 PNo A9009 4983...

Page 2: ...18 Overview 18 Requirements 18 Requesting A Migration Code 18 Applying A Migration Code 20 Moving the Licence Dongle 21 Firmware Upgrade 23 Adding Devices 25 Adding An Auto Discovered Device 26 Manual...

Page 3: ...4 Status Bar 55 Adding Machine Status Information 57 Activating Prompting 58 To Activate Live Prompting 58 To De Activate Live Prompting 58 Run Orders 60 How to Create A Simple Run Order 60 Compatible...

Page 4: ...t Keys to Apply Colours 95 Prompter Preview Preferences 96 Blanking 96 Cue Marker 99 Cue Marker Style 99 Cue Marker Colour 99 Cue Marker Vertical Offset 100 Controls Prompt Position 101 Clock 103 Oper...

Page 5: ...tings 133 Remove A Presenter 134 Script Macros 135 Adding Script Macros 135 Editing Macro Preferences 136 Bookmarks Snapshots 140 Configuring Bookmarks 141 Selecting Bookmarks 142 Configuring Snapshot...

Page 6: ...70 Encoding 171 Use Encryption 171 Passive Mode 171 Limit Connections 172 Max Connections 172 Backup Servers 172 Connecting to a Shared Directory Newsroom 173 Adding a Rundown in Shared Directory News...

Page 7: ...terface 199 Automation 200 Overview 200 Configuration 200 Configuration 201 Overview 201 Configuration Toolbar 202 Add A Configuration 203 Add Parent or Child Configurations 205 Modify Configurations...

Page 8: ...Foot Control CON FC USB 001 233 iDevice Integration and Operation 237 Overview 237 Licence Software Requirements 237 Autoscript Licence Required 237 Autoscript Supported software 237 Supported Apple d...

Page 9: ...WC IP Wireless Controller A9009 0007 257 WB IP Base station for Wireless Scroll Control A9009 0008 257 Configuring the WC PKG Wireless Controller 258 Adding The WB IP 258 Adding The WC IP 259 Pairing...

Page 10: ...process of continuous development and improvement of the documentation The information or statements given in this document concerning the suitability capacity or performance of the mentioned hardwar...

Page 11: ...m Production Solutions and supply an email address to receive a copy of your delivery note You will receive an email from Videndum Sales Support with a delivery note including your serial id number To...

Page 12: ...then continue Click Next Click I accept the license terms and conditions and click Next You will then be asked for a location for the destination folder Enter a new address by clicking Change or click...

Page 13: ...Page 12 You will be given another opportunity to change the folder install the application or cancel Click Finish to complete the installation If successful the following window will be displayed...

Page 14: ...y the machine id from the Licence Management window Register the machine id and serial id s at http www autoscript tv support register product software You can access that address directly here A lice...

Page 15: ...ng the latest version from www autoscript tv support software download Please Note An annual licence may be purchased to enable version upgrades not essential Device firmware upgrades are bundled with...

Page 16: ...available Studio No Yes 12 Months from activation No loss of functionality license renewal and software support update packages availabl News Yes Yes 12 Months from activation No loss of functionalit...

Page 17: ...are no longer entitled to upgrade to this version for free Please update your current licence first by contacting support Videndumgroup com or in the Americas please contact servicesupport Videndumgr...

Page 18: ...appear There are several circumstances that can invalidate the licence key WP IP cannot decrypt the licence key because characters from the key have changed been added been removed The Machine ID in...

Page 19: ...Dongle to continue prompting to devices Requirements This feature requires the user to be running WinPlus IP version V1 12 or later They must also have purchased the USB Licence Dongle Autoscript Par...

Page 20: ...urce and destination have been selected click REQUEST MIGRATION This will automatically generate a Migration Code This code will be automatically copied to your clipboard and you will see this confirm...

Page 21: ...lied Applying A Migration Code Once you have received the Migration Authorisation Code you can apply it In WinPlus IP click Help Licence Migration Click the Migrate button A new window will open Paste...

Page 22: ...Sec before the disconnect occurs When the timer reaches 0 the licence will revert to a Temporary licence and Prompting will be disabled If you close the window before the timer reaches 0 prompting wil...

Page 23: ...licence type will be applied to WinPlus IP when it launches Error Warning messages If you have requested a Migration Authorisation Code but you do not apply it before your WinPlus IP licence expires...

Page 24: ...ices window requiring a firmware upgrade will display a warning sign yellow triangle beside the device Status light The message will show as Device firmware needs to be updated To update the firmware...

Page 25: ...much of the process has been completed When the image installation is done the Firmware Update will show as Complete The warning sign will no longer be visible in the Status column of the Devices win...

Page 26: ...units EPIC IPXX EVO IPXX EVO IPSXX XBOX IP IP scroll controllers IDevice iPad iPhone Please Note Support is also included for serial devices such as legacy controllers and closed caption encoders The...

Page 27: ...g An Auto Discovered Device When Add Discovered Device is clicked a list of the available devices connected to the network will populate The window shows the type of device available its friendly name...

Page 28: ...ed Device window and appear in the Devices list Repeat these steps to add all remaining devices When all available devices are added to the Devices list the Add Discovered Device window will be empty...

Page 29: ...Device IPAddress and Subnet window will open Edit the devices IP address and subnet mask Click Ok Please Note If you do not edit the Subnet Mask to match that of the appropriate network the device wi...

Page 30: ...anually add the device In the devices window click the icon This will launch the Add Discovered Device window Click Manually Add Device The Manually Add Device window will open Click Select to view a...

Page 31: ...desired device does not appear you may require a software update After selecting your device type the Manually Add Device window will then give you the opportunity to add a friendly name and the devic...

Page 32: ...eleted Once this now statically assigned device is deployed it should then be manually added to the Device pane If the auto discovered profile is retained it may connect However if for any reason the...

Page 33: ...NDI outputs combined are allowed E g You can enable 1 x NDI Prompter and 2 x Local Prompter or 3 x NDI Prompter and 0 x Local Prompter etc It is recommended that NDI 5 or later be used but not essent...

Page 34: ...ct the desired NDI frame rate click the pull down and click on the frame rate Preview Mode Enabled When prompting is switched off the source output will show the text which will be displayed when the...

Page 35: ...lease Note IP address and Controlled by will not be visible for NDI Prompter When prompting is enabled the NDI source will be the same as the WP IP Preview Adding a Local Prompter To add a Local Promp...

Page 36: ...ered Type the name you would like to use E G Gallery Monitor The window will show the Display number and the resolution the monitor is set to at that time Preview Mode Enabled When prompting is switch...

Page 37: ...guration button Please Note IP address and Controlled by will not be visible for Local Prompter When prompting is enabled the Local Prompter display will be the same as the WP IP Preview To exit Local...

Page 38: ...wer Try the manually add Local Prompter procedure again The maximum number of display devices Local or NDI that can be added is 3 If a user attempts to add an additional device they will see the below...

Page 39: ...lay the users name the machine device name The users name is the name they are logged into the machine with The device name is as seen in the About details of your PC In the above example the user is...

Page 40: ...hen given an option to proceed Clicking Yes will result in BrownR UKBUR PC0YQFX1 taking over that device On AnisR UKTW1 004030 s machine this will now show as Blue and the owner will be shown as Brown...

Page 41: ...Line Disabled Blue Light Busy in use by another WP IP Green Light Connected Orange Light Connecting Purple Light Device Type Mismatch Blue Up Arrow Updating Script this may flash intermittently Re or...

Page 42: ...ple an outside broadcast where the prompter laptop PC is in a studio and the presenter is some distance away In this case the remote devices may not be on the same LAN as the laptop PC running WP IP T...

Page 43: ...are on these devices traffic must also be able to pass over Port 69 Additional Information WinPlus machine discovery WP IP uses a proprietary protocol using UDP broadcasts on port 52385 IP Controller...

Page 44: ...Default Layout Icon Size The size of the icons in all toolbars can be adjusted to increase visibility or to reduce the space used Selection is made by clicking Settings Icons Three different sizes are...

Page 45: ...ns the applicable window to the sidebar Close X Closes the applicable window Burger 4 horizontal lines Enables options for the applicable window to be selected Window Layout Default Layout The default...

Page 46: ...pped relative to the pane they are hovering over Tabbing Panes Central Position When dropped the dragged pane will be tabbed with the pane which it is hovering over Multiple panes can be tabbed to the...

Page 47: ...Order panes are all tabbed Tabb s can be dragged to reorder if required Story Editor Toolbar Default functions icons are set in the Story Editor toolbar These functions can be added or removed by clic...

Page 48: ...our Select the colour for highlighted text Also displays colour of the text which the cursor is currently on Click on pull down to select colour Backcolour Select the colour for highlighted text Also...

Page 49: ...in the Story Editor window to correspond with the part of the script that is currently being prompted Note When Script Matches Prompt is unchecked the Scroll to Prompter feature is disabled aA This wi...

Page 50: ...ill point up If the location of the text in the run order displayed in the Story Editor window is above the text displayed in the Prompter Preview Window the arrow will point up To have the script in...

Page 51: ...to decrease the size of the image Drag the slider to the right to increase the size of the image Please Note Adjustment of the slider effects only the size of the image in the Story Editor window It h...

Page 52: ...s Default Icon Features Find Enter a story number from the Run Order list and hit enter and that story will become the live prompted story Add Will add a story to the bottom of the Run Order Remove St...

Page 53: ...oated stories from the Story Editor by clicking on the burger then Hide Floated Stories Please Note Stories can be floated using a shortcut key To float put the cursor on the story and click F2 To un...

Page 54: ...l move down in the Run Order window Scroll to Prompter When activated Scroll to Prompter will automatically position the script in the Story Editor window to the corresponding position with the story...

Page 55: ...g the slider to the left to increase drag the slider to the right Language Selection Click the Language button in the main toolbar This will allow you to select English Default or Simplified Chinese a...

Page 56: ...atus of the Devices even if the Devices pane is closed pinned or tabbed Please Note This bar cannot be closed or moved There are two areas of the status bar The right of the Status Bar Shows the statu...

Page 57: ...d will be displayed This message will not be shown when a Run Order is loaded from an NRCS In addition to the Run Order messages displayed above there are a number of messages which may also be shown...

Page 58: ...tatus Bar The select status information will be added Show CPU Usage shown in the Status Bar as CPU This is the of the CPU being used by WP IP Show Total System CPU Usage shown in the Status Bar as To...

Page 59: ...w Please Note Clicking F9 when the cursor is on the text in the Story Editor window will result in the output starting from where the cursor is positioned If applicable press Go Live as an option on o...

Page 60: ...outline The current available Run Order will be highlighted red The Function button will be red and will display Go Live The following are examples of how the default application will be displayed in...

Page 61: ...indow and Untitled will appear in the Run Orders window To add another Slugline right click anywhere in the text and select Convert To Slugline or click Ctrl F5 You will then be given the option to ad...

Page 62: ...d as applicable into WP IP Word Doc copy and paste import DOCX copy and paste import Text txt Rich Text Files rtf Adobe PDF Legacy WinPlus wpl BBC Scriptwriter spt Please Note additional file formats...

Page 63: ...extension is awp Autoscript WinPlus Scripts can also be saved as an XML file To add a new Run Order click File New or ALT F N or click in the main toolbar or in the Run Order window header You can add...

Page 64: ...port Runorder pane Please Note See the section below Printing Options Configuration for an explanation of the functionality of these options Once all settings have been confirmed click EXPORT You can...

Page 65: ...ling A Run Order To recall a Run Order click File Open or type Ctrl O Saved Run Orders can also be opened by clicking the Open Run Order From File icon in the main toolbar or in the Run Orders window...

Page 66: ...ries in the Active Run Order window Click on a story right click and select Renumber From To launch the Renumber Stories pane Prefix This can be alpha numerical and will be placed at the front of the...

Page 67: ...ill appear before the name of the Run Order and the word EDIT will appear in the Status column When the Run Order is saved the word Saved will appear in the status bar for a few seconds The Asterix an...

Page 68: ...ut of another script In the following example I have 3 Run Orders loaded Script 1 Script 2 Script 3 I want to prompt and edit Script 1 I right click on Script 1 and select Prompt and Edit Run Order Th...

Page 69: ...results in the following Script 2 is now in the Story Editor pane and Script 1 is still the Prompter Preview pane the live script To confirm the title bar of the Story Editor pane and the Prompt Previ...

Page 70: ...a blue border outlining the green signifying I have selected it and choose Prompt Run Order Script 2 is now in both the Story Editor pane and the Prompt Preview pane the live script I then right click...

Page 71: ...pane By using these options the user can preview and edit one script while live prompting another Automatically Scroll from One Run Down Into the Next In many instances multiple run downs are loaded...

Page 72: ...ing the Merge function run orders are merged upwards I E run orders are merged up into the top selected run order As an example there are five run orders loaded The user wants to combine three of thes...

Page 73: ...to launch the Renumber Stories pane See the section Renumbering Run Orders above for more details Please Note If you want to merge into a run order which is not currently the highest drag and drop th...

Page 74: ...ouped run orders Please Note the file extension for grouped WP IP run orders is awg Once saved the Run Orders pane will show the new grouped run orders name A blue arrow will allow the user to expand...

Page 75: ...dd a run order to an existing group drag the run order over of the group When you release it you will be asked to confirm if you would like to add it to the group Please Note The existing group must b...

Page 76: ...ht click on a story in the Active Run Order window The options to move stories are Move After Live Story Move After Story Move After Live Story Single Story Action Select the story you would like to m...

Page 77: ...ories will move from their current position in the Run Order to be the next story in the Run Order below the current live story The stories will be positioned below the live story based on the order t...

Page 78: ...lt The selected stories within the selected story block will move from their current position in the Run Order to be the next story in the Run Order below the current live story The story which was ne...

Page 79: ...ries and insert them after a specific story determined by the user Once the story stories or story block has been selected right click on one of the stories and select Move After Story A window will o...

Page 80: ...Float Text or can be removed from the prompted output but remain in the story editor using the Float Cloak Function The Floated text will be highlighted in the Story Editor Floating from the Story Ed...

Page 81: ...ick F2 Example To remove Floated status click on the Floated text and click CTRL F2 To Float A Selection F2 In the Story Editor select the text you would like to Float and click F2 Example To remove t...

Page 82: ...te If a selection is made by dragging only the text which is selected will be floated Example To remove the Floated status select the Floated text and click CTRL F2 To Float Selected Paragraphs In the...

Page 83: ...t connected to a NRCS a story or a selection of stories can be Floated from within the Active Run Order window by using the Float Story button by right clicking and select Float or by clicking F2 In t...

Page 84: ...Order pane click the burger then Columns Notes To add a Note In the story you want to make a note click under the word Notes A box will appear where you can begin typing Type the note you would like t...

Page 85: ...mber of blank lines to be removed on import when a new line is to be created and which text formats you would like to import Please Note these preferences are universally applied so are not specific t...

Page 86: ...en a run order is imported which has 4 blank lines 3 of those blank lines will be removed To switch this function off uncheck the box Please Note this option applies both to when run orders are import...

Page 87: ...llowing it The 3 spaces are forced onto the next line before END Using the same text and the Spaces After set to 2 Will produce the following result A new line is forced after the because there are 2...

Page 88: ...ext is done using the options o Number of spaces to replace starting tabs o Number of spaces to replace non starting tabs Using the following text as an example Entering a different value will affect...

Page 89: ...replace non starting tabs 1 There are 3 x Tabs so total spaces to replace tabs is 3 With these settings The results are The two tabs at the start of the first sentence starting tabs are removed and r...

Page 90: ...TIPS These are B or b Start of Story I or i Inverse Video On V or v Inverse Video Off When Handle TIPS tags is enabled these tabs are converted to the format specified above Please Note The number fol...

Page 91: ...Page 90 When the feature is enabled And the TIPS document is imported the resulting conversion is Please Note Additional TIPS tags may be supported in future versions...

Page 92: ...en text is copied and pasted into a location in the Story Editor which has a Presenter applied and From Destination is selected the parameters of the Presenter will be applied Fonts and Sizes This ref...

Page 93: ...shortcut key list are SHFT HOME will select a line Double click on a word will select it Triple click on a word will select a sentence Shortcut Keys Several shortcut keys are available to improve the...

Page 94: ...ptions This will bring up the Available Colours pane Edit the Custom Colours The custom colours may be edited wherever a colour option is available For example they may be set via the Story Editor pan...

Page 95: ...of the numbers 0 9 In the below example Custom Colour 0 is selected This will open a colour selector Move the cursor to create a colour you want Click Select to assign that to the Custom Colour number...

Page 96: ...llows To apply a colour to the Forecolour text select ALT SHIFT Number 0 9 To apply a colour to the Back Colour text select ALT Number 0 9 To use the shortcut keys to apply the corresponding Custom Co...

Page 97: ...cted by text on the screen An example of this is when an interviewee is not in the same location as the presenter The presenter will interview them through the camera In this example any text on the s...

Page 98: ...ank or to show a message To completely blank the output uncheck the Show Message button The following will result To show a message check the Show Message button You can then add the message to be dis...

Page 99: ...se up to 3 message lines or use a single character The message text will automatically be centre justified Please Note If you edit the message text when blanking is activated you will be able to see t...

Page 100: ...r tab enables the user to set parameters for the marker displayed on the Prompter Preview pane Cue Marker Style This can be set to be an arrow or a block Cue Marker Colour The colour of the marker can...

Page 101: ...click Close Cue Marker Vertical Offset The offset of the marker from the top of the Prompter Preview can be adjusted using a slider This will correspond to where each new story appears on screen Pleas...

Page 102: ...Cue Marker or if it is always displayed at the top of the output Examples where the Cue Marker vertical offset is approx 60 down the Prompter Preview pane Controls Prompt Position on Result The story...

Page 103: ...mpter preview independent of the Cue Marker position Any subsequent stories will also be positioned at the top line of the prompter preview independent of the Cue Marker position Please Note Cue Marke...

Page 104: ...ngs are shown above Please Note the settings within the Preferences are applied to the clock To activate the clock itself click on the Prompter Preview burger and select Show Clock There are several a...

Page 105: ...he output When unchecked seconds will be removed from the output Text Colour Background Colour The applicable colour can be either from presets and a selection of standard common colours or generated...

Page 106: ...w window closed you can add the function buttons which would have been displayed in the Prompter Preview window to the main toolbar Click Settings Toolbar and select the buttons you would like to add...

Page 107: ...e may be docked with other panes when launched The toolbar functions are from L R Start Timer Pause Timer Reset Zero Timer Count Up Count Down The counter displays the time and status colour Red the c...

Page 108: ...tart Timer button To pause the Timer click the Pause Timer button To reset the Timer click the Reset Zero Timer button To set the Timer to count up in seconds click the Count Up button To set the Time...

Page 109: ...n the Timer is displayed on the prompt output Use the pull down to select which option to apply Never show this will stop the Timer from ever being displayed Show when timer is active This will displa...

Page 110: ...allows the user to select how long this change of colour will be displayed within a range of 0 seconds 60 seconds Once the Time To Show Alert has exired the colours will revert to those set for Active...

Page 111: ...ssigned colours to those of the default pictured above Please Note Different colours from the default can be selected using the pull down beside each Text and Background box Timer Position On Screen T...

Page 112: ...this option is ON or OFF Countdown alerts This feature lets you choose what happens when an alert time has been reached Stop and alert at zero When selected the Timer will stop counting when it has re...

Page 113: ...on the prompter output which are not part of the script These can be useful ways of sending information to the presenter E g David on line 1 To launch the message pane in the main toolbar click Window...

Page 114: ...re are a maximum number of 9 shortcut keys The shortcut keys are CRTL SHFT 1 9 Shortcuts are assigned 1 9 in the order that the messages are saved If a message is deleted a new message will occupy tha...

Page 115: ...free up the shortcut for another message right click on the message and click Delete Right Click SHFT or CTRL to select and delete multiple messages at the same time Showing Hiding Messages There are...

Page 116: ...the preferences pane This pane can be accessed from two locations In the Prompter Preview pane click the burger and Preferences In the Prompter Messages pane click the burger and Preferences If you us...

Page 117: ...ill change Please Note Duration figures up to 20 can also be typed into the Seconds box The Message will be displayed with the colours in the two colour fields Normal Colours Text colour this is the c...

Page 118: ...you increase the Duration time to anything larger than 0 additional fields will appear These fields allow you to change how the Message looks after a certain period of time to highlight the message Th...

Page 119: ...displayed with the colours in the two colour fields Alert Colours Text colour this is the colour the Message text will display during the alert period Alert Colours Background Colour this is the back...

Page 120: ...electors beside these two configurable options Please Note Numbers can also be typed into the Font Size box Y Position The Y axis orientation of the message position on screen can be determined using...

Page 121: ...l text up to the end of a paragraph will be converted to a Slugline Fit Prompt Output Width The slugline length will match that of the text in the corresponding line of text in the Prompt Preview wind...

Page 122: ...suglines from the prompter output The options are to Show or Hide sluglines These can be selected from the pull down Please Note Slugline settings can only be applied when prompting is not live When...

Page 123: ...n Order window Prompter Preview Layout Formatting Several options are applicable which enables the user to determine the appearance of the output This configuration is accessed via the Prompter Previe...

Page 124: ...the output is done using the left and right upward pointing arrows Drag the margin markers to the desired position To increase the width of the right margin drag the right margin marker to the left To...

Page 125: ...it by clicking the right or left cuemarker icon to toggle it on or off To change the vertical position of the Cue Marker left mouse click on it and drag it to the desired position Please Note The vert...

Page 126: ...ill resize automatically The illustration below shows the default spacing and the position of the adjustment arrow Marked with a red dot and the corresponding text in the Story Editor window The numbe...

Page 127: ...ch the Presenter Settings window This window will display a list of the configured presenters Please Note When WP IP is first installed a presenter profile named Default is shown The settings enable y...

Page 128: ...r Within the tabs Prompter Layout Blanking Cue Marker Clock there is an option to Override Global Settings see below the global settings option under the Prompter Layout tab Click on each of the boxes...

Page 129: ...he presenters name in the Name field in the General Tab This will autofill the presenters name in the parent name field For example Presenter John When the presenters name is displayed the presenters...

Page 130: ...eters in the Prompt Name field of the Font Styles tab to the below The resulting output is Click Apply to save these settings and add the new Presenter to the list Display the Presenters Name The opti...

Page 131: ...Slugline is selected the presenters name will be shown Please Note It is not required to reload the Run Order to apply these changes Display of the presenter s name can also be determined by the brac...

Page 132: ...checked For example the Blanking tab If you do not want to use the global settings of the Blanking feature for Presenter John select Presenter John then the Blanking tab and check the Override Global...

Page 133: ...Page 132 Settings can be changed for the other functions in the Presenter menu by clicking Override Global Settings E g Prompter Layout Cue Marker settings Clock settings...

Page 134: ...ed for example in a different colour or in italics this formatting will remain The application of a Presenter will not overwrite these format changes with the selected Presenters formatting Apply Pres...

Page 135: ...e Default Presenter parameters will be applied to the story If the Default Presenter is assigned to a story then the Presenter name column will be blank Presenter parameters can be changed or overwrit...

Page 136: ...Grey No Data Stored Red Data Stored To assign text to a macro highlight the required text and press one of the Macro buttons When the text has been assigned to a macro the colour of the button will tu...

Page 137: ...macro by hovering over it To delete data associated with each button right click on the button and select Clear You can assign data to a macro using shortcut keys Editing Macro Preferences The assignm...

Page 138: ...ow the contents of that macro Please Note This function is for review of the contents of the macro only no edit of the macro contents can be done from this field Shows a preview of what the macro butt...

Page 139: ...of keystrokes is not allowed an error message will appear You must re enter using the parameters explained in the error message If a combination of keystrokes has already been assigned to another mac...

Page 140: ...Enables the exporting and saving of all macros data and contents to an XML file which can then be imported into the same or another instance of WP IP Enables the import of all macro data and contents...

Page 141: ...arch this is perhaps more useful for longer term markers Snapshot useful if you need a quick marker that you can jump back to shortly after making it Snapshots are a smaller cut down version of bookma...

Page 142: ...e position you want to add as a Bookmark Click ALT M This will mark the line you clicked on as a Bookmark The text in the Story Editor will be highlighted in Pink and the text will appear in the Bookm...

Page 143: ...us field is linked to the status of the story in the Newsroom and so will only populate if WP IP is connected to a Newsroom and if the application has a WP IPN licence Text Shows the text which has be...

Page 144: ...pshot The text in the Story Editor will be highlighted in Grey and the text will appear in the Snapshot pane Selecting Snapshots To jump to the Snapshot position in the Story Editor double click anywh...

Page 145: ...ifferent text enter the text you want to replace in the Find Text field Enter the text you want to use to replace this with in the Replacement Text field To replace the text click Replace Next To repl...

Page 146: ...apply specific formatting to the replacement text click the Apply Formatting box This will extend Find Replace Window to show the available formatting options which can be applied to the replacement t...

Page 147: ...he Spell Check WP IP will then automatically scan the text for spelling errors and underline them in red Edit the text to correct the spelling and the underline will be removed Please Note if the text...

Page 148: ...from the XBOX IP output will not match that of the script Access the Font Management tool via Settings Preferences Then selecting Font Management The Font Management window shows two fields Windows F...

Page 149: ...default fonts and cannot be removed To Add A Font Select the font you would like to add to WP IP Then click Add Selected In this example Aharoni font is selected When Add Selected is clicked the Aharo...

Page 150: ...initially put at the end of the Installed Fonts so you can see it has been added After the Preferences window is closed it will be put into the correct position in the alphabetic fonts list To actual...

Page 151: ...device is switched off or disabled when the font is applied it will automatically receive that font when it is powered on and enabled again Adding Fonts from a File This option will allow the user to...

Page 152: ...te only fonts which appear in white in the Installed Fonts pane can be removed Those which appear in grey are permanently installed both in WP IP and all devices Important If you would like to install...

Page 153: ...rinting options are accessed from Settings Preferences in the main application toolbar and then clicking the Print tab I mportant Please note from WinPlus IP Version 1 12 onwards Printing options and...

Page 154: ...will print the name of the Run Order If the Run Order is from a newsroom it will print the name which is shown in the Run Orders pane If the Run Order is local it will print the filename Colour Closen...

Page 155: ...ness slider set to the far right The printed copy will be as below Editing Run Order Selected Story Settings Page per story When checked this will start a new print page for each story When unchecked...

Page 156: ...ext in the Prompt Preview pane When unchecked the print output will use the full width of the printed page Slugline Formatting When checked sluglines can be set to appear in different way when printed...

Page 157: ...this machine Page Size The pull down displays all the available page sizes for the specific selected printer Select Stories The pull down enables you to select to print All Stories or Only Selected S...

Page 158: ...aunches click the pull down to select MOS Please Note The MOS functionality does not have a Newsroom Specific connection it uses generic MOS commands for connection as outlined by MOS here http mospro...

Page 159: ...h an X as illustrated below Click apply If successfully connected the MOS connection will now appear in the Newsrooms list The Status light will show the connection Green Light connected Orange light...

Page 160: ...ers You can view this as a list view or a tree view This window will show the Run Order name Start Time and the Newsroom Click on the Run Order you want to select in then click ADD or Double click the...

Page 161: ...then ADD The stories will begin to load and populate the Run Order Story Editor and Prompt Preview windows Repeat this operation to add additional Run Orders To delete a Run Order right click and sele...

Page 162: ...tion button The Edit Newsroom Window will open The additional options are seen below the MOS ID field Use Backup Buddy Server If a connection is lost to the main MOS server WP IP will automatically us...

Page 163: ...s Once a connection is established the Heartbeat function begins Heartbeat timeout is how long WP IP will wait before deciding there s a problem shutting the connection down and then trying to re esta...

Page 164: ...list will initially be empty it will not display any currently MOS active runorders When a runorder is made MOS active in the newsroom it will automatically appear in the Run Orders list Please Note...

Page 165: ...laced The INAC status will be removed in the Run Orders window and the warning triangle in the Status tray will be removed Pausing Runorder Updates When using a MOS NRCS connection it is possible to p...

Page 166: ...l changes made to the Rundown during the Pause period will automatically be applied The pause icon will be removed Please Note When the paused is disabled if any edits have been made to the script loc...

Page 167: ...ewsroom Licence key to access the Newsroom functionality The application type in the top right hand corner will show Newsroom Click on the plus sign in the Newsrooms window Click Select Newsroom Type...

Page 168: ...ing Red light not accessible Blue light busy in use by another instance of WP IPN Adding a Rundown In iNews In the Run Orders pane click Open run order from newsroom You will then see the available Ru...

Page 169: ...y Editor and Prompt Preview windows Repeat this operation to add additional Run Orders Please Note if the Directory field is left blank this will connect to the users default iNews Home queue Use the...

Page 170: ...ssage Please Note If you choose to delete the currently live run order the currently prompted script will be deleted As the rundown is loading into a device a blue arrow icon will be displayed beside...

Page 171: ...click the Configuration button The Edit Newsroom Window will open The additional options are seen below the Filter field Connection Timeout MS Connection timeout is the time the WP IP machine will wa...

Page 172: ...is only one way i e WP IP connects to the iNews server so only one direction of firewall needs to be opened Passive only needs ONE direction of firewall open When unchecked Active Mode FTP the iNews s...

Page 173: ...t Connections is enabled see above Backup Servers When additional iNews FTP servers are available they can be added in the Backup Servers field One server connection will be used at a time If one serv...

Page 174: ...s the Newsroom functionality The application type in the top right hand corner will show Newsroom Click on the plus sign in the Newsrooms window Click Select Newsroom Type and Select Shared Directory...

Page 175: ...ully connected the Shared Directory connection will now appear in the Newsrooms list The Status light will show the connection Green Light connected Orange light connecting Red light not accessible Bl...

Page 176: ...re than one run order is available you can select multiple rundowns by clicking and holding the CTRL key at the same time then ADD The stories will begin to load and populate the Run Order Story Edito...

Page 177: ...ading run orders can be set in the Preferences window To launch this window in the Newsrooms pane click on the newsroom you want to configure then click on the burger and select Preferences The Prefer...

Page 178: ...ch are made to the current live story will be updated inreal time Ignore changes which are made to the current live story in the prompter will be ignored and discarded Defer changes which are made to...

Page 179: ...ory Editor will be visible Please Note If the user has locked the story editor using the lock button before one of the above locking conditions occurs when the condition is no longer true the story ed...

Page 180: ...ed Any story breaks will not be displayed in the Story Editor or the prompt output Breaks off included Any story breaks will be displayed in the Story Editor the prompt output Presenter Instructions o...

Page 181: ...of bracket Click on the arrow to dispaly the options The selected option will then be applied to any text which is imported within that particular set of brackets Where a Presenter is selected for a...

Page 182: ...ion settings so will look like this text in and will be imported as they are i e no specific option will be applied Please Note Changing the Bracket Options to a Run Order which has already been loade...

Page 183: ...s an illustration of 12 colours MOS Colours can be reset by clicking the Reset button This will reset the number of colours and the colours themselves Click on the pull down arrow in the colour field...

Page 184: ...ed the associated date and time of that run order will be displayed If you would like to see the Date Time column as the first column drag the column to the right Please Note Rundown Date Time data is...

Page 185: ...n Order pane In this example edits will be made to story A4 Russia Intro When the rundown is first loaded into WP IP this column will not display the REP status When the first edit is made in the NRCS...

Page 186: ...e REP status select the story by clicking anywhere in it then right click and select Clear Replaced Status This will then remove the REP text Any subsequent edits to story A4 will resume the REP count...

Page 187: ...Hide Breaks These can be selected from the pull down Please Note Break settings can only be applied when prompting is not live When applied the prompt position will be set back to the top of the Run...

Page 188: ...ioner Configuration Closed Caption generators CC can be configured through the WinPlus IP Device pane Click the icon to add a device Select Manually Add Device then Closed Caption Complete the Device...

Page 189: ...general options Other encoder has the following general options Offset from cue This value will determine when the CC data is sent to the encoder relative to the position of the Cue Marker Values can...

Page 190: ...combination of brackets There are only two types of data sent to the Closed Captioner device Normal story text Sound on Tape SOT transcripts Bracket functionality will be handled as follows Any bracke...

Page 191: ...tings can be used in conjunction with any applicable CC encoders EEG and Link CC Encoders The settings in the advanced tab can be used to determine the number of characters output and therefore determ...

Page 192: ...set Closed Caption Access Off When the CC encoder type is selected as Other the fields in the general tab equate to the following fields in WinPlus Ultra When the CC encoder type is selected as Link o...

Page 193: ...IPN WP IP WP Evaluation When redundancy is active and initiated all features of the live machine will be paired and replicated on the standby machine This includes Presenter settings Please Note Layou...

Page 194: ...Hostname column Details of the software version and WP IP licence type will also be displayed Please Note To pair two applications this operation must also be performed on a second WP IP application C...

Page 195: ...ONTROL will assign that machine to the live machine The Standby window will close The STANDBY window on the second machine will now display in green signifying that it is activey paired When paired th...

Page 196: ...will disappear The live machine will now automatically become the standby machine All devices will now be controller by the live machine Please Note For automatic failover see Additional Redundancy To...

Page 197: ...Primary Standby Heartbeat Timeout Both machines send heartbeats to each other to determine connected state This setting determines how long the Live machine will wait for a heartbeat response before a...

Page 198: ...oscript Voice and Autoscript Director Additional functions are available within the Redundancy status window Click on the chevron icon in the bottom right of the Standby window to view Unpair This wil...

Page 199: ...rundown changes from iNews are synched to the standby machine automatically MOS When integrating using MOS the NRCS must be added separately on the master and standby machine After redundancy mode is...

Page 200: ...Configuration Get Device s Current Configuration Set a Device s Configuration Video Source Switching Take control of devices Take control of a specific device Take control of all devices Prompting Ope...

Page 201: ...ting on at that story Configuration To configure Automation launch the Automation window under the Newsroom Pane Complete the MOS ID NCS ID and Port fields These are the Settings which Sony ELC will u...

Page 202: ...t Configurations libraries between different Winplus IP applications Configuration examples include Create shows with select devices run orders presenter settings Switch NRCS preferences Create studio...

Page 203: ...d Configuration Modify selected Configuration Load and reset missing Configuration items Load and leave missing Configuration items as currently set Reset to defaults Expand all Collapse all Clear sel...

Page 204: ...to the default Add A Configuration Click the Add button in the Configuration window toolbar This will then open the Add New Configuration window Complete the Name field in the below example this conf...

Page 205: ...ill be checked Click OK The Configuration pane will now display the new Configuration You can view the contents of the Configuration in a number of ways Click on the plus in the Master Configuration t...

Page 206: ...the Collapse All button Add Parent or Child Configurations Additional Configurations can be added either as a Child of an existing Configuration or as a new Parent Configuration To add as a Child sele...

Page 207: ...ra 2 Presenters deleted presenters John Jane Click the Add button and named the new Configuration 5PM Running Order Select all elements to save When OK is clicked the 5PM Running Order is saved as a C...

Page 208: ...ect the Configuration you wish to apply those edits to by clicking on the Configuration and then click the Modify button This will then open the Modify Current Configuration window You can then select...

Page 209: ...nfiguration click on the Configuration you want to delete to select it then right click and select Save When selecting this option a confirmation box will open Click Yes or No to save the current sett...

Page 210: ...o not appear in the 5PM Running Order Configuration will be reset When selecting this option a confirmation box will open Click Yes or No to apply the Configuration or close the confirmation box Load...

Page 211: ...icate Configurations If you would like to save time when creating or adding Configurations you can move or duplicate existing Configurations Click on the desired Configuration to select it then right...

Page 212: ...Paste or use the shortcut CTRL V Delete A Configuration To delete a Configuration click on the configuration you want to delete to select it and then click the Delete button This will delete the Conf...

Page 213: ...nables an individual user to have a personalised profile which they can carry with them Networks can have a standardised profile across a number of machines which can be easily edited and duplicated w...

Page 214: ...een selected to be exported Depending on the licence applied the user can choose to export whichever settings are available The function of the buttons in the footer of the window are as follows This...

Page 215: ...ting This will select all items except Layout Saved Run Order and Configuration These are the most preferred settings when a particular rundown is to be used and it is desirable to have the GUI layout...

Page 216: ...ns can be used This will then enable the user to export the selected settings by saving as an xml file This will cancel the operation and close the Select Settings to Export window Importing Settings...

Page 217: ...select it This will then launch the Select Settings to Import window You can then apply the same buttons as for the export depending on what settings you select to import Where you do not select a set...

Page 218: ...models this feature can be applied to are Sales Part Description A9011 0001 19 EVO IP prompt monitor A9011 0002 17 EVO IP prompt monitor A9011 0003 15 EVO IP prompt monitor A9011 0006 19 EPIC IP promp...

Page 219: ...check the box Advanced Configuration This will then add the two tabs DISPLAY and TALENT MONITOR DISPLAY This refers to the prompter screen EVO IPXX TALENT MONITOR This refers to the return video scre...

Page 220: ...ndby mode When the power is set to Standby the backlight will be dimmed to the minimum settings of brightness To switch to Standby click the STANDBY button To return the backlight to full power click...

Page 221: ...ure click the pull down in the colour temperature field and click on the option you would like Selecting User will enable you to create your own colour temperature by adjusting the RGB settings using...

Page 222: ...ng The image scaling can be adjusted by clicking in the pull down to select the preferred scaling Input Source The input source selections differ between the DISPLAY and the TALENT MONITOR Click in th...

Page 223: ...light areas where there s often a wider colour spectrum Click in the pull down to select the preferred level MPEG Noise Reduction MPEG Noise Reduction feature improves the quality of pictures by redu...

Page 224: ...details DISPLAY Picture in Picture Mode determines where the PiP image will be positioned in the display For no PiP select Off To set the position click in the pull down and then the preferred option...

Page 225: ...n click in the pull down and then the preferred option Picture in Picture Size determines the size of the PiP image Select Small or Large Please Note When Side by Side is selected as Picture in Pictur...

Page 226: ...ed to the WP IP application using a serial to ethernet convertor and bespoke serial cable This is supplied by Autoscript as a package part SRL IP Power All legacy controllers require external power Th...

Page 227: ...SCB The SCB itself will be connected to the network via the SRL IP serial cable A9009 5002 External power is required for the SCB All legacy devices will require power supply PSU HR The SRL IP convert...

Page 228: ...e the installation of the SRL IP power the Lantronix UDS1100 and connect it to the network The Lantronix Device Installer can be downloaded from here http ts Lantronix com ftp DeviceInstaller Lantroni...

Page 229: ...ice Installer it will automatically search for any devices Double click on the device that you can see and select the Web Configuration tab then click the green arrow to load the page Enter the userna...

Page 230: ...2400 For a CON FC Autocue set the baud rate at 1200 Click ok click apply settings wait for the page to reset then repower the Lantronix box Close and re open the Lantronix page You should be ready to...

Page 231: ...s Click Next to then set the IP address etc Click Next then Assign to change the IP address Once assigned click Finish Once you have done this go to the Winplus IP software and Click Add in the Device...

Page 232: ...on of Legacy Autocue Controllers With WP IP Legacy Autocue controllers can be connected and used with the WP IP application This includes the following controllers Autocue ShuttleXpress CON SE Autocue...

Page 233: ...ler will be detected and listed in the Auto Discovered device pane as the type ShuttleXpress Double click to add to the Devices pane To edit the settings select the device then click the Configuration...

Page 234: ...sing the Manually Add method In the Devices pane click the button and select Manually Add Device Click the pull down to see list of the devices which can be manually added Select Autocue USB Controlle...

Page 235: ...d Once connected it will show green The assigned COM port will be displayed Use the pull down to manually select the controller type Or press any button on the controller to have WP IP automatically d...

Page 236: ...en click the Configuration button In the main page you can change the device name Click CONFIGURATION then the GENERAL tab to view the functions assigned to each of the buttons For the Foot Controller...

Page 237: ...be assigned Click the pull down on each button to change the function assigned to that button Click the SPEED PROFILE tab to adjust sensitivity the size of the deadband and the ShuttleXpress maximum s...

Page 238: ...as a device within the WP IP device manager Once activated it will receive the prompting data from WP IP over Wi Fi or wired Ethernet adaptor enabling the script to be rendered in the iDevice so that...

Page 239: ...ences amongst iPads For example if you have 3 x iPads and 2 x iPhones and 3 x WP I licences you can add up to 3 x iDevices to the WP IP application These can be any combination of the 5 x iDevices the...

Page 240: ...P IP header You will now be able to add an iPad or iPhone to your list of devices Please Note If you have WP IP already installed and then add the WP I feature you will receive a licence that includes...

Page 241: ...t typically transmit through different subnets However IT engineers may be able to configure a route between two networks tunnel VPN which enables iEVO to connect to WP IP In this case there should be...

Page 242: ...Page 241 iEVO Network Connection Examples Local Network iPad iPhone Connection...

Page 243: ...Page 242 Remote Network iPad iPhone Connection...

Page 244: ...on your connected iDevice and have the appropriate licence installed on your WP IP application you can add the iDevice In the devices window click the icon This will launch the Add Discovered Device...

Page 245: ...g on the iDevice In the below example WP IP has auto discovered an iPad on the network with the name Jib iPad When the device is added to the devices list it will disappear from the Add Discovered Dev...

Page 246: ...l be added to the Devices window but you will not be able to use that device Once the Subnet of the iDevice is edited to match that of the network which the laptop PC running WP IP is also connected t...

Page 247: ...Page 246 This will launch the Add Discovered Device window Click Manually Add Device The Manually Add Device window will open Click Select to view a pull down of the available device types...

Page 248: ...ce window will then give you the opportunity to add a friendly name and the device IP Address Populate these fields Any incorrect entries will result in an error icon being displayed next to the field...

Page 249: ...er on camera units As with the other devices there are configurable options To access these right click on the iDevice and select Edit or click on the Configuration button If the prompting is currentl...

Page 250: ...nfiguration to access a menu General Shows the general information for the iPad including the device Serial Number and Firmware version A yellow triangle alerts you that the Firmware is now out of dat...

Page 251: ...pplying Identify If you click Yes the identification screen will be displayed for 3 seconds and then will automatically revert to displaying the prompter text Time Zone This feature allows the user to...

Page 252: ...nd position click the burger Preferences Clock To use the time generated in the WP IP application the device is attached to uncheck the box Use Host Time Zone To use the time set in the location servi...

Page 253: ...with a hood and glass check the box Vertical Flip To use the iDevice in straight read configuration uncheck the box Vertical Flip Prompting Control The loading of script text and speed and direction...

Page 254: ...and click the CONFIGURATION button In the Device Configuration window click CONFIGURATION CLOCK tab Use Host Time Zone Uses local PC time If checked other time zone options will be hidden Time Zone S...

Page 255: ...on for the Clock module click the TALLY tab Clock Module Tally Enabled If enabled the Clock will tally when triggered If disabled the Clock will not the On Air colour option will be hidden and Clock w...

Page 256: ...function buttons programmed within WinPlus IP Colour options RGB White standard User definable Status Display Illuminated multi colour window shows device network status and operational mode Power 3W...

Page 257: ...tatus Display Illuminated multi colour window shows device network status and operational mode Power 3W Max power consumption Powered over Ethernet PoE Requires 3rd party PoE injector or XBox IP not i...

Page 258: ...rechargeable battery with USB C charging port Weight 70g 0 15lb Dimensions 120 x 40 x 20mm 4 75 x 1 6 x 0 8 WB IP Base station for Wireless Scroll Control A9009 0008 Wireless Range 100m 300Ft line of...

Page 259: ...dd Discovered Device Adding The WB IP Power Connect an ethernet cable to the WB IP This must be a powered connection either from a PoE switch or from a PoE injector Once connected and powered in the d...

Page 260: ...he WC IP In the devices window click the icon This will launch the Add Discovered Device window When Add Discovered Device is clicked a list of the available WC IP connected to the network will popula...

Page 261: ...1 is connected to WinPlus IP via Basestation WB IP 88 99 A9 In the WC IP name column it displays the name of the WP IP WC IP Rob1 and then the WB IP it is using to connect to the WinPlus IP applicatio...

Page 262: ...lay when the files have been saved in the location specified Additional logging options are available In the main toolbar click Settings Preferences Logging Common Settings Maximum Log Size Select the...

Page 263: ...Mainzer Stra e 139 55545 Bad Kreuznach Phone 49 671 483 43 38 Email support videndum com USA Videndum Production Solutions Inc West Coast 20600 Plummer Street Chatsworth CA 91311 Phone 1 800 541 1667...

Page 264: ...sales services for a fixed price that will provide everything you need This can include maintenance visits to your site by an engineer dedicated spare parts to keep you moving Operator training and fa...

Page 265: ...Page 264 Notes...

Reviews: