❷
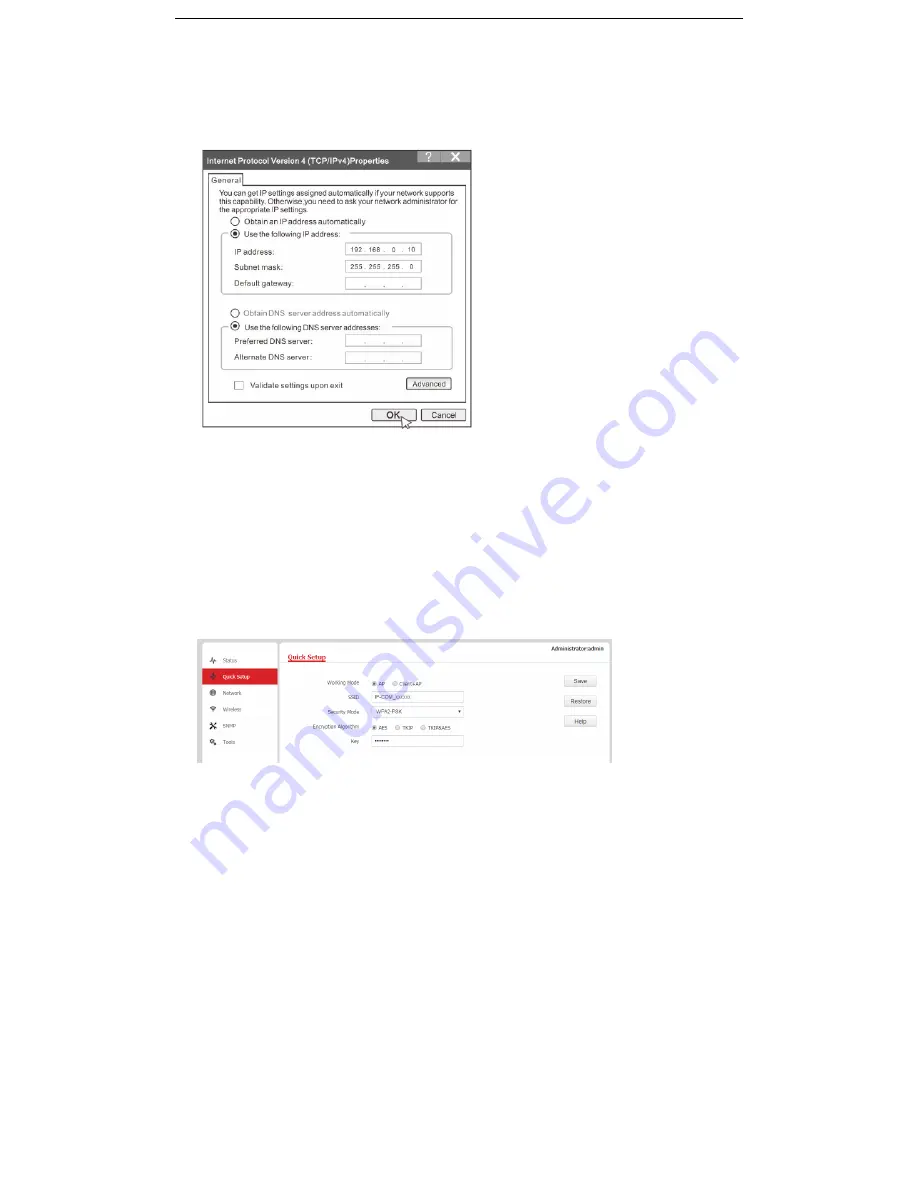
Configure the IP address of your computer (Example: Win7)
Right-click the network icon on the lower-right corner of your computer. C
lick
Open Network and Sharing Center
,
Local
Area Connection
, and then
Properties
. Double-click
Internet Protocol Version 4 (TCP/IPv4)
, select
Use the following IP
address
, set
IP address
to
192.168.0.
x
(
x
: 2 to 253. The IP address in this example is 192.168.0.10) and
Subnet mask
to
255.255.255.0
, and click
OK
.
❸
Log in to the web UI of the AP
Start a web browser on your computer, and enter the AP’s management IP address (
192.168.0.254
) in the address bar,
and press
Enter
. Then enter the user name and password (default:
admin/admin
) of the AP, and click
Login
.
Tip
: If you cannot log in to the web UI of the AP, refer to
Q1
in
FAQ
.
❹
Set WiFi name and WiFi password for the AP
Click
Quick Setup
, then configure
SSID
(WiFi name),
Security Mode
(WPA2-PSK is recommended),
Key
, and click
Save
.


