


TIGER XTL Instrument User Manual V1.0
P
ion
eering Gas Sensing Technology.
Page 24 of 56
ionscience.com
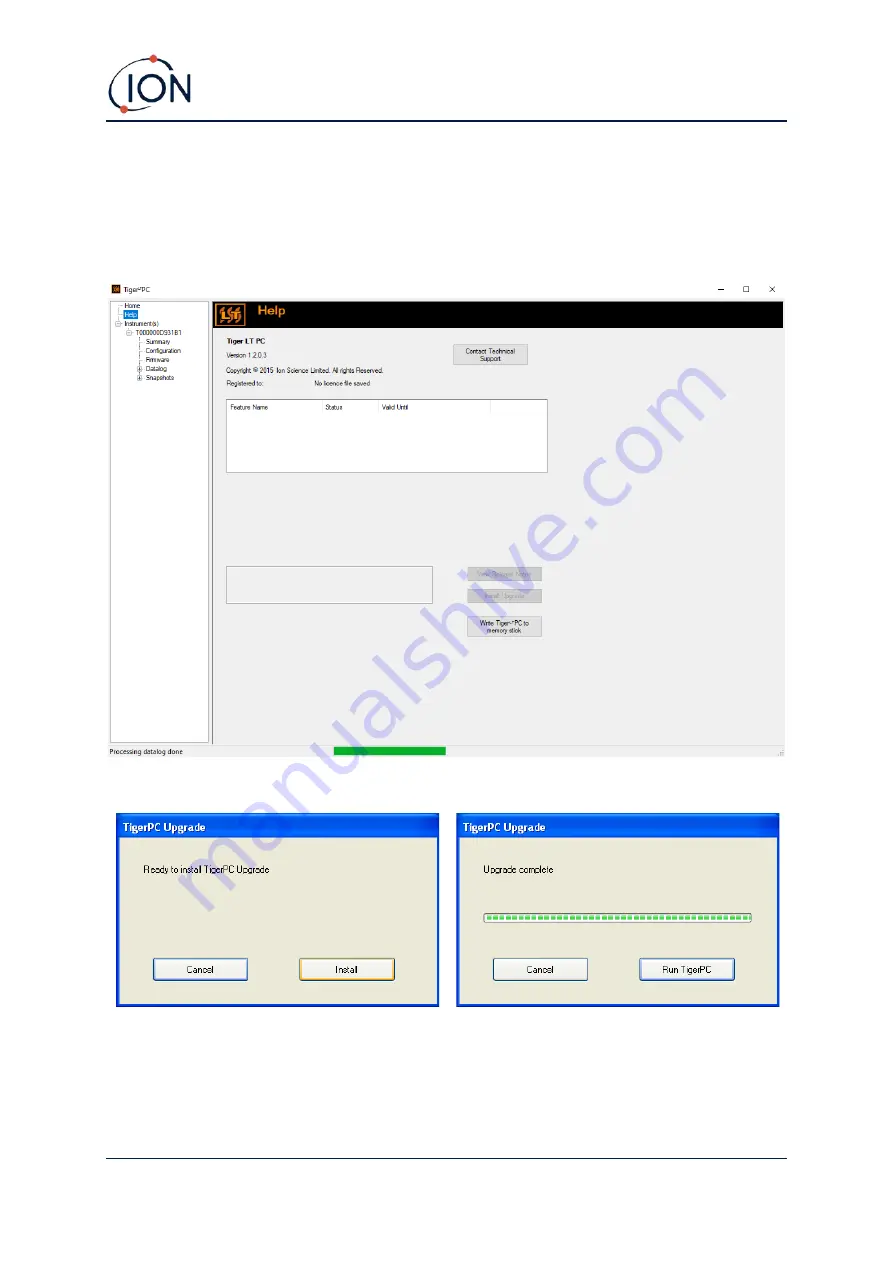
Help Screen
This screen will inform you if a new version of PC software is available. You can then install the
upgrade if required. We recommend that Tiger XTL PC is kept up to date to ensure that the latest
functionality is available to you.
To install an upgrade, press
Install Upgrade
. The following are then displayed:
The Instruments List
The
Instrument(s)
list in the menu lists the Internal Reference Numbers (IRNs) of the TIGER XTL
instruments that Tiger XTL PC has previously interfaced with and listed. Your instrument will be
added to this list once Tiger XTL
PC has “read” it, as described next.


