background image

11.


Assure that the take-up and feed shafts lock collars are flush against the left
shaft support blocks.  These collars lock the shafts in position so they do not
move side to side, which may induce frame alignment problems during plotting
or paper feeding.  The right end of the shafts should be butted against the right
end plate.  For a more detailed description.  (See pages 22 to 25 of your Users
Guide to Operations).

12.


Reposition the outside chart wheels together at an equal distance from the left
and right edges of the paper (at least 2”).   You may have to position the chart
wheels in different locations until you get the desired tracking.  The center
wheels should be pushed against the bronze square shaft support brackets.

13.


Inspect the chart wheels for worn or delaminated rubber and that they spin
freely.

14.


Verify the tension springs are still attached to the back of the chart wheel arms
and have not been stretched out, which would change the pressure of the wheel
and cause paper slippage.

15.


Inspect the grit shaft for excessive grit wear of paper buildup where the wheels
grip the paper.  Clean the grit shaft using a soft bristle nylon brush.

16.


Remove any paper or ink build up on the chart wheels, which could cause the
wheels to slip on the paper.

17.


Ensure that the dancer bars move freely.  A jammed dancer bar ads drag or
friction to one side of the paper loop, and may cause frame alignment problems.

18.


Check all set screws on the grit shaft (5/64” hex), x and y-axis transmission
assemblies (5/64” and 1/8” hex).  A loose set screw can induce frame alignment
problems due to gear or shaft slippage.

Technical Specifications are:

1.


Frame to Frame Alignment: within 1.27mm (0.050”).  This is the distance or
space, if any, between frames.

2.


Intra-frame Repeatability: within 0.51mm (0.020”).  This is the accuracy if you
were to draw on top of the same design.

Summary of Contents for Summit

Page 1: ......

Page 2: ......

Page 3: ......

Page 4: ......

Page 5: ......

Page 6: ......

Page 7: ......

Page 8: ......

Page 9: ......

Page 10: ......

Page 11: ......

Page 12: ......

Page 13: ......

Page 14: ......

Page 15: ......

Page 16: ......

Page 17: ......

Page 18: ......

Page 19: ......

Page 20: ......

Page 21: ......

Page 22: ......

Page 23: ......

Page 24: ......

Page 25: ......

Page 26: ......

Page 27: ......

Page 28: ......

Page 29: ......

Page 30: ......

Page 31: ......

Page 32: ......

Page 33: ......

Page 34: ......

Page 35: ......

Page 36: ......

Page 37: ......

Page 38: ......

Page 39: ......

Page 40: ......

Page 41: ......

Page 42: ......

Page 43: ......

Page 44: ......

Page 45: ......

Page 46: ...NTENTS Blue Logic Board Reset ROM 2 30 Blue Logic Board Reset ROM 3 00 Box Style Frame Sensor Adjustment Dimensional Calibration Frame Gap or Overlap Green Logic Board Reset Maintenance Schedule Operational Recommendations Plotter Port Test ...

Page 47: ...defaults and will dump anything that might be causing the plotter to act differently than expected 1 Turn off power and remove power and data cables from Summit 2 Remove the main board access panel located on the bottom right of the machine 3 On the main logic board locate JP2 jumper positioned at the lower left corner of the board which is marked CLR RUN 4 Move the jumper to the CLR side to clear...

Page 48: ...nstructions provided by Ioline Corporation 9 After installing new ribbon cable into cartridge assy guide the ribbon cable through the end plate opening and securely fasten it to the carriage traverse assembly using scotch tape This is to keep the ribbon cable from retracting into the cartridge assy while mounting the cartridge assy to the left end plate 10 Refasten the cartridge assy to the left e...

Page 49: ...umper are 1 2 3 4 5 6 7 8 9 11 10 12 13 14 15 16 17 18 19 20 21 22 23 24 25 4 Turn on the Summit while you hold down the Sensor Test key on the keypad Continue holding down Sensor Test key until Summit beeps and the light flashes three times This places the plotter in the serial diagnostic mode 5 Press any Arrow key on the plotter keypad This emulates the transmitting and receiving of characters T...

Page 50: ...ields and ground connections MUST be properly connected Connector backshells must have cable strain relief hardware and lock assemblies installed Solder cup contacts are not preferred but if used each solder connection should be covered with heat shrink tubing after soldering 4 Serial cables should be routed away from power cables and other sources of electrical noise The computer and its attached...

Page 51: ... the use of 30 36 66 and 72 inch widths of paper for best performance We are now working on an improved grit shaft that will give top performance with all common widths of paper 7 Environmental conditions can affect the accuracy and repeatability of plotting with the Summit For best performance keep the temperature between 10 and 30 C 50 and 86 F and 20 to 80 relative humidity during plotting Rapi...

Page 52: ...th cotton swab and isopropyl alcohol Monthly 1 Clean traverse rods with a clean rag and isopropyl alcohol 2 Using a cotton swab and isopropyl alcohol clean pen lifter plate rods on the carriage assembly These are the rods on which the pen jaw rides up and down Excessive dirt build up can cause sticking and deterioration of plot quality Illustration operations manual pg 63 3 Clean white ribbon cabl...

Page 53: ...rlapping and intraframe registration problems due to paper shift 3 Check X Y axis transmission pinion gear set screws Access the transmissions by removing the right end cover of Summit A loose setscrew can cause unexplainable Y axis shifting or sometimes no movement at all 4 Check flex coupling set screws to ensure they are fastened properly The flex coupling connects the x axis transmission drive...

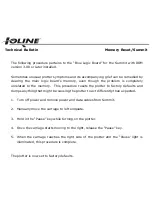
Page 54: ...urn power off and remove power and data cables from Summit 2 Remove the main board access panel located on the bottom right of the machine 3 Locate and remove the ni cad battery located at the lower right position of the logic board 4 Press the tab that held the battery in place until it touches the surface below and then replace the battery 5 Next to the battery is JP4 Run ClrMem jumper Remove th...

Page 55: ...ers memory 5 Clean the sensor lens with a cotton swab and isopropyl alcohol 6 Adjust the sensor height to optimize frame mark recognition see Box Style Frame Sensor Adjustment Technical Bulletin 7 Review your paper loading process Make sure the paper is pulled taut tight and square when attaching it to the take up shaft See pages 34 to 41 of your Users Guide to Operations for proper paper loading ...

Page 56: ...e tension springs are still attached to the back of the chart wheel arms and have not been stretched out which would change the pressure of the wheel and cause paper slippage 15 Inspect the grit shaft for excessive grit wear of paper buildup where the wheels grip the paper Clean the grit shaft using a soft bristle nylon brush 16 Remove any paper or ink build up on the chart wheels which could caus...

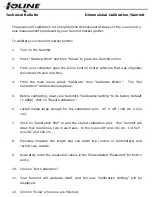
Page 57: ...ould appear 5 Before calibrating reset your Summit s Calibration Setting to its factory default 1 0000 click on Reset Calibration 6 Install media large enough for the calibration plot 41 X 48 104 cm X 122 cm 7 Click on Calibration Plot to plot the stored calibration plot Your Summit will draw four ruled lines two in each axis In the X axis 40 and 101 cm In the Y axis 46 and 116 cm 8 Precisely meas...

Page 58: ...Summit should be in Pause mode to perform this procedure 2 Position over the paper where you normally set the Starting Point position 3 Adjust the sensor height by turning the sensor height adjustment screw 5 32 Allen located at the top rear of the sensor housing The distance between the sensor lens and the paper should be 200 inches ...

Page 59: ... is difficult to reach the low voltage clean the sensor lens It is also possible that the sensor was too low to begin with so start at 22 inches away from the platen 10 After setting the voltage disconnect the voltmeter leads from J1 and move the carriage about 12 inches to the left and then back to the adjusting position This is to ensure sensor height adjustment is maintained after the carriage ...

Page 60: ...y This procedure resets the plotter to factory defaults and dumps anything that might be causing the plotter to act differently than expected 1 Turn off power and remove power and data cables from Summit 2 Manually move the carriage to left endplate 3 Hold in the Pause key while turning on the plotter 4 Once the carriage starts moving to the right release the Pause key 5 When the carriage reaches ...

Page 61: ...t shaft bearing s Ceased servo motor Blown transistor s on logic board Position Q1 Q4 Loose x axis transmission motor pulley Damaged x axis transmission gear assy Loose set screw on flex coupling Loose set screw on grit shaft assy Clear paper jam Replace grit shaft bearing s Manually turn motor shaft if hard to turn replace servo motor Test transistor s w ohm meter touching D drain S source leads ...

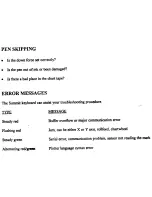
Page 62: ...pect and check pulley set screws Alternating Red Green Plotter Language Syntax Error or Major Communication Error Wrong plotter language Wrong plotter driver Wrong data transfer protocol settings for serial port File sent before plotter was placed online Synchronization problem caused by defective servo motor encoder Defective computer serial port Damaged IC RS 232 interface IC on logic board Chan...

Page 63: ......

Page 64: ......

Page 65: ......

Page 66: ......

Page 67: ......

Page 68: ......

Page 69: ... 50V 1 L 104523 PCB ASSY 80188 LOGIC BOARD 102797 CAP ELEC TANT 10UF 25V 1 LEAD 104523 PCB ASSY 80188 LOGIC BOARD 102798 CAP CERAMIC MONO 47UF 50V 2 104523 PCB ASSY 80188 LOGIC BOARD 102800 CONN HDR 5 PIN 1 X 5 156 SP W 104523 PCB ASSY 80188 LOGIC BOARD 102801 CONN HDR 8 PIN 1 X 8 156 SP 104523 PCB ASSY 80188 LOGIC BOARD 102805 CONN HDR 64 PIN 2 X 32 104523 PCB ASSY 80188 LOGIC BOARD 102806 CONN H...

Page 70: ...80188 LOGIC BOARD 104536 IC MICROPROCESSR ADSP 2105 104523 PCB ASSY 80188 LOGIC BOARD 104537 IC 74HC32 QUAD OR CMOS 104523 PCB ASSY 80188 LOGIC BOARD 104538 RES 47 OHM 5 1 4 W 104523 PCB ASSY 80188 LOGIC BOARD 104539 TRANSISTOR P MOSFET 104523 PCB ASSY 80188 LOGIC BOARD 104540 IC TC4426 DUAL MOSFET DRIVER 104523 PCB ASSY 80188 LOGIC BOARD 104541 CRYSTAL 10 000 MHZ HC49 104523 PCB ASSY 80188 LOGIC ...

Page 71: ......

Page 72: ......

Page 73: ...Y 80188 MOTHER BOARD 101360 CONN HDR 3 PIN 1 X 3 1 SP GO 103982 PCB ASSY 80188 MOTHER BOARD 101376 TAPE FOAM DOUBLE COAT 5 IN 103982 PCB ASSY 80188 MOTHER BOARD 102064 RES ARRAY 1K OHM SIP PU 10 PIN 103982 PCB ASSY 80188 MOTHER BOARD 102441 CAP TANT 10UF 15V 1SP 103982 PCB ASSY 80188 MOTHER BOARD 102445 IC NVRAM CTLR DS1210 CMOS BAT 103982 PCB ASSY 80188 MOTHER BOARD 102450 CAP CERAMIC MONO 22PF 5...

Page 74: ... PIN DIP 1 X 6 MAC 103982 PCB ASSY 80188 MOTHER BOARD 103418 DIODE ZENER 1N5230B 4 7V 103982 PCB ASSY 80188 MOTHER BOARD 103724 RES 4 7 OHM 5 1W 103982 PCB ASSY 80188 MOTHER BOARD 103725 RES 680 OHM 5 1 4W 103982 PCB ASSY 80188 MOTHER BOARD 103928 RES 33 OHM 5 1 2W 103982 PCB ASSY 80188 MOTHER BOARD 103938 ZIPLOCK BAG STATIC 12 X 16 103982 PCB ASSY 80188 MOTHER BOARD 103941 IC 74ALS573 103982 PCB ...

Page 75: ......

Page 76: ... SUMMIT 104413 PLATEN 76 100 LG 104297 CHSY ASSY SUMMIT 104390 CARTRIDGE ASSY SUMMIT 104297 CHSY ASSY SUMMIT 102034 ARM CHART HOLD LIFTER 104297 CHSY ASSY SUMMIT 104440 SPRING EXTENSION 104297 CHSY ASSY SUMMIT 104393 CHART MOTOR SWITCH ASSY 104297 CHSY ASSY SUMMIT 103826 TENSIONER ASSY 104297 CHSY ASSY SUMMIT 103207 PLATE END LEFT 5000 PLAT WHT 104297 CHSY ASSY SUMMIT 103206 PLATE END RIGHT 5000 P...

Page 77: ...W 8 32 1 25 LG SHC FULL THD 104297 CHSY ASSY SUMMIT 100024 SCREW 6 32 187 LG SH SET CUP PO 104297 CHSY ASSY SUMMIT 104007 SCREW 8 32 312 LG PHP SEMS 104297 CHSY ASSY SUMMIT 103908 SCREW 8 32 50 LG PHP SEMS 104297 CHSY ASSY SUMMIT 104013 NUT 8 32 KEP 104297 CHSY ASSY SUMMIT 103772 SCREW 10 32 625 LG SHC NYLOC 104297 CHSY ASSY SUMMIT 100099 WSHR 10 875OD 06TH FLAT 104297 CHSY ASSY SUMMIT 100111 SPAC...

Page 78: ......

Page 79: ......

Page 80: ......

Page 81: ......

Page 82: ......

Page 83: ......

Page 84: ......

Page 85: ......

Page 86: ......

Page 87: ......

Page 88: ......

Page 89: ......

Page 90: ......

Page 91: ......

Page 92: ......

Page 93: ......

Page 94: ......

Page 95: ......

Page 96: ......

Page 97: ......

Page 98: ...RNT_DESC 101051 02 LABOR FRAME UP 104300 DANCER BAR ASSY SUMMIT 101051 01 LABOR SUBASSY 104300 DANCER BAR ASSY SUMMIT 104437 TUBE DANCER BAR 104300 DANCER BAR ASSY SUMMIT 104402 END CAP ASSY DANCER BAR 104300 DANCER BAR ASSY SUMMIT ...

Page 99: ......

Page 100: ...G DANCER BAR CAP 104402 END CAP ASSY DANCER BAR 102025 BEARING CAP DANCER BAR PLUNGER 104402 END CAP ASSY DANCER BAR 102493 O RING 609 ID X 139 104402 END CAP ASSY DANCER BAR 104417 PLUNGER DANCER BAR 104402 END CAP ASSY DANCER BAR 100046 SCREW 8 32 1 25 LG SHC FULL THD 104402 END CAP ASSY DANCER BAR 105064 SCREW 8 32 1 25 LG PHP PLATED S 104402 END CAP ASSY DANCER BAR 100333 RING RETAINING 1 2IN ...

Page 101: ......

Page 102: ...COMPONENT COMP_DESC PARENT PARNT_DESC 101051 01 LABOR SUBASSY 104404 SHAFT FEED ASSY 104422 SHAFT FEED 104404 SHAFT FEED ASSY 104356 END CAP 1 50 IN 104404 SHAFT FEED ASSY ...

Page 103: ......

Page 104: ... CHART WHEEL ASSY LEFT ONE SPRING 101861 PIN IDLER ARM 101527 CHART WHEEL ASSY LEFT ONE SPRING 101862 SPRING SLIDE CHART WHEEL 101527 CHART WHEEL ASSY LEFT ONE SPRING 101863 SPRING TENSION CHART WHEEL 4 101527 CHART WHEEL ASSY LEFT ONE SPRING 101866 ARM IDLER ALUM EXTRUSION ANODIZE 101527 CHART WHEEL ASSY LEFT ONE SPRING 101867 ARM IDLER LIFTER ALUM EXTRUSION 101527 CHART WHEEL ASSY LEFT ONE SPRIN...

Page 105: ......

Page 106: ...HART WHEEL ASSY RIGHT ONE SPRING 101861 PIN IDLER ARM 101528 CHART WHEEL ASSY RIGHT ONE SPRING 101862 SPRING SLIDE CHART WHEEL 101528 CHART WHEEL ASSY RIGHT ONE SPRING 101863 SPRING TENSION CHART WHEEL 4 101528 CHART WHEEL ASSY RIGHT ONE SPRING 101866 ARM IDLER ALUM EXTRUSION ANODIZE 101528 CHART WHEEL ASSY RIGHT ONE SPRING 101867 ARM IDLER LIFTER ALUM EXTRUSION 101528 CHART WHEEL ASSY RIGHT ONE S...

Page 107: ......

Page 108: ...2389 PEN HOLDER ASSY 102350 JAW MOVING SINGLE 102389 PEN HOLDER ASSY 102351 JAW FIXED SINGLE PEN 102389 PEN HOLDER ASSY 103388 SPRING COMPRESSION 240 OD 032 102389 PEN HOLDER ASSY 103102 POST ALIGNMENT 102389 PEN HOLDER ASSY 102620 WAVE WASHER 102389 PEN HOLDER ASSY ...

Page 109: ......

Page 110: ......

Page 111: ...SSY TAKEUP OUTPUT 104345 WIRE 18 GA ST WHT 104388 CABLE ASSY TAKEUP OUTPUT 104323 CABLE 24 GA 4 COND SHLD DRN 104388 CABLE ASSY TAKEUP OUTPUT 100284 CONN CRIMP INSERT 18 24 GA 156 104388 CABLE ASSY TAKEUP OUTPUT 103022 CONN HSG 2 PIN 1 X 2 FEMALE 104388 CABLE ASSY TAKEUP OUTPUT 102942 CONN HSG 1 X 5 FEMALE 104388 CABLE ASSY TAKEUP OUTPUT 102898 CONN RECEPTACLE COVER 1 X 5 1 104388 CABLE ASSY TAKEU...

Page 112: ......

Page 113: ...102393 CARRIAGE ASSY 103507 CLAMP PEN LIFT MOTOR 102393 CARRIAGE ASSY 103221 BEARING RADIAL FLANGE 125ID 3 102393 CARRIAGE ASSY 102614 OPTO ASSY 102393 CARRIAGE ASSY 102632 SPRING PEN LIFT 102393 CARRIAGE ASSY 102402 BEARING 125ID X 250OD 102393 CARRIAGE ASSY 102979 SPACER 4 188OD 125ID SS RAF 102393 CARRIAGE ASSY 100705 PAD PEN CAP 1 4 DIA 102393 CARRIAGE ASSY 103260 SCREW 4 40 75 LG PHP 102393 C...

Page 114: ......

Page 115: ...499 PCB ASSY PEN CARRIAGE 102816 RES 270K OHM 5 1 4W 104499 PCB ASSY PEN CARRIAGE 102825 TEST POINT TURRET SWAGE 094 HOLE 104499 PCB ASSY PEN CARRIAGE 102831 IC OP W COMP LM392 104499 PCB ASSY PEN CARRIAGE 102873 CONN 8 SOCKET MINI DIN VERTICAL 104499 PCB ASSY PEN CARRIAGE 103767 POT TRIMMER 100K 1 TURN 104499 PCB ASSY PEN CARRIAGE 103776 RES 1MEG 1 1 4W 104499 PCB ASSY PEN CARRIAGE 103814 RES 23 ...

Page 116: ......

Page 117: ...E 104390 CARTRIDGE ASSY SUMMIT 104371 BODY CARTRIDGE 104390 CARTRIDGE ASSY SUMMIT 104406 FLEX CABLE 104390 CARTRIDGE ASSY SUMMIT 101376 TAPE FOAM DOUBLE COAT 5 IN 104390 CARTRIDGE ASSY SUMMIT 105562 PROTECTOR PIN CARTRIDGE 104390 CARTRIDGE ASSY SUMMIT 104013 NUT 8 32 KEP 104390 CARTRIDGE ASSY SUMMIT 104007 SCREW 8 32 312 LG PHP SEMS 104390 CARTRIDGE ASSY SUMMIT 104337 SCREW 4 40 375 PHP SEMS 10439...

Page 118: ......

Page 119: ...T SHAFT ASSY 101051 04 LABOR GRITSHAFT 104408 GRIT SHAFT ASSY 100550 SHAFT X AXIS DRIVE FINISHED 104408 GRIT SHAFT ASSY 100316 BEARING BALL 25ID 625OD 196 104408 GRIT SHAFT ASSY 100551 PIN 249 DIA 1 20 LG 104408 GRIT SHAFT ASSY 100552 SUPPORT BLOCK X AXIS 104408 GRIT SHAFT ASSY ...

Page 120: ......

Page 121: ... ASSY 103823 TENSIONER Y AXIS 25 DIA SHAFT 103826 TENSIONER ASSY 103824 SHAFT IDLER PULLEY 25 DIA 103826 TENSIONER ASSY 100316 BEARING BALL 25ID 625OD 196 103826 TENSIONER ASSY 103825 SPACER SHAFT 103826 TENSIONER ASSY 100046 SCREW 8 32 1 25 LG SHC FULL THD 103826 TENSIONER ASSY 102222 RING RETAINING E CLIP 1 4 103826 TENSIONER ASSY ...

Page 122: ......

Page 123: ..._DESC PARENT PARNT_DESC 104324 CABLE FLAT 28 GA 34 COND 104383 CABLE ASSY 34 PIN RIBBON 102896 CONN RIBBON CABLE 34 PIN FEMALE 104383 CABLE ASSY 34 PIN RIBBON 100277 TYRAP 1 IN X 3 IN 104383 CABLE ASSY 34 PIN RIBBON ...

Page 124: ......

Page 125: ...INAL 110 18 22GA INSU 102892 CABLE ASSY SERVO MOTOR 100284 CONN CRIMP INSERT 18 24 GA 156 102892 CABLE ASSY SERVO MOTOR 102886 CONN KEY INSERT 156 SP 102892 CABLE ASSY SERVO MOTOR 102890 WIRE 18 GA ST BLK X 29 IN UL 1007 102892 CABLE ASSY SERVO MOTOR 102891 WIRE 18 GA ST WHT X 29 IN UL 1007 102892 CABLE ASSY SERVO MOTOR ...

Page 126: ......

Page 127: ...E 18 GA ST GRN X 25 IN UL 1007 103632 CABLE ASSY 5000 DC POWER 100198 WIRE 18 GA ST BLU X 25 IN UL 1007 103632 CABLE ASSY 5000 DC POWER 100203 WIRE 18 GA ST WHT X 25 IN UL 1007 103632 CABLE ASSY 5000 DC POWER 100256 CONN HSG 8 PIN 1 X 8 FEMALE 103632 CABLE ASSY 5000 DC POWER 100284 CONN CRIMP INSERT 18 24 GA 156 103632 CABLE ASSY 5000 DC POWER 100268 KEY POLARIZING 156 SP CONN 103632 CABLE ASSY 50...

Page 128: ......

Page 129: ...SSION 104407 FRAME SENSOR ASSY 104359 SHAFT 187 DIA 2 25 LG 104407 FRAME SENSOR ASSY 104369 BLOCK SENSOR MOUNTING 104407 FRAME SENSOR ASSY 104398 COVER SENSOR 104407 FRAME SENSOR ASSY 104337 SCREW 4 40 375 PHP SEMS 104407 FRAME SENSOR ASSY 104421 SCREW MODIFIED 104407 FRAME SENSOR ASSY 104132 SCREW 4 40 156 LG SET NYLON TI 104407 FRAME SENSOR ASSY 100063 SCREW 4 40 375 LG PHP BLK OXI 104407 FRAME ...

Page 130: ......

Page 131: ......

Page 132: ...ECTIFIER 102885 CONN HSG 1 X 5 156 SP FEMALE 102889 CABLE ASSY RECTIFIER 100244 CONN TERMINAL 250 14 16GA INSU 102889 CABLE ASSY RECTIFIER 100284 CONN CRIMP INSERT 18 24 GA 156 102889 CABLE ASSY RECTIFIER 102886 CONN KEY INSERT 156 SP 102889 CABLE ASSY RECTIFIER 104339 WIRE 18 GA ST BLK 102889 CABLE ASSY RECTIFIER 104344 WIRE 18 GA ST RED 102889 CABLE ASSY RECTIFIER ...

Page 133: ...8 CONN MINI DIN 9 PIN STRAIGHT 105052 FRAME SENSOR ASSY 100343 RES 2 2K OHM 5 1 4W 105052 FRAME SENSOR ASSY 104975 SCREW 6 32 375 LG BTN HD 105052 FRAME SENSOR ASSY 102736 SCREW 2 56 25 LG FHP 105052 FRAME SENSOR ASSY 104559 SCREW 2 56 3125 LG FHP 105052 FRAME SENSOR ASSY 104010 SCREW M3 4 MM LG 105052 FRAME SENSOR ASSY 103726 TYRAP 1 IN X 3 IN BLACK 105052 FRAME SENSOR ASSY 103908 SCREW 8 32 50 L...

Page 134: ......

Page 135: ...ECTIFIER 102885 CONN HSG 1 X 5 156 SP FEMALE 102889 CABLE ASSY RECTIFIER 100244 CONN TERMINAL 250 14 16GA INSU 102889 CABLE ASSY RECTIFIER 100284 CONN CRIMP INSERT 18 24 GA 156 102889 CABLE ASSY RECTIFIER 102886 CONN KEY INSERT 156 SP 102889 CABLE ASSY RECTIFIER 104339 WIRE 18 GA ST BLK 102889 CABLE ASSY RECTIFIER 104344 WIRE 18 GA ST RED 102889 CABLE ASSY RECTIFIER ...

Page 136: ......

Page 137: ......

Page 138: ......

Page 139: ......

Reviews:

Related manuals for Summit