Invion GPS-4V606-IUS Instruction Manual Download Page 6

5

About the Touch Screen

    Do not touch the 

TOUCH SCREEN

 until the unit starts up completely. Otherwise, 

the touch screen may not function correctly. 

    The navigation device is mainly operated by touching the buttons on the touch 

screen. 

    If nothing happens when you touch the buttons on the touch screen, remove 

your hand from the screen and touch the button again. 

    Do not touch any buttons that are grayed out. 

    When cleaning the touch screen please use a soft cloth. Do not use water, soap, 

or abrasive cleansers. 
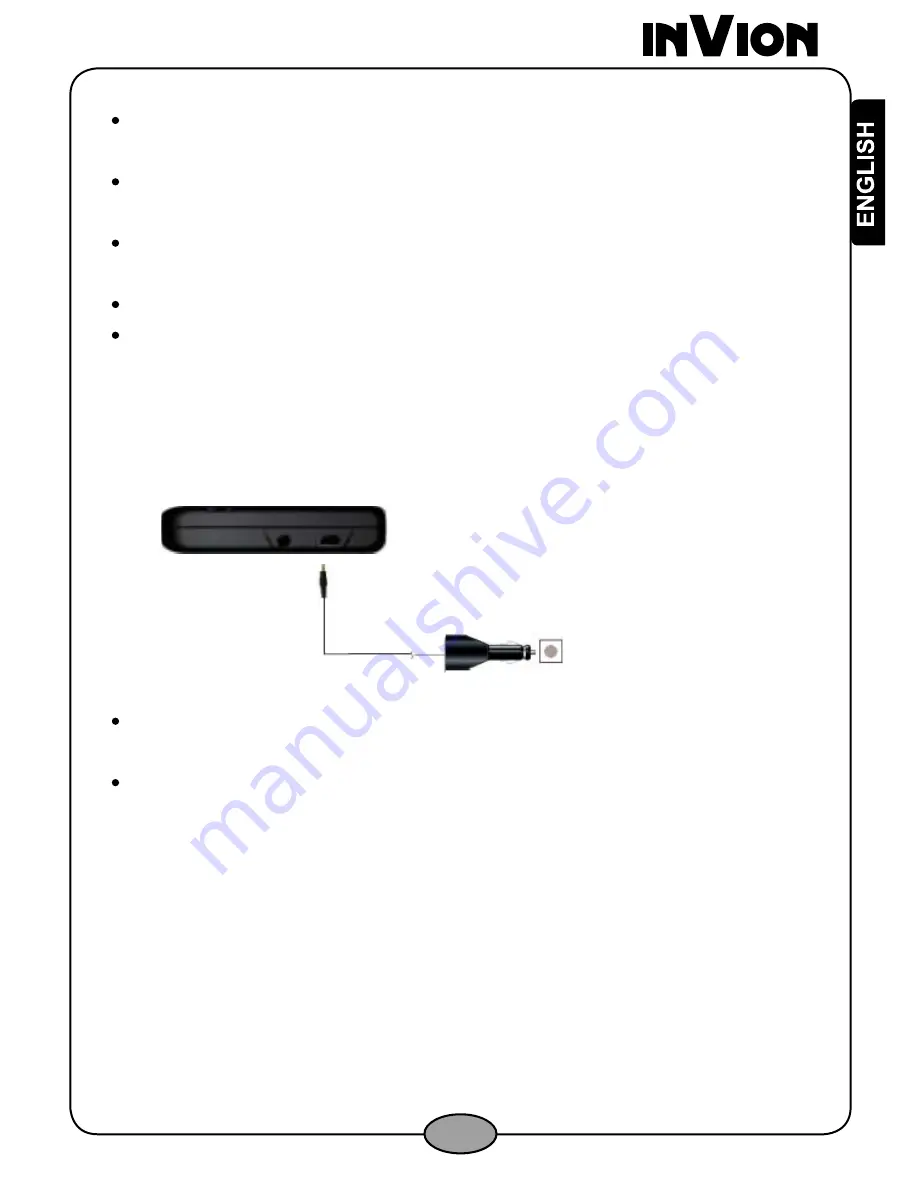
Connection 

Connect to Car Power 


 Connect the plug of the car power adapter to the USB port on the side of the GPS 

Unit. 

  Connect  the  car  cigarette  lighter  plug  of  the  car  power  adapter  into  the  car 

cigarette lighter socket. 

Summary of Contents for GPS-4V606-IUS

Page 1: ...INSTRUCTION MANUAL EN GPS NAVIGATION SYSTEM GPS 4V606 IUS...

Page 2: ...refully read the operating instructions and adhere to the safety precautions All activities at and with this product may only be carried out as described in these operating instructions Please be sure...

Page 3: ...Recent Locations Favorites 3 Maps Map Screen Current Location Indicator Map Point Map Views Map Buttons and Icons Map Settings Browse Map Mode Select Map Screen 4 Routes Manage Route Button Route Menu...

Page 4: ...Measure Language Time Settings QuickNav Look Feel Select Map Start Demo GPS Signal Help About Main Menu Specifications Legal 1 Notices Disclaimers and Terms of Use 2 Copyright notice 3 Safety advice...

Page 5: ...ems if you are missing any parts please contact your INVION dealer immediately GPS unit Car power adapter Suction mount USB cable Instruction manual Mounting bracket Quick Start Guide 1 Power on off 2...

Page 6: ...uch the buttons on the touch screen remove your hand from the screen and touch the button again Do not touch any buttons that are grayed out When cleaning the touch screen please use a soft cloth Do n...

Page 7: ...e Settings menu see Section 5 2 Settings Menus on page 35 1 1 1 Language Settings Set text and voice language preferences Figure 1 Language Screen 1 1 2 Map License Agreement Please review the license...

Page 8: ...gure 3 Time Zone Settings 1 1 4 Units of Measure Specify system measurement units Figure 4 Units of Measure 1 1 5 Driver Warning Review the driver warning information and tap the OK button to continue...

Page 9: ...ain Menu 1 2 1 Go Menu Button When you tap the Go button the Go menu is displayed providing basic GPS navigation features such as traveling to an address points of interest or to a favorite location F...

Page 10: ...enu is displayed providing features to better configure the Softwareapplication Figure 9 Settings Menu 2 Create a Route This chapter discusses all the GPS features that let you create a route 2 1 Go M...

Page 11: ...en 2 2 2 1 Cities First When you tap the City First button the GPS displays the following address entry order Address City Address Street and Address Number 2 2 2 2 Intersections When you tap the Inte...

Page 12: ...through the list Figure 14 Address City Screen You can tap the See List button to enlarge the list display so that it covers the keyboard Tap the Show Keyboard button to reduce the list display When y...

Page 13: ...ove to the next address screen 2 2 3 3 Address Number The Enter Address Number screen displays a list of address numbers to choose from Street Midpoint is displayed first You can use the keyboard to s...

Page 14: ...hich are used in many European languages 5 Lets you extend the address list by hiding the keyboard When the list is expanded tap the Show Keyboard button to display the keyboard 6 Tap the OK button to...

Page 15: ...ation 2 3 POI 2 3 1 Points of Interest Button From the Go menu tap the Points of Interest button to display the Find POI screen Figure 20 Points of Interest Button 2 3 2 Search Around Options The Find...

Page 16: ...and tap the Search button You can search with characters that are in the middle or end of the word 2 3 4 Search by Category From the Find POI screen tap the Search by Category button to display the PO...

Page 17: ...us screen 2 3 5 1 Sort by ABC Distance Tap the Sort by ABC button to sort the POI results alphabetically Figure 25 POI Results Sorted Alphabetically When the POI results are sorted alphabetically tap...

Page 18: ...ddress Tap Go to start route or Cancel to return to the Go menu Tap the Back button to return to the previous screen 2 3 7 Actions See Section 2 2 6 on page 14 2 3 8 POI Display You can designate POI...

Page 19: ...cations You can select a previous location to travel to 2 4 1 Recent Locations Menu Button From the Go menu tap the Recent Locations button to display the Recent Locations screen Figure 29 Recent Loca...

Page 20: ...Tap the Back button to return to the previous screen 2 4 5 Actions See Section 2 2 6 on page 14 2 5 Favorites The Favorites screen displays saved locations 2 5 1 Save Favorite Point From the Travel T...

Page 21: ...d location as well as the Go and Cancel button Tap Cancel to return to the Go menu Tap Go for the GPS to start the route Tap the Back button to return to the previous screen 2 5 5 Favorite Groups From...

Page 22: ...cation on the map The indicator s appearance changes among the different map view modes and whether GPS reception is on or off as described in the section below Current location in Vehicle Mode or Ped...

Page 23: ...s You can change the map view for day or night driving 3 4 1 1 Day and Night View Button The Day and Night views let you select between two colors schemes for the map view area light and dark From the...

Page 24: ...the Compass button changes to 2D Tap the Compass button a second time and it changes to 2D North Up tap it a third time and it returns to 3D 3 4 2 2 2D and 3D View on Map When you open INVION the Comp...

Page 25: ...2D map view with North at the top Use the Volume bar to adjust or mute the volume Next turn information Tap for turn by turn directions Tap the toggle button for different GPS information Travel Dist...

Page 26: ...ap Settings button for the Map Settings screen to appear Figure 41 Map Settings Button 3 6 2 Map Settings Screen The Map Settings screen displays a list of buttons bars and icons that can be displayed...

Page 27: ...icating whether your device is plugged in or running on battery Use Auto Zoom When selected the zoom is speed dependent The map zooms out at higher speeds displaying a larger map area and zooms in at...

Page 28: ...GPS Figure 44 Free Map Browsing Mode 3 8 Select Map Screen 3 8 1 Select Map Menu Button From the Settings 2 of 3 menu tap the Select Map button to display the Select Map screen Figure 45 Select Map Bu...

Page 29: ...ile running the software it will not appear unless you tap Refresh Delete To remove a map select it and tap Delete A warning message appears prompting you to verify that you want to remove the selecte...

Page 30: ...m the Settings 1 of 3 menu tap the Manage Route button to display the Route menu Figure 47 Manage Route Button 4 2 Route Menu The Route menu provides additional features that supplements the GPS s nav...

Page 31: ...creen Figure 50 Driving Directions Button 4 3 3 Driving Directions Screen The Driving Directions screen displays a list of directions starting from your current location to the selected destination in...

Page 32: ...ections screen you can tap the Turn button to display a map of the selected turn Tap the Prior button to view the previous turn or the Next button to view the following turn Figure 53 Next Turn Map 4...

Page 33: ...o display the Route Overview screen Figure 56 Route Overview Button 4 5 2 Route Overview Screen See Section 4 3 3 1 Route on page 30 4 6 Road Types 4 6 1 Road Types Menu Button From the Route menu tap...

Page 34: ...te the shortest route which may not be the quickest Pedestrian Instructs the GPS to generate a route suitable for a pedestrian The following rules apply to Pedestrian routes Generates a route up to te...

Page 35: ...d once the route is completed or cancelled the detour will no longer be in effect Figure 60 Detour Screen You can choose the length of the requested detour which may be one of the following options 20...

Page 36: ...on page 22 5 4 Browse Map From the Settings 1 of 3 menu tap the Free Map Browsing button to disable GPS and browse through the map For more information see Section 3 7 Browse Map Mode on page 26 5 5 P...

Page 37: ...raveling to Arriving Lets you know that you have arrived at your destination Maneuvers The GPSannounces the next turn Say Road Names The GPSannounces the road name that you are turning onto Note This...

Page 38: ...Screen Figure 66 Units of Measure Screen This screen lets you select from the following list of units of measure options Miles Yards UK Miles 10th of a Mile US Kilometers Meters Tap OK to save the sel...

Page 39: ...pending on the the software build Tap OK to save your language settings Tap the Back button to return to the Settings menu without saving your settings 5 10 Time Settings You can select the time zone...

Page 40: ...route to a predefined location or point of interest in a single button tap For example you can set the button to his home or hotel or to the nearest gas station 5 11 1 QuickNav Menu Button From the Se...

Page 41: ...n from the Points of Interest module to let you specify a POI category Tap OK to save QuickNav settings Tap the Back button to return to the Settings menu 5 11 3 QuickNav Button on Main Map When you t...

Page 42: ...maps that are installed on your device For more information see Section 3 8 Select Map Screen on page 27 5 14 Start Demo From the Settings 3 of 3 menu tap the Start Demo button to display the Map scre...

Page 43: ...igure 77 GPS Signal Screen This screen displays the following information Longitude Latitude Speed Altitude Number of Satellites 5 16 Help 5 16 1 1 Help Menu Button From the Settings 3 of 3 menu tap t...

Page 44: ...5 17 1 1 About Button From the Settings 3 of 3 menu tap the About button to display the About screen Figure 80 About Button 5 17 1 2 About Screen This screen displays the INVION version and copyright...

Page 45: ...rn on the unit The main menu screen will be displayed as below Tap Navigation to start program System Tap the System icon on the main menu now you are in the main system menu You can setup Volume Back...

Page 46: ...harged and battery is not full the Battery Level is processing To check the system information tap Sys Info Tap USB the interface is displayed as below Tap Calibration the interface is displayed as be...

Page 47: ...SiRF Atlas III Built in Antenna Built in Li polymer Battery Built in 2GB MLC flash memory Dimension 123L X 83W X 20H mm Weight 222g Hard Key and Connection Ports Power on off Headphone jack USB port R...

Page 48: ...Inc be liable to Client and Client hereby waives any indirect special incidental or consequential damages in connection with the transactions contemplated by this agreement whether or not such damage...

Page 49: ...omplete text of this copyright notice and provided further that any unauthorized commercial distribution of this manual or any revision hereto is strictly prohibited Information in this document is su...

Page 50: ...on Always operate the vehicle in a safe manner Do not become focused on the unit while driving and always be fully aware of all driving conditions Minimize the amount of time spent viewing the screen...

Page 51: ...e The government s system is subject to changes which could affect the accuracy and performance of the unit Although the unit is a precision navigation device any navigation device can be misused or m...

Page 52: ...However there is no guarantee that interference will not occur in a particular installation If this equipment does cause harmful interference to radio or television reception which can be determined b...

Page 53: ...Service team The costs and the risk of loss for unsolicited mailings will be borne by the sender We reserve the right to refuse the acceptance of unsolicited mailings or to return the corresponding me...

Page 54: ...o abuse misuse accident or unauthorized alterations or repairs In no event will SP by Design Inc be liable for any incidental special indirect or consequential damages resulting from the use misuse or...

Page 55: ...SP by Design Inc 26439 Rancho Pkwy Unit 115 Lake Forest Ca 92630 Tel 949 273 8288 Fax 949 273 8289 Toll Free 800 984 3270 WWW INVIONUSA COM Made in China...

Reviews: