Application Note 1809
4
Intersil Corporation reserves the right to make changes in circuit design, software and/or specifications at any time without notice. Accordingly, the reader is
cautioned to verify that the Application Note or Technical Brief is current before proceeding.
For information regarding Intersil Corporation and its products, see www.intersil.com
AN1809.0
December 5, 2012
Running the Software
Once the installation is complete, the software can be launched
by double clicking on the shortcut located on the desktop, by
default called “iEvalADC”. There is no need to attach the
evaluation kit hardware to launch the software. The first time the
program is launched, you may experience a delay as the Java
runtime environment unpacks the required libraries. Subsequent
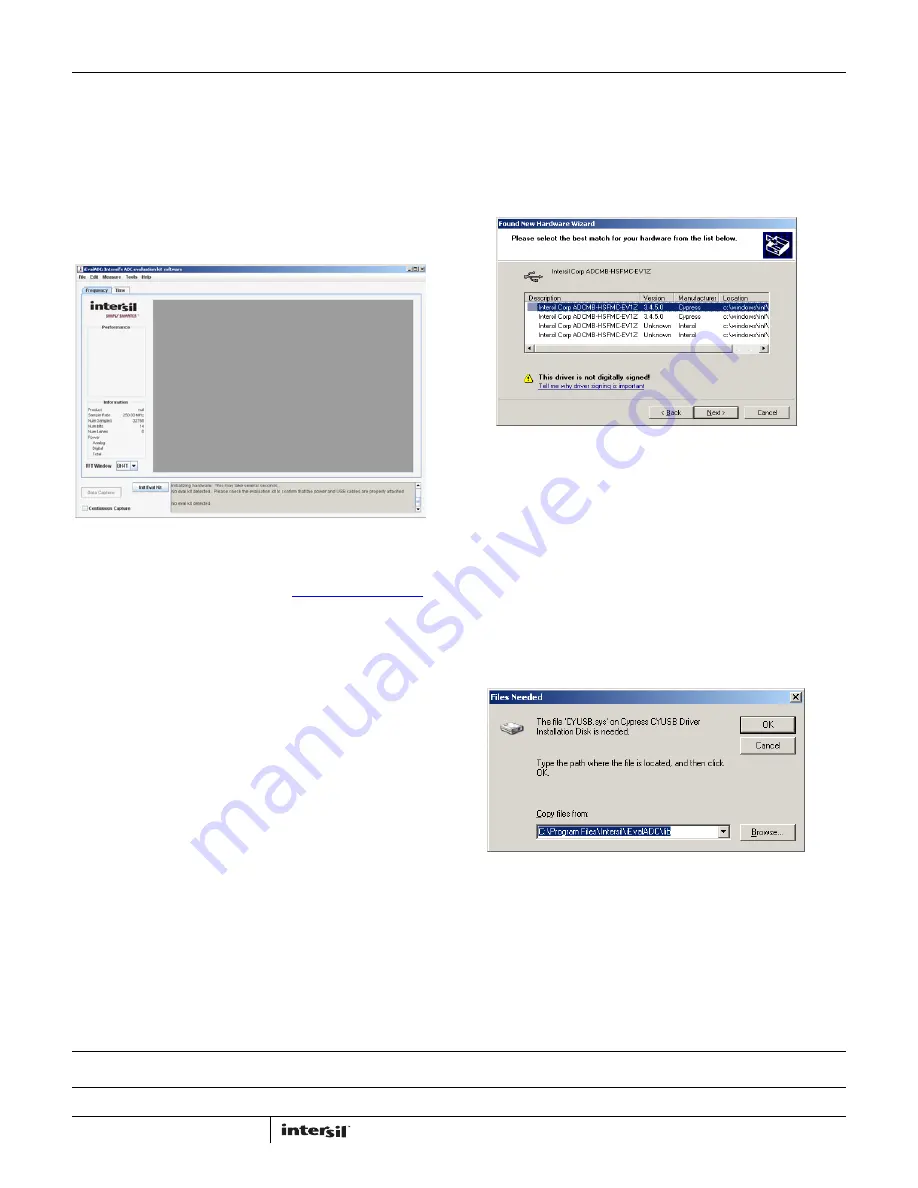
runs will be much shorter. A window similar to the following will
be displayed once iEvalADC has launched.
Thank you for installing the iEvalADC software. For a complete
user guide for iEvalADC, please refer to
Application Note 1809
.
Appendix A
Source Requirements
Source jitter and noise will degrade performance. For best test
results, a combined jitter (for both clock and signal sources) that
does not exceed 200fs is recommended.
Sample Clock and Input Signal Source Setup
Sample clock settings:
• 40MHz to 500MHz sine, +10dBm
Signal settings:
• 4.5MHz to 250MHz, +10dBm to +16dBm (depending on
analog input attenuation)
Appendix B
Sometimes there are multiple drivers that match the VID/PID
characteristics of the hardware. In those cases, a window similar
to the following will be displayed when trying to automatically
install the driver. When this occurs, select the driver with the
location of “c:\windows\inf\Icyusb.inf” and click “Next”.
Occasionally, windows will prompt for the ‘ICYUSB.sys’ file after
selecting the icyusb.inf file. If so, the prompt will look something
like the window displayed in Figure 13. If this prompt is
displayed, fill in the install directory of iEvalADC along with the
subdirectory, lib. Alternatively, browse to this directory. If you
accepted the defaults during installation, the correct path will be
C:\Program Files\Intersil\iEvalADC\lib. After entering the
appropriate directory, click “OK”, then, click “Search for the best
driver in these locations”. Also, make sure the check box “Include
this location in the search” is selected and the directory
highlighted is the install directory of iEvalADC with the “lib”
subdirectory, and click “Next” or ”OK”.
FIGURE 11.
FIGURE 12.
FIGURE 13.


