2
4
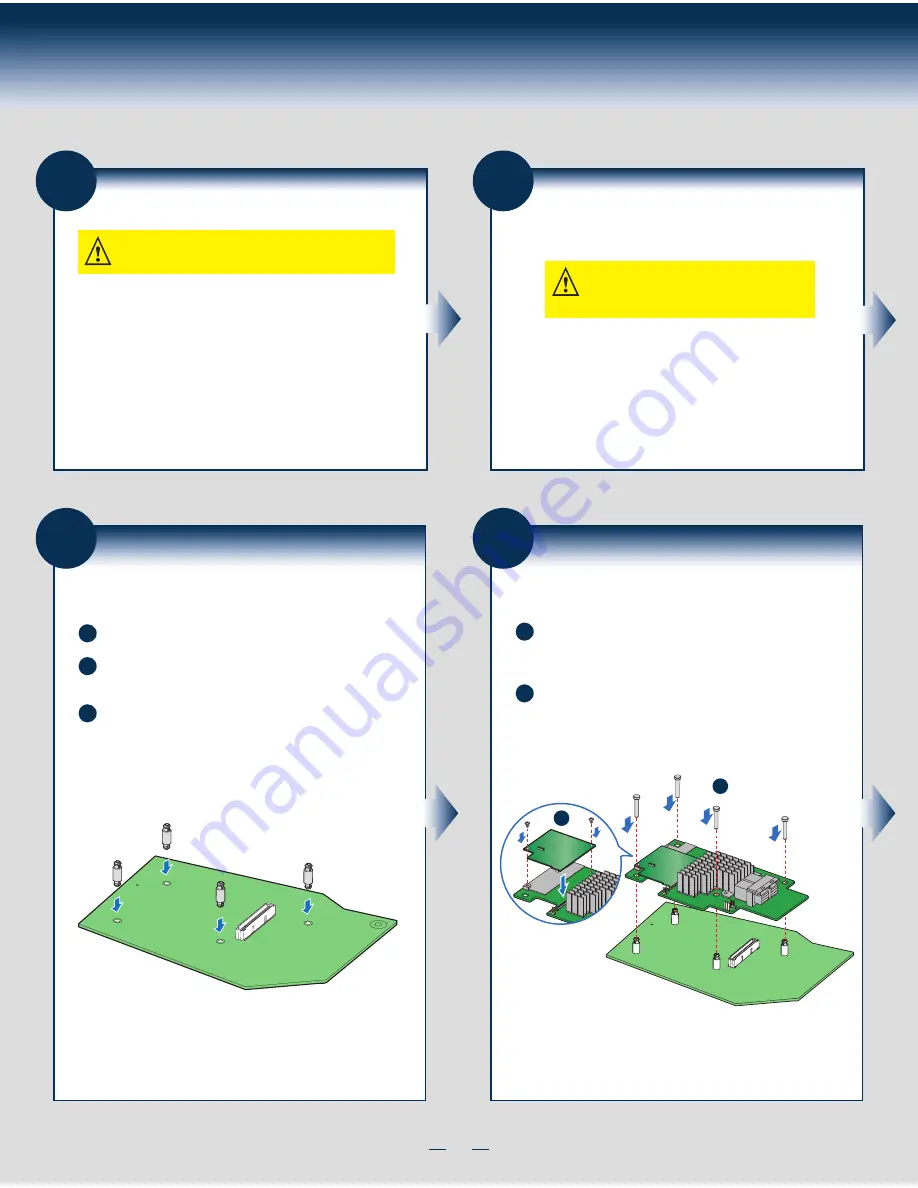
Install the RAID Module and
RMFBU5
A
(Optional) Hold the RMFBU5 module so that the front side faces
upward, and align the J2 connector on the RMFBU5 with the
connector JT3 on the RAID module.
B
Press down gently but firmly to ensure that the RAID module is
properly seated in the connectors, and then insert the four pin
standoffs into the barrel standoffs respectively.
AF006555
B
A
General Installation Process
1
Unpack the RAID Module
Unpack the RAID module in a static-free environment. Remove the
module from the antistatic bag, and inspect it for damage. A low-profile
bracket is included with the RAID module. If the RAID module appears
to be damaged or the low-profile bracket is missing, contact Intel or
your reseller support representative.
CAUTION: It is good practice to back up your data before
adding hardware, such as a RAID module, to your system.
The latest versions of the documentation, drivers, and firmware are
available on the Intel website at
http://www.intel.com/support
. See
Reference Documents
for more information.
The website contains utility programs, device drivers for various
operating systems, and related documentation.
2
Prepare the Host Computer
CAUTION: Before you install the RAID module,
make sure that the host computer is disconnected
from the power and from any networks.
Turn off the host computer, and unplug the power cords
from the rear of the power supply. Remove the cover from
the host computer.
3
Install the Barrel Standoff
A
Power down the system and disconnect the power cord.
B
Locate the matching SAS Module connector on your server board.
See your server board documentation.
C
Insert the barrel standoffs into the matching holes in the server
board. The Intel
®
Server Board S2600GZ is shown for illustrative
purpose.
Summary of Contents for RMS3CC040
Page 2: ...This page is intentionally left blank...
Page 9: ...This page is intentionally left blank...
Page 10: ...H46893 001...


