User Guide for NUC7CJYSAL
7
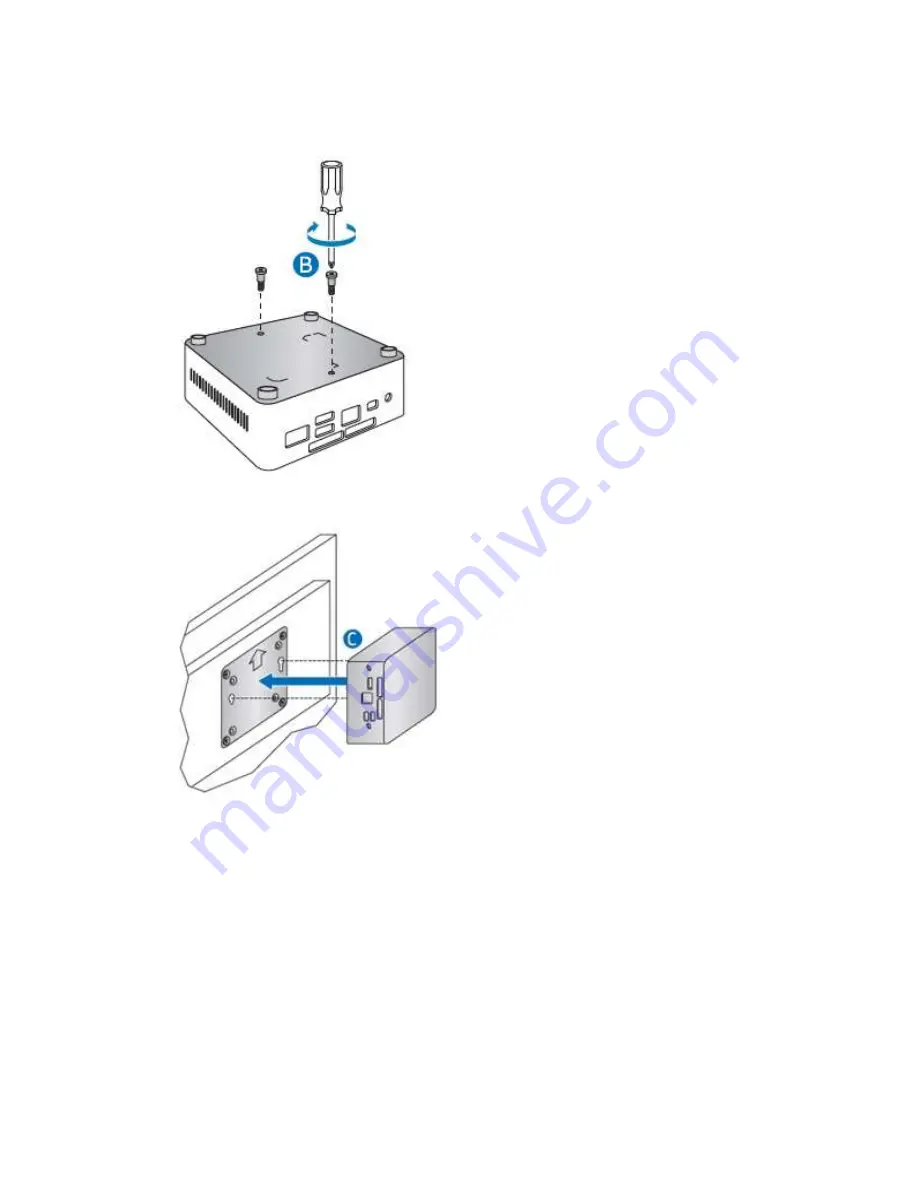
2.
Attach the two slightly larger black screws to the bottom chassis cover of the Intel NUC.
3.
Slide the Intel NUC onto the VESA mount bracket.
Page 1: ...User Guide for NUC7CJYSAL 1 Intel NUC 7 Essential a Mini PC with Windows 10 NUC7CJYSAL User Guide...
Page 2: ...el serial numbers installed options and configuration information Electrostatic discharge ESD can damage components Perform the procedures described in this chapter only at an ESD workstation using an...
Page 3: ...C Chassis Unscrew the four corner screws on the bottom of the chassis and lift the cover Upgrade System Memory The Intel NUC Mini PC NUC7CJYSAL has two 260 pin DDR4 SO DIMM sockets pre installed with...
Page 4: ...all the new memory module i Align the small space at the bottom edge of the memory module with the key in the socket ii Insert the bottom edge of the module at a 45 degree angle into the socket A iii...
Page 5: ...ool Follow these instructions to install a 2 5 Solid State Drive SSD or Hard Disk Drive HDD 1 Slide the 2 5 drive into the drive bay ensuring the SATA connectors are fully seated into the connectors o...
Page 6: ...s this be done by hand with a screwdriver to avoid over tightening and possibly damaging the screws Attach and Use the VESA Bracket Optional Follow these instructions to attach and use the VESA mount...
Page 7: ...User Guide for NUC7CJYSAL 7 2 Attach the two slightly larger black screws to the bottom chassis cover of the Intel NUC 3 Slide the Intel NUC onto the VESA mount bracket...
Page 8: ...s to be purchased separately Power cords are available at many Internet sites for use in multiple countries The connector on the power adapter is a C5 type connector BOXNUC7CJYSAL1 US power cord inclu...
Page 9: ...Center Drivers are available for the following features Realtek Audio Intel Bluetooth Intel Chipset ITE Consumer Infrared Intel Graphics Intel Wireless Realtek Gigabit Ethernet Realtek Card Reader Tru...
Page 10: ...rsonal files but it can remove recently installed apps and drivers Caution Before performing a reset or refresh Make sure to back up all personal data to external storage Remove SD card from the card...