2
General Installation Process
1
Unpack the RMFBU4 Module
Unpack the RMFBU4 module in a static-free environment. Remove the
module from the antistatic bag, and inspect it for damage. If the
module appears to be damaged, contact Intel or your reseller support
representative.
CAUTION: It is good practice to back up your data before
adding hardware, such as an RMFBU4 module, to your
system.
2
Prepare the Host Computer
CAUTION: Before you install the RMFBU4 module, make
sure that the host computer is disconnected from the
power and from any networks.
Turn off the host computer, and unplug the power cords from the rear
of the power supply. Remove the cover from the host computer to
permit access to the RAID controller.
3
Remove the RAID Controller from
the Computer
A
Unplug all cables from the RAID controller, remove the screw that
attaches the bracket to the computer chassis, and carefully remove
the RAID controller from the slot.
B
Place the RAID controller on a flat, clean, static-free surface.
4
Attach the RMFBU4 Module to the
RAID Controller
A
Ground yourself, and make sure that the system is grounded.
B
Place the RMFBU4 module front-side-up on a flat, clean, static-free
surface.
C
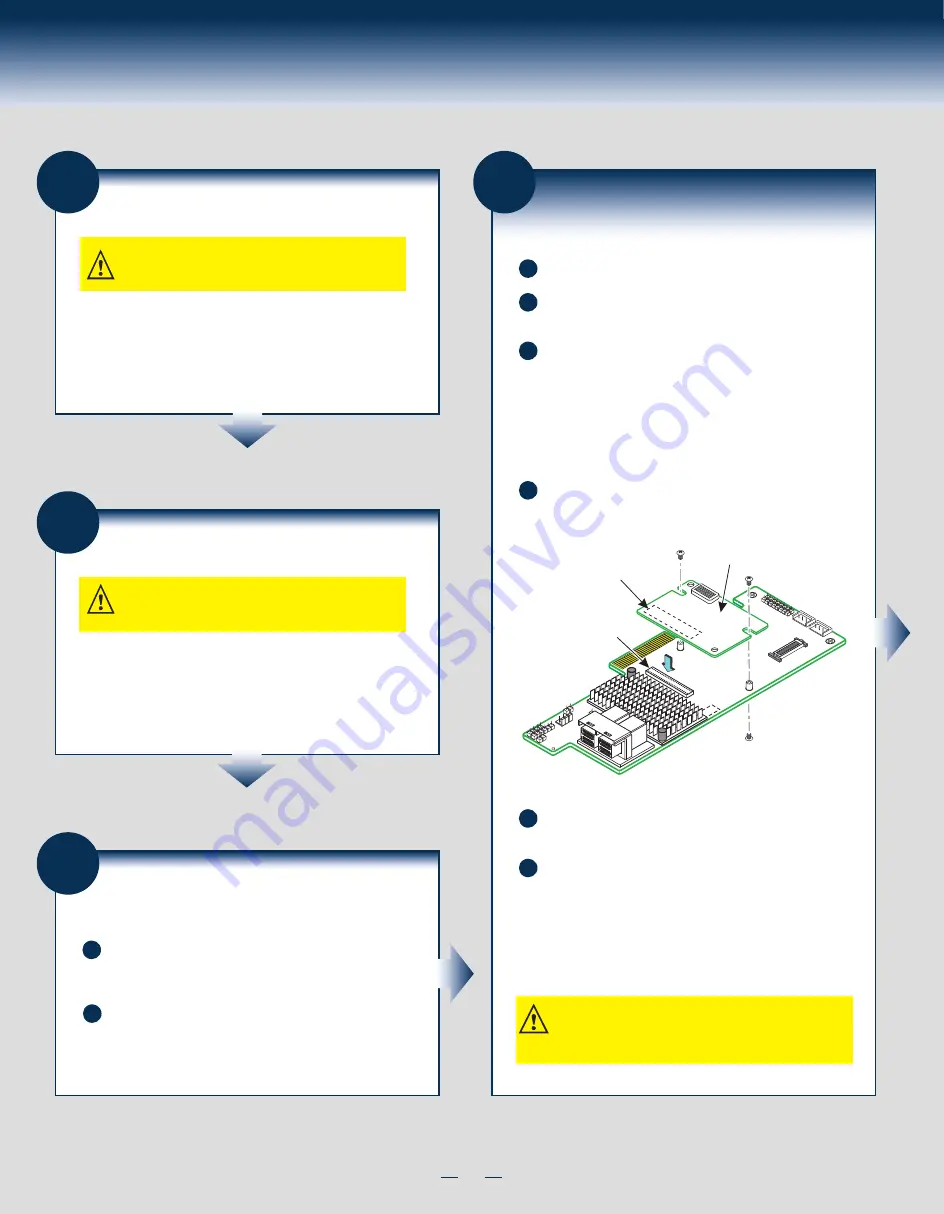
Mount the two standoffs on the front side of the RAID controller by
screwing in two screws from the back side of the RAID controller, as
shown in the following figure.
The standoffs are threaded at both ends, and the screws thread from
the back side of the RAID controller into the board-to-board
standoffs.
Center the screwdriver carefully to avoid stripping the screw heads.
Do not over-tighten the screws.
D
Hold the RMFBU4 module so that the front side faces upward, and
align the J2 connector on the RMFBU4 module with the connector
on the RAID controller.
E
Carefully press the RMFBU4 module onto the RAID controller so
that the two connectors are firmly joined.
RMFBU4
J2
Connector
J4B1
Connector
Intel
®
RAID Controller
RS3DC080 as shown
F
Secure the RMFBU4 module to the RAID controller by screwing in
the two screws from the top side of the RAID controller.
The standoffs are threaded at both ends, and the screws thread from
the back side of the RAID controller into the board-to-board
standoffs.
Center the screwdriver carefully to avoid stripping the screw heads.
Do not over-tighten the screws.
NOTE: If the Super Capacitor Pack module is to be attached to
a remote mount board, continue to follow the steps 5 to 9. If
the Super Capacitor Pack module is to be attached to an Intel
®
Server Chassis, continue to follow the steps 10 to 12.
Summary of Contents for AXXRMFBU4
Page 2: ...This page is intentionally left blank...
Page 12: ...H24048 001...


