


a.
inst
alla
tion
8
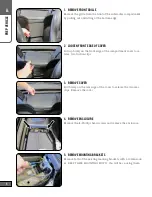
16. attach Mounting Brackets
Using the original mounting bolts, attach both mounting brackets.
Tighten the bolts finger tight - the brackets should not be loose,
but you should be able to move them.
17. teMPorarilY Place enclosure in suB coMPartMent
Slide the enclosure into the compartment, cable gland side first.
Make sure the wiring and plug are clear of the underside of the
enclosure. The enclosure should sit flush and even with the con-
sole on either side.
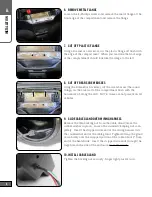
18. align the Mounting holes
Use the flashlight to site inside the speaker mounting hole. Use
the #10 x 1” machine screws to alighn the mounting holes and the
clip nuts/brackets by threading them, centering them, centering
the enclosure in the compartment, then removing the machine
screws.
Remove the enclosure. Firmly tighten the bolts securing the
mounting brackets.
19. insert foaM sheet
Place the 10”x12” foam sheet along the bottom of the subwoofer
compartment. The sheet should cover both the upper and lower
portions of the sheet metal and cross beam in the compartment.
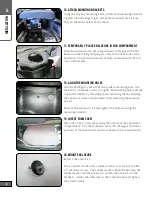
20. Mount enclosure
Replace the enclosure.
Place a fender washer and a rubber washer over each of the #10
x 1” machine screws. The rubber washer should be between the
fender washer and the enclosure. Attach the enclosure to the
brackets. Center the enclosure in the compartment and tighen
the screws firmly.


