


a.
inst
alla
tion
6
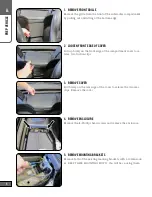
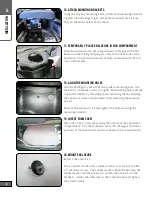
6. reMoVe Metal flange
Loosen the (2) Phillips screws and remove the metal flange at the
front edge of the compartment and remove the flange.
7. cut off Plastic flange
Using a Dremel or a Hacksaw, cut the plastic flange off flush with
the edge of the compartment. When you are done the front edge
of the compartement should look like the image to the left.
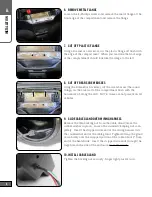
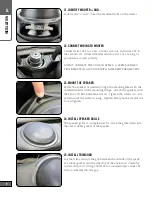
8. cut off rear screW Bosses
Using the Dremel (or hacksaw), cut the screw bosses (the round
things) on the back wall of the compartment flush with the
horizontal rib along the wall. NOTE: these are not present on all
vehicles.
9. slide caBle gland oVer Wiring harness
Remove the thin backing nut from the Cable Gland (leave the
rubber washer in place). Loosen the rounded clamping nut com-
pletely. Insert the stripped wires end of the wiring harness into
the rounded nut end of the cable gland. Tighten/Clamp the gland
down firmly over the wrapped portion of the cable, about 2” from
end of the heatshrink. Insert the stripped wire ends through the
large hole in the side of the enclosure from the inside.
10. install caBle gland
Tighten the backing nut securely - finger tight plus 3/4 turn.


