6
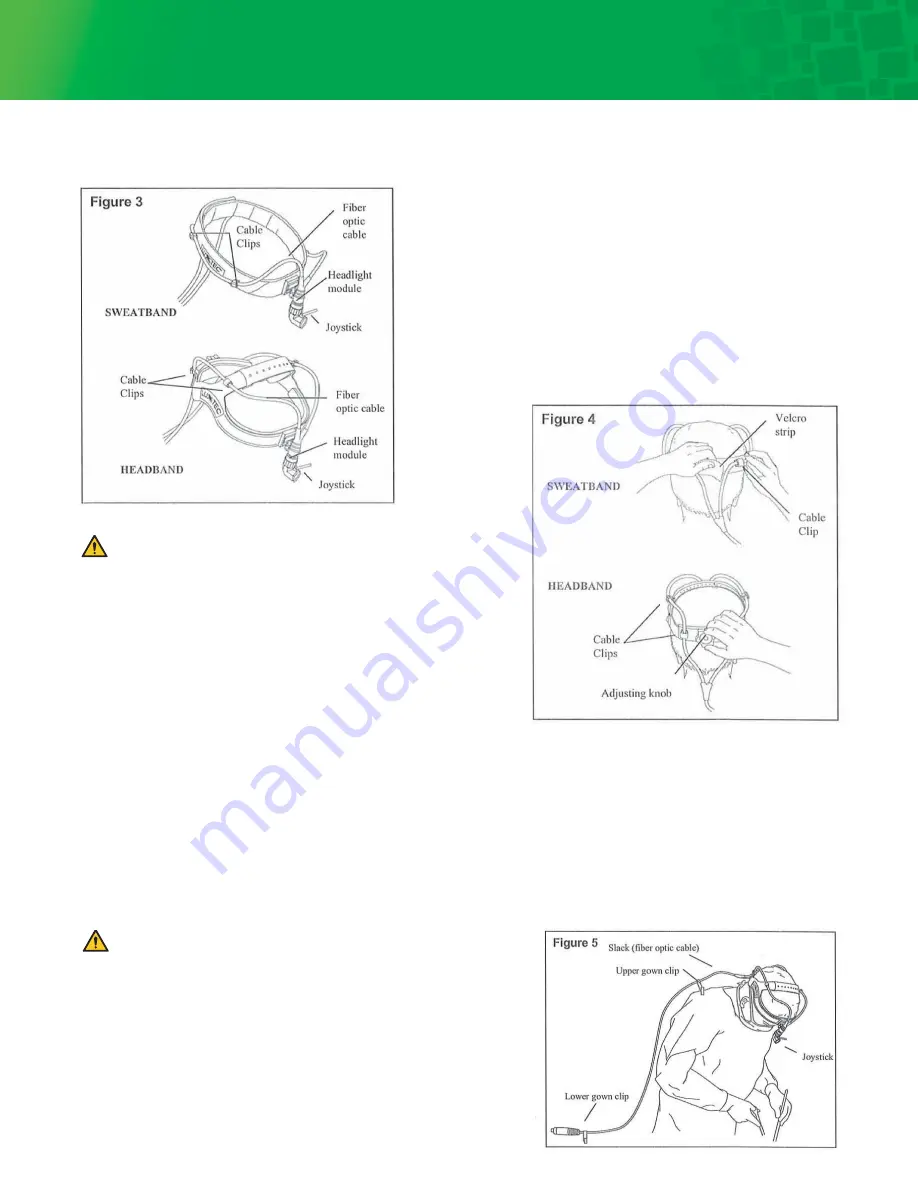
Next, place the headband or sweatband on your head. You can make
size adjustments on the headband by turning the knob at the rear of
the headband until it fits comfortably. The cross band can be adjusted
for even more comfort. Push out the tab and slide the band until the fit
is correct, then replace the tab. The sweatband should be pulled to a
comfortable tension and closed using the velcro strip (Figure 4).
To remove the module from the headband or sweatband, a small
screwdriver is needed. Insert the screwdriver into the slot at the top
of the module receptacle. Lift the handle of the screwdriver and the
module will slide out.
Assembly continued
Caution:
To plug or unplug the fiber optic cable from the light source,
it is recommended that the light source power be turned off.
Be sure to hold the strain reliever near the end of the cable.
This part of the cable is reinforced to prevent damage to the
glass fibers inside, and to prevent burns.
Once the headlight module and fiber optic cable are attached to the headband, the headlight assembly is ready to use.
The headlight module can be adjusted while wearing the headlight system by grasping the joystick. The joystick can
be removed for autoclaving or to prevent misaligning the headlight module when working in close quarters. The iris
adjustment varies the spot size from 20mm to 100mm (0.8 to 4 inches) at a 40 cm (16 inch) working distance (Figure 1a).
The headlight system comes with two gown clips to relieve the weight of the cable from the headband. The upper clip
is attached to the surgical gown just below the shoulder (Figure 5). Be sure to leave enough slack in the cable to
allow for freedom of head movement. If the surgeon needs to detach the cable from the light source, the lower gown
clip is used to attach to the surgeon’s gown. This reduces the risk of dropping or tripping over the cable.
Adjustments
CAUTION: The metal portions of the cable at the light source
get hot during operation. Allow components to cool outside
of the light source for at least 5 minutes before touching.
Integra manufactures its headlights to the highest quality standards.
Each one is tested thoroughly before leaving the factory to ensure
proper working conditions.
These instructions should help you get started with your new Integra
equipment, quickly and easily. If you have any problems, please
contact the Integra Service Department, 1+(914)-592-9050 (USA only),
or +33 (0) 4 37 47 59 10, fax 1+(914)-592-8056, or integralife.com.


