


28
NS-24ER310NA17/NS-24ER310CA17
NS-32DR310NA17/NS-32DR310CA17/NS-48DR510NA17
www.insigniaproducts.com
48"model
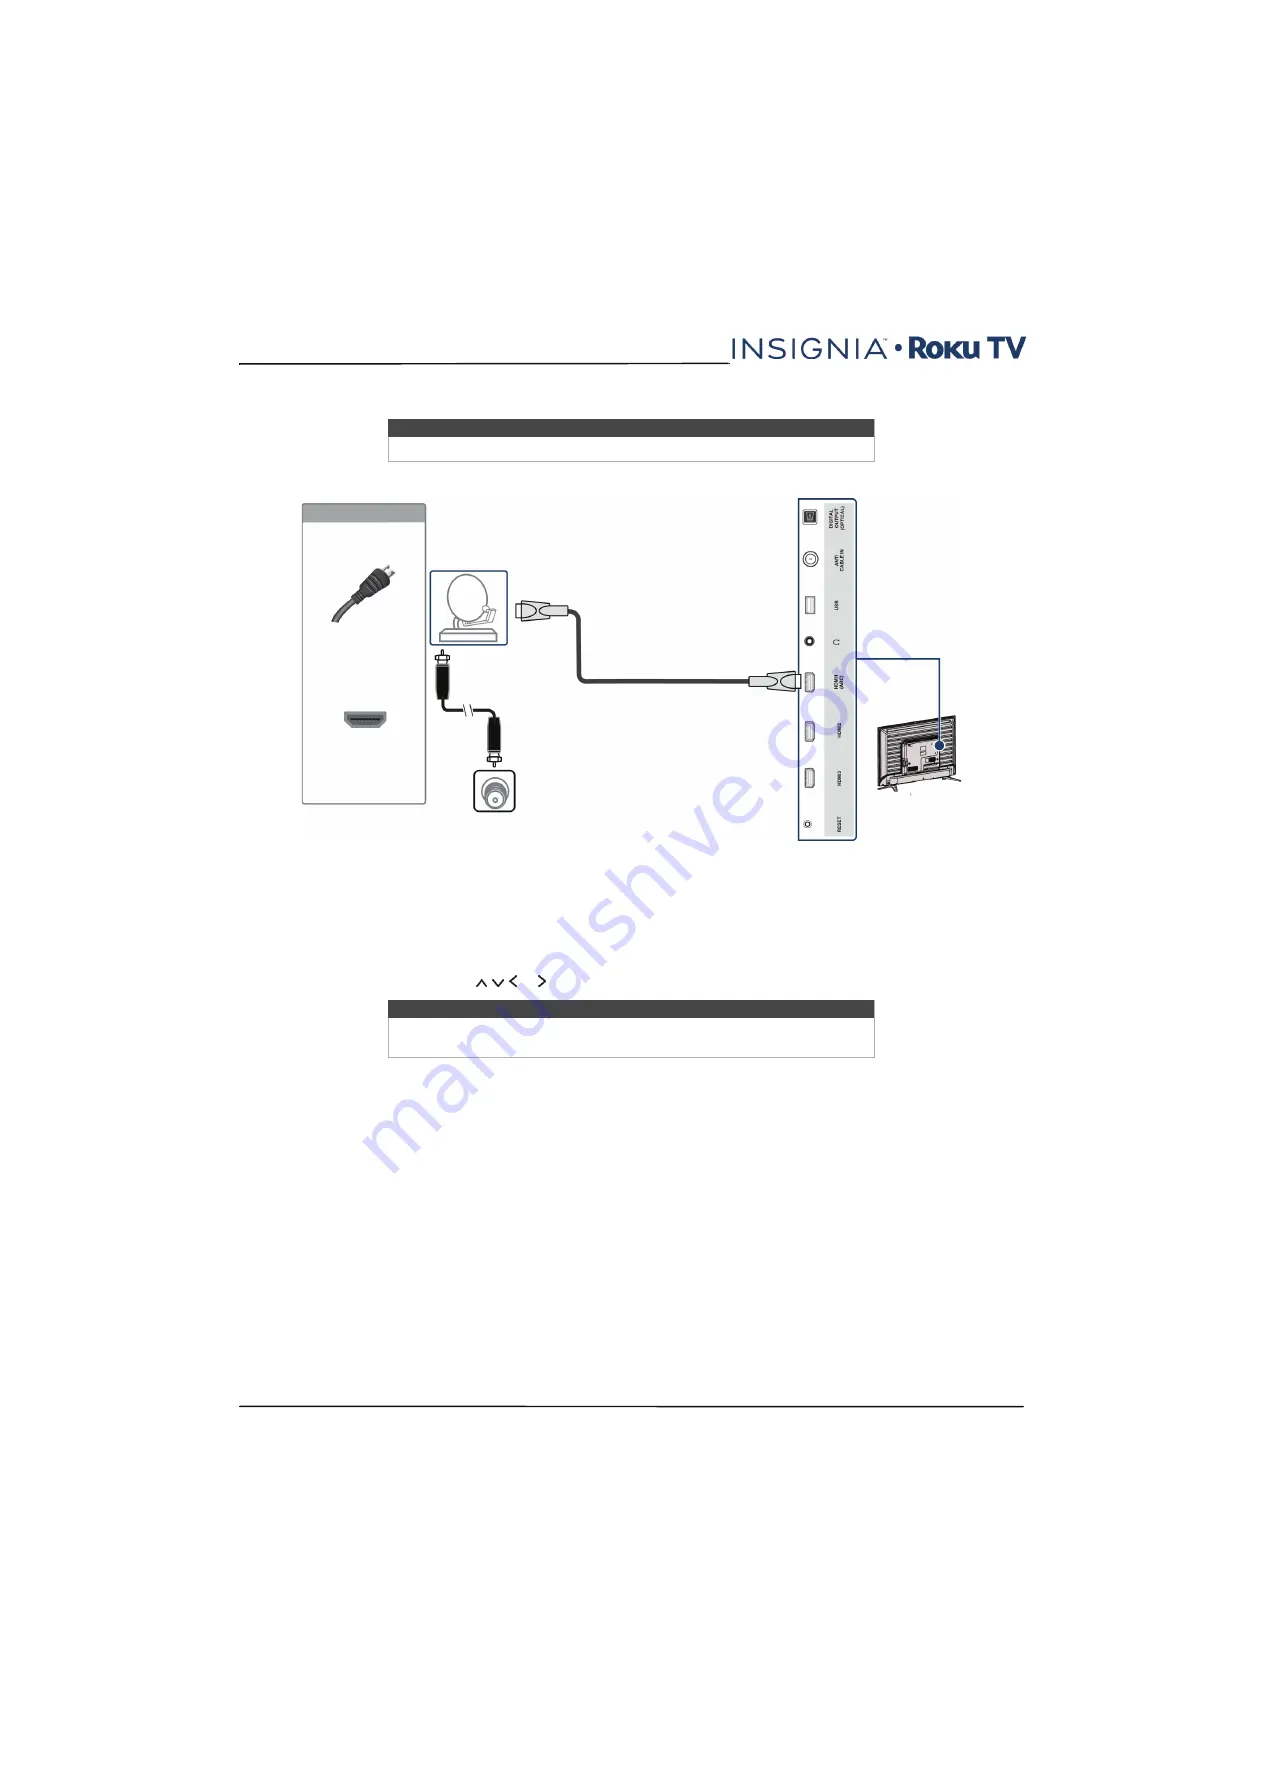
1
Make sure that your TV’s power cord is unplugged and all connected devices are turned off.
2
Connect the incoming cable from the cable wall jack to the cable-in jack on the cable or satellite box.
3
Connect an HDMI® cable (not provided) to an
HDMI
jack on the side of your TV and to the
HDMI
OUT
jack on the
cable or satellite box.
4
Plug your TV’s power cord into a power outlet, turn on your TV, then turn on the cable or satellite box.
5
On the Home screen, press or to highlight the
HDMI 1
,
HDMI 2
, or
HDMI 3
tile, then press
OK
.
Note
If your TV is the 24" or 32" model, go to
on page
Note
An HDMI® cable carries both audio and video. You do not need to use any
audio cables.
HDMI® cable
Cable or
satellite box
Side of TV
HDMI® cable
connector
HDMI® jack
On your TV
Cable
wall jack


