


5
Insignia NS-PDP42/50-09 42" and 50" Plasma TV
www.insignia-products.com
Outdoor antenna grounding
If an outside antenna or cable system is
connected to your TV, make sure that the
antenna or cable system is grounded to provide
some protection against voltage surges and
built-up static charges. Article 810 of the
National Electrical Code, ANSI/NFPA No. 70,
provides information with respect to correct
grounding of the mast and supporting structure,
grounding of the lead-in wire to an antenna
discharge unit, size of grounding conductors,
location of the antenna-discharge unit,
connection to grounding electrodes, and
requirements for the grounding electrode.
Note to CATV system installer
This reminder is provided to call the CATV
system installer’s attention to Article 820-40 of
the NEC that provides guidelines for correct
grounding and in particular, specifies that the
cable ground must be connected to the
grounding system of the building as close to the
point of cable entry as practical.
End of life directives
Your new TV contains materials which can be
recycled and reused. At the end of your TV’s life,
specialized companies can dismantle the
discarded TV to concentrate the reusable
materials and to minimize the amount of
materials to be disposed of. Dispose of your old
TV according to local regulations.
Features
Accessories
Make sure that the following accessories are
provided in the package:
•
Power cord
•
75 ohm round cable
•
Remote control and batteries (2 × AAA)
•
User manual
•
CD manual
•
Protection cover
•
Bolts for stand assembly
•
Cable holders
•
Cable management clip
Front
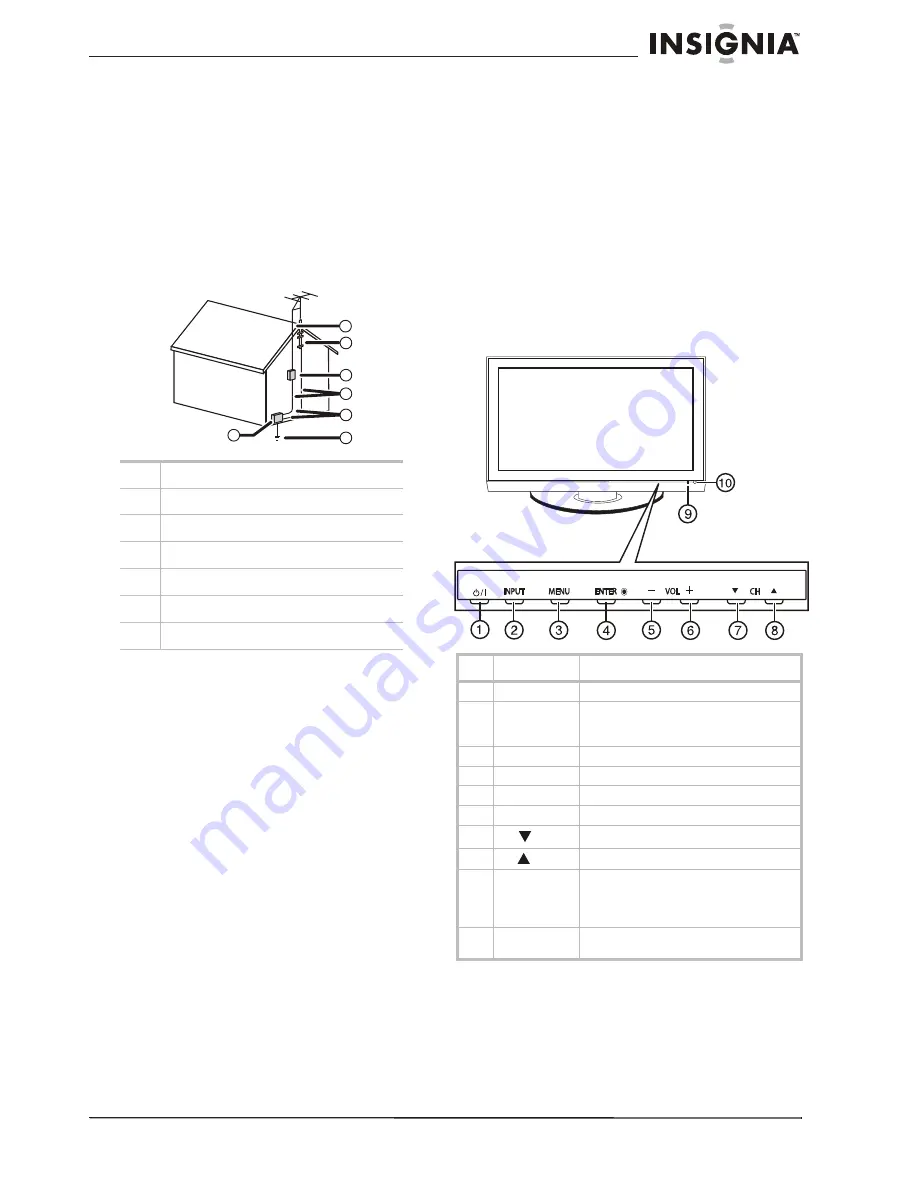
1
Electric service equipment
2
Power service grounding electrode system
3
Ground clamps
4
Grounding conductors
5
Antenna discharge unit
6
Grounding clamp
7
Antenna lead-in wire
6
7
5
2
1
3
4
#
Item
Description
1
POWER button Press to turn your TV on or off.
2
INPUT button
Press to select the AV signal input. You can
select
TV, AV1
,
AV2
,
S-Video
,
Component
,
DVD
,
HDMI
, or
PC
.
3
MENU button
Press to open the on-screen menu.
4
ENTER
Press to confirm your selections.
5
VOL -
Press to decrease the volume.
6
VOL +
Press to increase the volume.
7
CH
Press to change to a lower channel.
8
CH
Press to change to a higher channel.
9
Power/Standby
indicator
Lights when your TV is plugged into a
power outlet. When your TV is on, the
indicator is blue. When your TV is in
standby mode, the indicator is red.
10
IR sensor
Receives signals from the remote control.
Do not block.


