background image

5

unused for long periods of time, unplug it from the power outlet and disconnect the antenna or cable 

system. This helps prevent damage to your TV from lightning and power line surges. 

Servicing

Do not attempt to service your TV yourself because opening or removing covers may expose you to 

angerous voltage or other hazards. Refer all servicing to qualified service personnel. 

Replacement parts 

When replacement parts are required, make sure that the service technician uses replacement parts 

specified by the manufacturer that have the same characteristics as the original part. Unauthorized 

substitutions may result in fire, electric shock, personal injury, or other hazards. 

Overloading 

Do not overload power outlets and extension cords because this can result in a risk of fire or electric 

shock.

Object and liquid entry 

Never push objects of any kind into your TV through openings because objects may touch dangerous 

voltage points or short out parts that could result in a fire or electric shock. Never spill liquid of any kind 

on your TV. 

Damage requiring service 

Unplug this TV from the power outlet and refer servicing to qualified service personnel under the 

following conditions: 

• When the power supply cord or plug is damaged or frayed. 

• If liquid has been spilled or objects have fallen into your TV. 

• If your TV has been exposed to rain or water. 

• If your TV does not operate normally by following the operating instructions. Adjust only those controls 

that are covered by the operating instructions because incorrect adjustment of other controls may result 

in  

damage and will often require extensive work by a qualified technician to restore your TV to its normal 

operation. 

• If your TV has been dropped or damaged in any way. 

• When your TV exhibits a distinct change in performance. 

Safety check 

After completing any service or repair to this TV, ask the service technician to perform routine safety 

checks to determine that your TV is in correct operating condition. 

Power source 

Operate your TV only from the type of power source indicated on the marking label. If you are not sure 

of the type of power supplied to your home, consult your TV dealer or local power company. 

Screen protection 

Your TV’s screen is made of glass. Do not drop your TV or hit the glass screen. If the screen breaks, be 

careful of broken glass. Reviewers: Please confirm. 

Non-active pixels 

The LCD panel contains almost 3 million thin film transistors, which provide exceptionally sharp video 

quality. Occasionally, a few non-active pixels may appear on the screen as a fixed blue,green, or red 

point. These non-active pixels do not adversely affect the performance of your TV, and are not 

considered defects. 

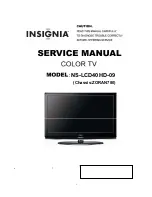
Summary of Contents for NS-LCD40HD-09

Page 1: ...1 NS LCD40HD 09 Chassis ZORAN780 T V ...

Page 2: ... LOCATION OF CONTROLS AND COMPONENTS 7 3 1 Board Location 7 3 2 Main Board 7 3 3 Power Board 11 3 5 LCD Panel 12 4 INSTALLATION INSTRUCTIONS 14 4 1 External Equipment Connections 14 4 2 HDMI Connections 18 5 OPERATION INSTRUCTIONS 20 5 1 Front Panel Controls 20 5 2 Back Panel Controls 20 5 3 Universal Remote Controller 20 6 DISASSEMBLY INSTRUCTIONS 22 6 1 Whole Machine 24 6 2 Base Subassembly 25 6...

Page 3: ...3 1 Warning ...

Page 4: ...tructions Heat Make sure that your TV is located away from heat sources such as radiators heat registers stoves or other products including amplifiers that produce heat Grounding or polarization Do not defeat the safety purpose of the polarized or grounding type plug A polarized plug has two blades with one wider than the other A grounding type plug has two blades and a grounding prong The wide bl...

Page 5: ...ayed If liquid has been spilled or objects have fallen into your TV If your TV has been exposed to rain or water If your TV does not operate normally by following the operating instructions Adjust only those controls that are covered by the operating instructions because incorrect adjustment of other controls may result in damage and will often require extensive work by a qualified technician to r...

Page 6: ...6777216 NO of preset channels 181 OSD language English Color system NTSC ATSC Audio system Audio output power Built in W 15W 2 Audio output power outer W YES Total power input W 260W Voltage range V AC110V Power frequency Hz 60Hz Time of sleep timer MINS 120Min Net weight KG 21 5 Gross weight KG 26 Net dimension MM 1043 315 755 Packaged dimension MM 1058 330 780 ...

Page 7: ...7 3 LOCATION OF CONTROLS AND COMPONENTS 3 1 Board Location No Parts number Description A Board TV 5210 291 Power Board B Board TV 5210 296 Main Board 3 2 Main Board 3 2 1 Function Description ...

Page 8: ...8 Main Board Process signal which incept from exterior equipmentˈthen translate into signal that panel can display Signal flowing chart 3 2 2 Connector definition ...

Page 9: ...e power of system 2 GND Ground 3 5VSB Power of TV standby 4 GND Ground 5 GND Ground 6 12V Power of system 7 12V Power of system Pin number Signal name Description 1 5V Supply the Power of bright and IR receiver 2 IR Receive IR signal 3 G Show green when TV standby 4 B Show blue when TV working 5 GND Ground 6 NC NC ...

Page 10: ...FT LCD Panel through the power supply unit path 3 GND GND 4 5V Not use Pin number Signal name Pin number Signal name Pin number Signal name 1 LVDS VDD 9 Not use 17 A1P 2 LVDS VDD 10 Not use 18 A1N 3 LVDS VDD 11 Not use 19 A2P 4 LVDS VDD 12 Not use 20 A2N 5 Not use 13 A0P 21 GND 6 Not use 14 A0N 22 GND 7 GND 15 GND 23 CK1P 8 GND 16 LVDS_SEL 24 CK1N Pin number Signal name 25 A3P 26 A3N 27 GND 28 GND...

Page 11: ...d 3 3 2 Connector definition CONNECTOR CON2 CONNECTOR CON6 CONNECTOR CON4 3 4 LCD PANEL CON2 Signal name 1 24V 2 24V 3 24V 4 24V 5 24V 6 GND 7 GND 8 GND 9 GND 10 GND CON6 Signal name 1 2 16 5V 3 4 GND CON4 Signal name 1 ON OFF 2 GND 3 5VSB 4 GND 5 GND 6 12V 7 ...

Page 12: ...12V 6 GND GND 7 GND GND 8 GND GND 9 GND GND 10 RO 0 N ODD LVDS SINGAL 11 RO 0 P ODD LVDS SINGAL 12 RO 1 N ODD LVDS SINGAL 13 RO 1 P ODD LVDS SINGAL 14 RO 2 N ODD LVDS SINGAL 15 RO 2 P ODD LVDS SINGAL 16 GND GND 17 ROCLK ODD LVDS SINGAL 18 ROCLK ODD LVDS SINGAL 19 GND GND 20 RO 3 N ODD LVDS SINGAL 21 RO 3 P ODD LVDS SINGAL 22 NC NC 23 NC NC 24 GND GND 25 RE 0 P EVEN LVDS SINGAL ...

Page 13: ...r equivalent Pin No Symbol Description 1 2 3 4 5 VBL 24V Power input 6 7 8 9 10 GND Ground 11 NC NC 12 BLON BL ON OFF 13 PWM Internal PWM Control 14 NC NC 4 INSTALLATION INSTRUCTIONS 4 1 External Equipment Connections Accessories Remote Control User Manual Battery Antenna Connection Generally speaking to enjoy a clearer picture we recommend that you use a CATV system or an ...

Page 14: ...bler box you can connect your cable TV directly to your TV If you have a converter descrambler box you can connect your cable TV using an RF switch not supplied For more information about connecting a converter descrambler box contact your cable TV provider To connect cable TV without a converter descrambler box 1 Connect one end of a 75 ohm cable to the coaxial jack on the back of your TV 2 Conne...

Page 15: ...15 ...

Page 16: ...16 ...

Page 17: ...17 ...

Page 18: ...18 4 2 HDMI CINNECTIONS When the source device DVD player or Set Top Box supports HDMI ...

Page 19: ...fit into your non polarized AC outlet do not attempt to file or cut the blade It is your responsibility to have an electrician replace the obsolete outlet If you cause a static discharge when touching the TV and the TV fails to function unplug the TV from the AC outlet and plug it back in The TV should return to normal operation HDMI Cable not supplied with the product HDMI to DVI Cable not suppli...

Page 20: ...20 5 OPERATION INSTRUCTIONS 5 1 Front panel controls 5 2 Back panel controls ...

Page 21: ...control to shock or liquids Do not use the remote control in an area with high humidity Do not place the remote control in direct sunlight Do not place objects such as furniture between the remote control and the remote sensor The remote control may not work if direct sunlight or bright light shines on the remote sensor Either move your TV or change the angle at which you use the remote control ...

Page 22: ...emove the twelve screws indicated on figure above by ƻ ĸ Then remove the back cover from the unit 2 Remove the Pedestal ķ Lay down the unit so that rear cover faces upward ĸ Remove the four screw from the rear cover indicated with ƻ Ĺ Then remove the pedestal ...

Page 23: ...he Main board ķ Remove the four screws indicated on the figure above by ƻ ĸ Disconnected the coupler CN28ǃCN2ǃCN26ǃ CN22ǃCN23ǃCN20ǃCN21 Ĺ Remove the Main board 6 1 whole machine 5 Remove the speaker Remove the four screws take out the speaker 6 Remove the remote control board Remove the two screws take out the remote control board ...

Page 24: ...elǃ Power assembly PSU ǃ Wire subassembly Components List NO Name Description Parts number 1 Accessory 2 Packaging 3 TV Set 3 1 Base subassembly TV 0250 47 3 2 Back cover subassembly TV 1300 155 3 3 Screen bracket module 3 3 1 Screen bracket assembly 3 3 2 Main Board TV 5210 296 3 3 3 PSU TV 5210 291 3 4 LCD PANEL 3 5 Front frame subassembly TV 1300 156 ...

Page 25: ...se subassembly NO Name Description Parts number 1 Base subassembly 2 Base assembly TV 0250 47 2 1 Base cover 2 2 Iron soleplate 2 3 Base support Board 2 4 Rubber PAD 3 Bolt 4 Bolt 6 3 Back cover subassembly 1 2 ...

Page 26: ...2 1 Back cover 2 2 Side av label 2 3 Back jack label 2 4 Screw 6 4 Screen bracket subassembly 1 1 1 Components List NO Name Description Parts number 1 Screen bracket subassembly 2 Screen bracket assembly 2 1 Screen bracket 2 2 Metallic Jack Board 6 5 Front frame subassembly 2 2 1 2 3 2 4 2 5 5 3 ...

Page 27: ...ey board trestle 3 Screw SJ2824 87 ST3X12F 4 Screw SJ2824 87 ST3 10F 6 6 Wire subassembly Connection Sketch Interpretat 6 6 1 Wire Photo 6 6 2 Components List NO Name Description Parts number 1 Power input connect wire 2139 5P 500mm 2 24v power wire TJC3 3P 450mm TJC3 15P 3 LVDS wire 4 12V Power wire 5 Remote control wire PH7 350MM PH15 700MM PH5 6 Key wire PH 3 800mm PH 3 7 Speaker wire ...

Page 28: ...STMENTS The way to the factory mode menu 1st adjust the volume to zero in the TV state 2en input 9876 3rd press ok Finished these operations system will be into the factory mode menu 1 Factory menu 2 1 RF Upgrade 2 Service Menu ...

Page 29: ...29 3 Auto Color 4 Recall PQ settings 5 SW L_2780_SS40 071227 ...

Page 30: ...30 6 Aging Mode ...

Page 31: ...31 8 BLOCK DIAGRAM AND CIRCUIT DIAGRAM 8 1 BLOCK DIAGRAM 8 2 CIRCUIT DIAGRA ...

Page 32: ... January 18 2008 Title Size Document Number Rev Date Sheet of MCU_I2C2DATA 22 MCU_I2C2CLK 22 3 3VSB_MCU FB29 150_Ohm_2A 1 2 R997 22R_DNS UA14 ISL1208_DNS 1 2 3 4 5 6 7 8 X1 X2 VBAT GND SDA SCL IRQ FOUT VDD YA3 32 768KHz_DNS C710 10UF 16V C711 0 1uF R995 0 R996 22R_DNS ...

Page 33: ...0 E9 D8 D9 D10 E10 HDMI0_D2P HDMI0_D2N HDMI0_D1P HDMI0_D1N HDMI0_D0P HDMI0_D0N HDMI0_CLKP HDMI0_CLKN HDMI0_CEC HDMI0_SCL HDMI0_SDA HDMI0_HPD HDMI0_5VSENSE HDMI0_RXATEST HDMI0_REXT R781 390_1 R979 4 7K 1 2 SiI9185 SI9185 U43 TQFP80G 12 75 14 15 18 19 21 22 24 25 27 28 11 10 8 7 5 4 2 1 3 34 6 23 13 58 59 61 62 64 65 67 68 30 54 16 32 31 76 79 77 78 56 72 70 71 53 36 52 50 51 38 39 41 42 44 45 47 48...

Page 34: ... C19 C15 C23 C17 D19 D15 C22 C20 D21 B16 A16 A17 B18 D16 C16 D20 A12 B12 C21 C13 S0_DQ15 S0_DQ14 S0_DQ13 S0_DQ12 S0_DQ11 S0_DQ10 S0_DQ9 S0_DQ8 S0_DQ7 S0_DQ6 S0_DQ5 S0_DQ4 S0_DQ3 S0_DQ2 S0_DQ1 S0_DQ0 S0_UDM S0_LDM S0_VREF S0_A13 S0_A12 S0_A11 S0_A10 S0_A9 S0_A8 S0_A7 S0_A6 S0_A5 S0_A4 S0_A3 S0_A2 S0_A1 S0_A0 S0_BA2 S0_BA1 S0_BA0 S0_UDQSN S0_UDQS S0_LDQSN S0_LDQS S0_RASN S0_CASN S0_WEN S0_CKN S0_CK ...

Page 35: ...4K7 R33 27 1 2 R6 1K m19 C574 100pF 1 2 m7 CNC11 USB_DNS 1 2 3 4 6 5 C5 0 1uF 1 2 C2 0 1uF R968 15K R8 4K7 R2 4K7 m8 R597 0 m10 R29 10K_DNS SPI FLASH 32M bit U3 M25P32 1 2 3 4 5 6 7 8 9 10 11 12 13 14 15 16 HOLD Vcc NC1 NC2 NC3 NC4 S Q W GND NC5 NC6 NC7 NC8 D C C571 56pF 1 2 m11 R28 10K M13 R610 4K7_DNS R7 1K R1 4K7 Y1 25 MHz R10 4K7_DNS C6 27pF M3 R19 4K7 C4 0 1uF FB1 150_Ohm_2A 1 2 SPI FLASH 32M...

Page 36: ...10 11 12 13 14 15 16 17 18 19 22 23 SHELL1 SHELL2 D2 D2 Shield D2 D1 D1 Shield D1 D0 D0 Shield D0 CK CK Shield CK CEC NC DDC CLK DDC DATA GND 5V HP DET SHELL3 SHELL4 R38 4 7K D124 ESD 0603_0 15PF D30 ESD 0603 D26 ESD 0603_0 15PF D10 ESD 0603_0 15PF D29 ESD 0603_DNS D21 ESD 0603_0 15PF D19 ESD 0603 D9 ESD 0603_0 15PF D18 ESD 0603 D13 ESD 0603_0 15PF D28 ESD 0603_0 15PF D20 ESD 0603_DNS CON31 HDMI_C...

Page 37: ...GC NC_PIN2 DIF M1 M2 M3 M4 NC VT TP DIF IF AGC 5V AFT SIF VIDEO OUT NC_PIN12 TP IF Out SCL SDA GND M4 M3 M2 M1 C515 30pF C15 47pF_16v C563 0 1uF L2 BLM18AG601 R426 0 R586 10K_DNS R70 1K_1 Q31 MMBT3904 1 2 3 C36 0 1uF_10v R71 1K C17 0 1uF_16v C516 0 01uF C566 0 1uF 1 2 R593 10K C20 10uF FB3 150_Ohm_600mA 1 2 C16 10pF_50v_DNS C570 0 01uF C38 10uF C43 0 1uF_10v C46 0 1uF L41 0 R69 100 C562 470uF 16V ...

Page 38: ...1 2 3 4 5 6 CON38 RCA_LR 2 1 5 3 4 6 7 R GND L GND SW NC NC C68 1800pF C74 1800pF R82 22K R459 33K R458 22K R118 22K R480 33K C557 1800pF D43 ESD 0603 D48 ESD 0603 D45 ESD 0603 R120 33K C77 1800pF R89 100 R106 100 R109 22K CON39 RCA_LR 2 1 5 3 4 6 7 R GND L GND SW NC NC R472 4 7K R479 33K D34 ESD 0603 C60 1800pF R113 100 R96 33K C556 1800pF CON37 RCA_LR 2 1 5 3 4 6 7 R GND L GND SW NC NC C72 1800p...

Page 39: ...S C598 330pF_DNS C98 330pF_DNS C591 1uF C590 1uF Y C CON46 DIN4 4 1 2 5 3 6 7 8 C86 1uF R702 75R C108 330pF C90 0 1uF C596 0 1uF C104 47pF D54 ESD 0603 R133 75R C101 0 1uF D99 ESD 0603 R701 75R C106 0 1uF C99 330pF C89 330pF C599 330pF SD Video In U1L ZR39780_A_6 W3 U3 V3 Y3 U2 V2 Y4 CVBS0 SVIDEO0Y SVIDEO0C CVBS1 SVIDEO1Y SVIDEO1C CVBS2 C97 1uF C91 47pF C85 0 1uF C597 47pF D112 ESD 0603 C107 330pF...

Page 40: ...10K_DNS D77 ESD 0603 R141 75R_DNS C115 0 22uF C112 1uF R166 0 D60 ESD 0603 R160 75 R185 10K_DNS FB6 150_Ohm_600mA 1 2 R186 100 Q28 MMBT3906 1 2 3 C130 1uF R181 75 R136 100 C117 0 22uF D65 ESD 0603 Q29 2N7002LT1 1 2 3 R594 0_DNS R162 20K_DNS C124 1uF D69 ESD 0603 C132 10uF R168 0 R169 75 R189 100 D70 ESD 0603 C121 0 1uF R182 75 R490 4 7K_DNS R163 10K_DNS R137 100 C120 1000pF R493 4 7K R171 75 R176 ...

Page 41: ...10nF R197 0 R220 1K_DNS C191 0 22uF R233 1K L15 10uH R240 100K R975 100_DNS C559 0 1uF 50V D79 ESD 0603 R214 0R Audio I F U1E ZR39780_A_6 AF15 AE15 AE16 AD15 AC16 AB16 AD16 AC17 AB17 AF16 ACLK0 BCLK0 LRCLK0 ADATAI0_0 ADATAI0_1 ADATAI0_2 ADATAO0_0 ADATAO0_1 ADATAO0_2 IEC958_0 C202 1uF SMD CC0805A R196 0 NC C550 330PF C195 470pF 1 2 L17 33uH 2A L5 9 1 2 Q2 MMBT3906 1 2 3 C178 100nF C558 0 1uF 50V R2...

Page 42: ...1 2 R255 820_1 CND2 CON16 LVDS 1 3 5 7 9 11 13 15 2 4 6 8 10 12 14 16 18 17 R274 1K R429 37 4R_1 R273 4 7K C617 1u Video Out U1I ZR39780_A_6 AB25 AC25 AB26 AUX_AVID_COMP AUX_ATEST_RES AUX_RSET R756 560 R761 75R C225 0 01uF R254 4 7K_dns 1 2 R275 RES_dns R253 4 7K_dns 1 2 R759 0 D135 ESD 0603 CON48 Video RCA 102H _DNS 1 3 2 Video GND SW R266 1K_DNS R757 560 R762 33K R259 4 7K_DNS 1 2 R763 47K R257 ...

Page 43: ...R407 15 R281 4 75K_NS R401 15 R288 4 75K R399 15 R406 15 R280 4 75K R404 15 AFE GPIO U1K ZR39780_A_6 AC11 AB11 AA11 AA10 AA6 AA5 AB6 AB5 AB8 AA8 AC8 AD8 AE8 AA9 E11 D11 C11 B11 A11 E12 D12 C12 B2 A2 A3 B3 C3 AFE_DIN0 AFE_DIN1 AFE_DIN2 AFE_DIN3 AFE_DIN4 AFE_DIN5 AFE_DIN6 AFE_DIN7 AFE_DIN8 AFE_DIN9 AFE_DIN10 AFE_DIN11 AFE_DINCLK IF_DVAL GPIO_P0 GPIO_P1 GPIO_P2 GPIO_P3 GPIO_P4 GPIO_P5 GPIO_P6 GPIO_P7...

Page 44: ... C237 10uF 1 2 R296 62K 1 2 C239 1 0uF C236 0 1uF R295 0 ohm R972 0 ohm_DNS C243 10uF 1 2 C246 470nF 1 2 C241 1 0uF C242 39nF 1 2 C229 0 1uF U1Q ZR39780_A_6 M2 M1 N1 R2 N2 P2 P1 R1 L1 AA3 AB4 L4 AC7 N5 P5 AE7 Y5 Y6 W5 AB9 AC9 L3 AD7 W4 AB1 AA2 L2 W6 T1 W2 W1 M3 V1 M5 G7 U7 AA4 AB2 AB3 M4 T2 AVDD18_HPLL AVDD3_HPLL AVDD3_SYNC AVDD_SYNC1 AVDD3_AFE AVDD18_R AVDD18_G AVDD18_B AVDDLDO LVDSTX_VDD33_0 LVD...

Page 45: ...m 1 2 3 4 5 1 2 3 4 5 R306 0 R991 22K U19 AP1701_DNS 1 2 3 GND RESET VCC R304100 R468 4 7K R299 4 7K_DNS D89 DZ23C10_DNS 1 2 R312 100K C252 68PF R297 1K SW1 button_4pin_DNS 1 2 3 4 R308 220 C247 0 1uF R316 100 R305100 Q11 MMBT3906 1 2 3 C249 0 1uF H2 GEN315R140 8 1 2 3 4 5 6 7 8 9 10 H7 GEN315R140 8 1 2 3 4 5 6 7 8 9 10 CNE2 PH 4A5pin 2 0mm 1 2 3 4 5 1 2 3 4 5 R309 4 7K C248 0 1uF CNB1 TJC3 4A 4pi...

Page 46: ...VDD16 IOVDD8 IOVDD10 MVDD0 MVDD1 MVDD2 MVDD3 MVDD4 MVDD5 MVDD6 MVDD7 MVDD8 MVDD9 MVDD10 MVDD11 MVDD12 MVDD13 MVDD14 MVDD15 MVDD16 MVDD17 MVDD18 MVDD19 USB_VDD1 USB_VDD33 PLL_VDD DAC_VDD CORE_VDD0 CORE_VDD1 CORE_VDD2 CORE_VDD3 CORE_VDD4 CORE_VDD5 CORE_VDD6 CORE_VDD7 CORE_VDD8 CORE_VDD9 CORE_VDD10 CORE_VDD11 CORE_VDD12 CORE_VDD13 CORE_VDD14 CORE_VDD15 CORE_VDD16 CORE_VDD17 CORE_VDD18_0 CORE_VDD18 CO...

Page 47: ...16 T17 T18 U9 U10 U11 U12 U13 U14 U15 U16 U17 U18 V9 V10 V11 P4 U5 V12 V13 V14 V15 V16 V17 V18 P3 N3 B24 V5 R25 GND51 GND50 GND49 GND48 GND47 GND46 GND45 GND44 GND43 GND42 GND41 GND40 GND39 GND38 GND37 GND36 GND35 GND34 GND33 GND32 GND31 GND30 GND29 GND28 GND27 GND26 GND25 GND24 GND23 GND22 GND21 GND20 GND19 GND18 GND17 GND16 GND15 GND14 GND13 GND12 GND11 GND10 GND9 GND8 GND7 GND6 GND5 GND4 GND3 G...

Page 48: ...CU 5VSB R327 100 C575 1k R R977 0_DNS Y3 12MHz 1 2 CON25 JK_2 5 1 2 3 4 5 1 2 3 4 5 R601 330 R338 100 R413 100 R336 100 R332 100 R329 100 C390 22pF R600 1K R609 100K R323 100 C708 10UF 16V CON33 TJC3 4A_DNS 1 2 3 4 C709 0 1uF C576 0 01uF R602 100 R604 100 R328 100 R418 100 C512 0 1uF U37 AP1701_DNS 1 2 3 GND RESET VCC D138 1N4148 R322 100 R806 4 7K L32 10uH 1 2 R803 4 7K R342 4 7K R970 4 7K R318 1...

Page 49: ...U26 1 2 3 4 5 6 7 8 9 10 11 12 13 14 15 16 17 18 19 BST IN SW GND EN FB COMP SYNC TH_GND TH_GND TH_GND TH_GND TH_GND TH_GND TH_GND TH_GND TH_GND TH_GND TH_GND Q27 AO3401 1 2 3 C615 Option 1 2 R348 1K Q14 MMBT3904 1 2 3 CNA3 TJC3 3A 3pin 2 5mm _DNS 1 2 3 4 C11 470uF 16V R374 0_DNS R344 100k C426 0 22u D95 1N5822 C417 3 3nF C433 10uF 16V_DNS C12 470uF 16V C421 0 1uF C524 0 1uF 1 2 C436 0 1uF C427 0 ...

Page 50: ...478 100uF 16V U35 AP1117_ADJ 2 3 1 4 OUT IN GND TAB C518 0 1uF C521 0 1uF C463 0 1uF 1 2 C450 0 1uF C470 100uF 16V C475 0 1uF R484 100R R386 0 FB28 150_Ohm_2A 1 2 C466 100uF 16V C461 0 1uF U27 AP1084E33 2 3 1 4 OUT IN GND TAB R804 4 7k R483 220_1 C578 0 1uF C465 0 1uF 1 2 Q38 AO3401 1 2 3 C464 100uF 16V R387 0_DNS C448 22uF 16V U32 AP1117E18 2 3 1 4 OUT IN GND TAB C459 0 1uF L39 10uH C472 10uF 16V...

Page 51: ...88 0 1uF C501 0 1uF DDR II U34B K4T51163QC 2CE7_1 NC OPTION A1 A3 A7 A9 B2 B8 C1 C3 C7 C9 D2 D8 E1 E3 E7 E9 F2 F8 G1 G3 G7 G9 H2 H8 J1 J3 J7 J9 N1 M9 P9 R1 A2 E2 R3 R7 R8 VDD VSS VSSQ VDDQ VSSQ VSSQ VDDQ VDDQ VDDQ VDDQ VSSQ VSSQ VDD VSS VSSQ VDDQ VSSQ VSSQ VDDQ VDDQ VDDQ VDDQ VSSQ VSSQ VDDL VSS VSSDL VDD VSS VDD VSS VDD NC1 NC2 NC4 NC5 NC6 C489 0 1uF C490 0 1uF C496 0 1uF DDR II U33B K4T51163QC 2C...

Page 52: ...4 Active low 33 HDMI HPD Recognition GPIO_HPD Active high 04 SD card detect SD_DET 62 Active low 63 Back light voltage control BL_BR_CNTRL PWM type Video IN select VID_IN_SEL 55 Audio PWR Amp MUTE AUD_AMP_MUTE 47 Active low Audio IC s reset AUD_RESETN 48 Active low Note Tuner PWR switch TU_5V_SW 42 0 OFF 1 ON 1111 Setting 0000 0001 1010 1110 Boot from 8 bit NAND flash 1100 1011 0010 0011 Boot from...

Page 53: ......

Page 54: ...33 10 TROUBLE SHOOTING GUIDE 10 1 Simple check 10 1 1 LCD is not bright 10 1 2 No picture ...

Page 55: ...ctor CN4 P1 ĺ CN4 P13 ĺCN5 P1 P2 P3 ĺCN4 P2 P3 P4 P5 ĺCN4 P12 ĺCON4 P14 2 Check output voltage voltage Vblon ĺ 5VĺVipwm connector CN4 P12 ĺJ28 P26 P30 ĺCON4 P14 CN4 CN5 ON 2 0 5 0 V On Off Control Voltage OFF VBLON 0 0 8 V MAX 3 0 3 15 3 3 V Maximun duty ratio Internal PWM Control Voltage MIN VIPWM VSEL L 0 V Minimum duty ratio ...

Page 56: ...35 CN4 CN5 10 1 3 No sound ...

Page 57: ... 1st pin of CN20 is 18V Is 45th of U29 low Change U29 N Y N Y Y N Change power board Y Is there output of 21st and 39th pins of u29 Change main board Change U29 N Y Change speaker IS there input of 2ed pin of U29 ...

Page 58: ...peaker Second check CN2 CN3 with oscillograph confirm wave output or not Connector CN2 CN3 10 2 PSU failure check State No power First check cables which connect with PSU then check as follows 1 Check PSU input voltage AC input voltage 120V connector CON1 P1 P5 2 Check PSU output voltage orderly voltage 5V Stand By ĺON 5 0V ĺ 24V 12V connector CON4 3 ĺCON4 1 ĺCON4 6 7 CON2 1 4 State No sound 10 3 ...

Page 59: ...nvironment and something electric enter into LCD Mis align between TCP and Panel Panel failure TCP failure Failure Mode Part Name Description Phenomena Failure cause Dot Defect Bright dot dark dot in panel Incoming Inspection Standard Polarizer Bubble Bladder in Polarizer Bladder between Polarizer and top glass Polarizer Scratch Polarizer Scratch Tine or rigidity arose Panel or Polarlzer F M insid...

Page 60: ...om imbalance Abnormal Color Only color abnormal Capacitance improper bring crosstalk inside LCD panel Circuit Abnormal Color Only color abnormal 1 Chip lose action 2 IC short or joint bad 3 Panel and VSC connect bad Failure Mode Part Name Description Phenomena Failure cause Mechanlcal Nolse When turn panel appear cacophony Caused by Mechanica noise of backlight unit Ripple Connectric circle Causee...

Page 61: ...down B L shutdown in sometime Short between lamp housing and wire Because consume power too much F M F M in B L white back Rotundity or wire like F M in B L unit Failure Mode Part Name Description Phenomena Failure cause Light leakage Brightness at bottom of LCM brighter than normal B L unit badness Uniformity B L brightness asymmetric Sheet in B L unit is uneven Mechanlcal or B L Mount hole Lack ...

Reviews: