


42
NS-28DD310NA15 Insignia 28" LED TV/DVD Combo
www.insigniaproducts.com
Adjusting DVD player settings
1
While in DVD mode and with playback stopped
or no disc in the disc slot, press
SETUP
. The
General Setup Page menu
opens.
2
Press
S
or
T
to select a setting or press
W
or
X
to select another menu, then press
OK
.
3
When a setting is selected, press
W
or
X
to
adjust the setting, then press
OK
.
4
Press
W
to return to the top of the settings list if
you want to adjust more settings, or press
SETUP
to close the menu.
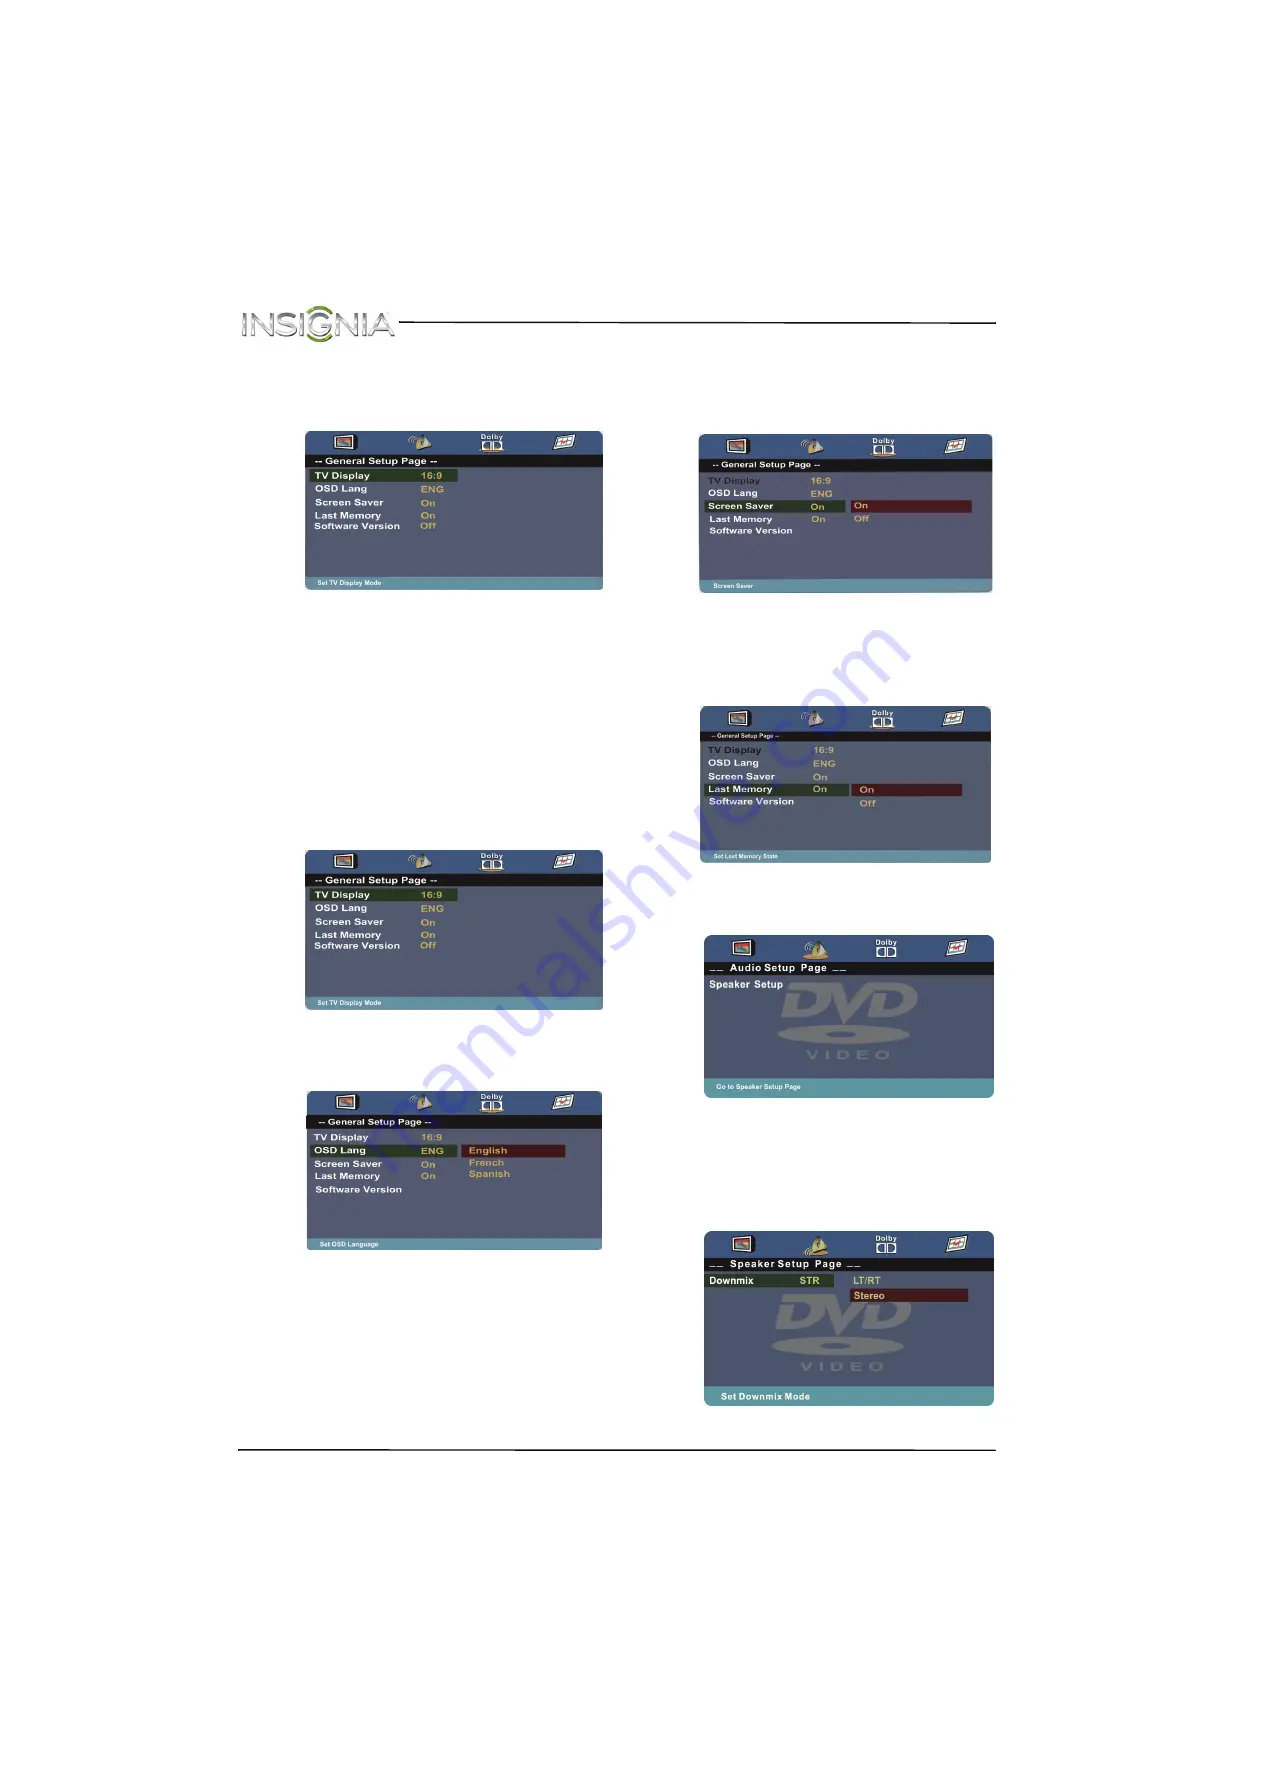
DVD on-screen menus
General Setup Page
•
TV Display
—Select the screen aspect ratio.
The default setting is
Wide
(16:9). You cannot
change this setting.
•
OSD Lang
—Selects the language for the
on-screen menus. You can select
English
,
French
, or
Spanish
.
•
Screen Saver
—When this setting is turned on
and the DVD player is stopped or paused for
three minutes, a screen saver appears. To close
the screen saver, press any DVD control
button. You can select
On
or
Off
.
•
Last Memory
—If you turn off your TV with a
disc in the disc slot or eject a disc when
Last
Memory
is turned on, then turn on your TV
or insert the same disc, playback resumes
where it stopped.You can select
On
or
Off
.
Audio Setup Page
Press
OK
or
X
to access the
Speaker Setup
menu.
Downmix
—You can select:
•
LT/RT
—Outputs the audio from a disc
recorded with multi-channel audio to the left
and right channels.
•
Stereo
—Outputs the audio from a disc
recorded with multi-channel audio in stereo.