background image

Mileage Coach

Clear Fuel Avg:         0.00
Last Fuel Econo:        0.00
Trip Odometer:         1250
Fuel Price: $           0.00
Mileage Cost: $         0.00
Trip Cost: $            0.00

44

Mileage Coach Set Up

Mileage Coach

The Mileage Coach feature provides useful tips and tools that 

help you learn ways to improve your fuel mileage.

The Trip Odometer is used to 

calculate the Trip Cost and 

Fuel Average.

The Last Fuel Economy option 

allows you to enter your actual 

Fuel Economy value.  This value 

is important and should be calcu-

lated and entered regularly.  This 

can be manually calculated by 

dividing the distance travelled by 

how much fuel you have used 

(Distance/Fuel = Fuel Economy). 

Some vehicles have their own 

Fuel Economy average that is 

displayed in cab and may be used 

instead of a manual calculation.

The Clear Fuel Average 

option clears the calculated 

average displayed in the 

Mileage Average PID.

Mileage Coach

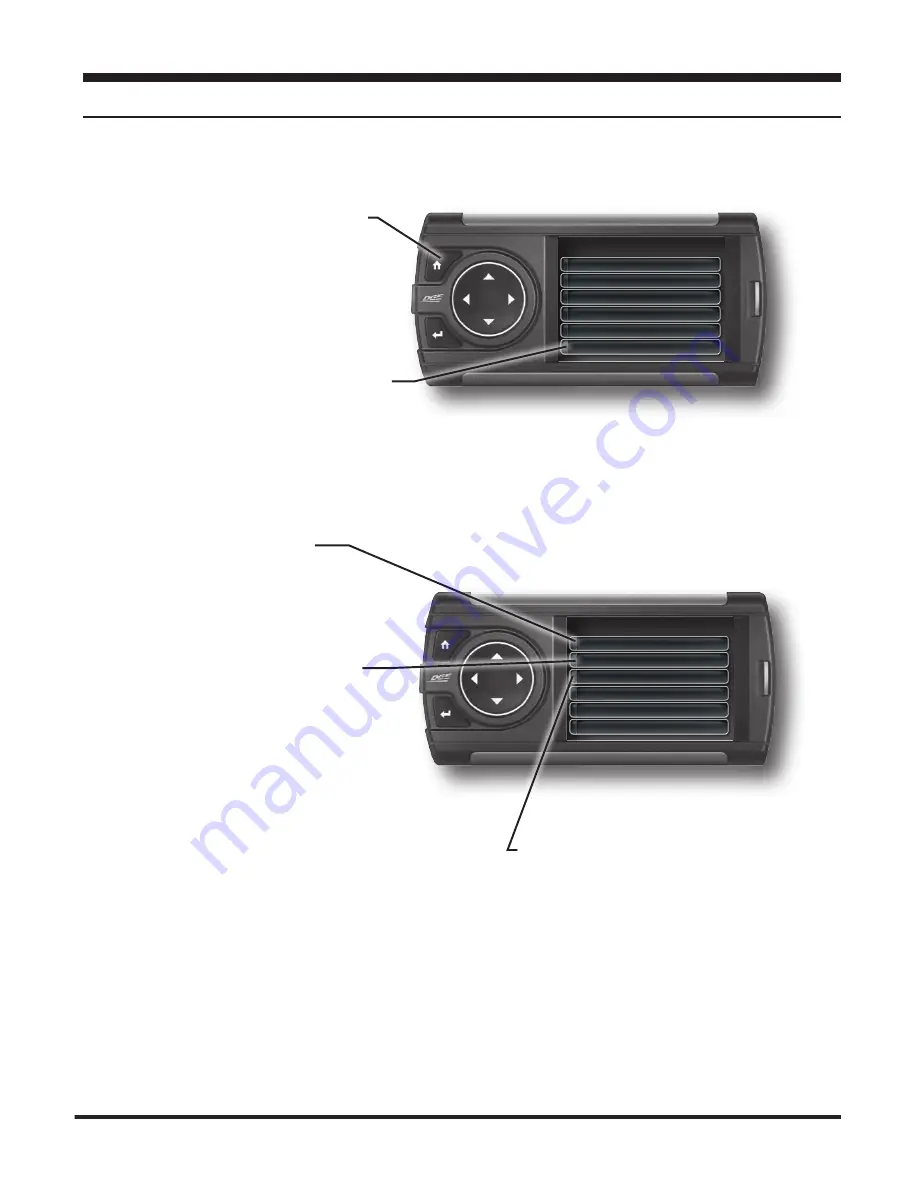
STEP 1 -

 Press the Home 

button to enter the Main 

Menu.

STEP 2 -

 Use the Up/Down 

arrow buttons to scroll down 

to the Mileage Coach option.  

STEP 3 -

 Press Enter.

Main Menu

Records
Performance Tests
Data Logging
Diagnostics
Maintenance Manager
Mileage Coach

Summary of Contents for CS 2

Page 1: ......

Page 2: ...he Default Background Image 16 Configuring the Home Screens 18 Individual Gauge Setup 20 Download and Install MyStyle Software 21 Adding Custom Background Images 22 Settings 22 Accessory Settings Turbo Cool Down Setup 23 Vehicle Settings Tire Size 24 Alert Settings 25 Sound Duration Alerts 25 Backlight Autodim 26 Background Color 27 Menu Time out 27 Units 27 Factory Reset 28 Diagnostics 28 Read DT...

Page 3: ... 41 Entering the Odometer Value 42 Setting the Alert Threshold 43 Customizing Maintenance Items 44 Mileage Coach 44 Mileage Coach Set Up 46 Additional Features 46 EFI Live 46 Smarty POD 47 EAS 12V Power Kit 48 Appendix 48 Limited 1 Year Warranty 49 Important Information about your Vehicle s Warranty 50 Commonly Used Acronyms 51 Trouble Shooting Guide 51 OEM EGT Locations Diesel Trucks Only ...

Page 4: ...duct in conformance with instructions in this Manual Caution alerts you to particularly important things that will keep your vehicle operating properly The Edge Product you have purchased is a high performance product As such it does present some risks of which you should be fully aware Do not use this product until you have carefully read the following safety information and the Owner Agreement N...

Page 5: ...Other prod ucts may have features incompatible with your Edge device Fol low all installation and operating instructions and do not stack products 4 Some modifications may affect other parts of your vehicle For example if you remove adjust the speed limiter in your vehicle be sure your tires and other components are rated for the increased speeds they will have to withstand Not doing so can lead t...

Page 6: ...iew The Display At a Glance HDMI Port Mount Receiver USB Port Ambient Light Sensor Home Enter Up Down Left Back Right Forward Gauges Level Indicator Alert Indicator Lights Orange Data Run Red Alert Blue Maint Item Due Green Regen ...

Page 7: ...7 At a Glance Accessories Windshield Mount OBDII to HDMI cable OBDII EAS HDMI Suction Cup Cam Lever Dual Tab Mount Mini USB Cable Zip Ties Alcohol Wipe Iso propyl Adjustment Nut ...

Page 8: ...esels to filter out soot EAS Expandable Accessory System Allows you to connect aftermarket sensors and other devices such as turbo timers ECM Engine Control Module aka ECU A computer that controls various sensors and engine components TCM Transmission Control Module aka TCU A computer that controls automatic transmissions PCM Power Control Module aka PCU Combines and provides power for the ECM and...

Page 9: ...ss the Enter button to select a sub menu Main Menu Screen Layout Records Data Logging Diagnostics Settings Help Background Layout 1 Master Layout 2 Needles Screen Layout STEP 4 Press the left arrow to return to the previous screen Main Menu Screen Layout Records Data Logging Diagnostics Settings Help STEP 5 Press the Home button to return to the gauge screen ...

Page 10: ...P 8 Click Close to exit once the installation is complete STEP 9 Double click the Fusion Icon on your desktop STEP 10 Click on the Create a New User option STEP 11 Fill in the required information and click Save An e mail containing your fusion password will be sent to the e mail you used in the form Use this password to login into Fusion NOTE The password is case sensitive STEP 12 Double click th...

Page 11: ...esktop STEP 2 When asked plug the display into the computer using the supplied USB cable STEP 3a If an update is available click YES to continue DO NOT unplug the display from the computer during an update STEP 3b If an update is not available click the OK button STEP 4 Once the update is complete click Close Getting Started ...

Page 12: ...hicles the side panel may be removed to expose the underside of the dash for easier routing Leave exposed until after the display is installed Windshield Mount Installation HDMI OBDII STEP 1 Use the Alcohol Wipe to liberally clean the windshield in the area you plan to place the suction cup Allow the glass to fully dry STEP 2 Firmly press and hold the suction mount against the glass STEP 3 Rotate ...

Page 13: ...lign the Dual Tabs on the Mount with the mount receiver on the back side of the display then slide it into place STEP 3 Adjust the viewing angle using the adjustment nut on the mount s swivel head STEP 4 Pull any extra cable back behind the pillar and dash Re install any panels removed during the Cable Installation Getting Started ...

Page 14: ...enu will appear Display Set Up STEP 1 Turn the vehicle to the ON or RUN key position STEP 2 Select one of the available options that applies Ford Chrysler Dodge GM Chevy Import EAS 12V Power Kit STEP 3 Follow the on screen instructions The Main Gauge screen will appear OEM Selection Menu Ford Chrysler Dodge GM Chevy Import EAS 12V Power Kit ...

Page 15: ...the Background option Refer to the Adding Custom Background Images section of this manual for information on how to add your own images to the display Main Menu Screen Layout Records Performance Tests Data Logging Diagnostics Maintenance Manager Screen Layout Background Layout 1 Master Layout 2 Needles STEP 4 Use the Left Right buttons to scroll through the available background images ...

Page 16: ...option STEP 3 Select either of the Layout options Main Menu Screen Layout Records Performance Tests Data Logging Diagnostics Maintenance Manager Screen Layout Background Layout 1 Master Layout 2 Needles STEP 4 Use the Up Down buttons to scroll through the available screen layouts Press Enter to select an option Screen Layout 1 Master Digital Retro Needles ...

Page 17: ...tal Gauges Retro Gauge Needle Gauges STEP 5 Once you have highlighted a screen layout press the Home button to return to the main gauge screen STEP 6 While on the main gauge screen press the Left or Right arrows to change between screen Layouts 1 and 2 ...

Page 18: ...the gauge location that you would like to modify STEP 3 Highlight the Select New PID option Then press Enter STEP 4 Use the Up Down arrow buttons to highlight a new PID then press Enter Engine Gas Temp Select New PID Alert Settings Gauge Color PID Information Exit Menu PID Select Menu Engine Coolant Temp Engine Load Engine Oil Pressure Engine RPM Fuel Level Remaining Fuel Rail Pressure ...

Page 19: ...fer to Alert Options section for more info regarding Alert Settings Some Analog Gauges allow you to change it s color STEP 6 Return to the main gauge screen The new PID will be displayed along with any customized options you may have changed STEP 5 Select each of the remaining options to further customize your gauge ...

Page 20: ... a folder location then click Next to continue STEP 6 Click Next to confirm the installation STEP 7 Click the OK button if during the installation the following message appears These drivers are not Windows Logo or WHQL verified If you are asked please choose to install them anyway STEP 8 Click Close to exit once the installation is complete MyStyle is software that allows you to customize your di...

Page 21: ...e supplied USB cable When a display is plugged in an image of the display will appear with a 9 digit number STEP 3 Click the image of your display STEP 4 Choose to Customize the Display STEP 5 Select an Image to replace STEP 6 Select the Open Image button STEP 7 Use the avail able tools to size and align your image STEP 8 Click the Save Background button to save your progress This will also save t...

Page 22: ... the previous menu WARNING Do not use this feature in an enclosed area Settings Accessory Settings Vehicle Settings Alert Settings Sound Duration 3 sec Backlight Autodim 99 Background Color This feature is only available and listed if an EAS Turbo Timer has been installed The Turbo Cool Down feature allows the engine to continue running after the key is in the off position until one of four condit...

Page 23: ...re size to the original default setting STEP 6 Use the arrow buttons to highlight a number then press enter to select it When done select Done or press Enter STEP 1 Press the Home button to enter the Main Menu STEP 2 Use the Up Down arrow buttons to scroll down to the Settings option STEP 3 Press Enter STEP 4 Select Vehicle Settings then select the Tire Size option STEP 5 Select the size option th...

Page 24: ... On or Off the alert system for all PIDs Turn On or Off this specific PID s alerts Turn On or Off the alert sound for this PID only This is the point at which you want the alert to be triggered for this PID The example above shows 11 5 as the value If the display detects a battery voltage of 11 5 volts or less the alert will be triggered During an alert 1 One of these lights will light up red and ...

Page 25: ...etects how much light is enter ing the vehicle cab During the day the display will be at it s maximum bright ness As it gets darker outside the display will automatically dim according to the amount of sunlight If the value is kept at 99 the display will be as dim as possible If the value is set to 50 the display will only be half as dim at night STEP 1 Press the Home button to enter the Main Menu...

Page 26: ...en Use the Left Right arrow but tons to adjust their values STEP 6 Make your adjustments Settings Accessory Settings Vehicle Settings Alert Settings Sound Duration 3 sec Backlight Autodim 99 Background Color The viewing window allows you to see the changes you are making real time Red Values Green Values Blue Values Opacity Value If this value is above 80 you may no longer see the background Use t...

Page 27: ...its are in English and then switch to Metric the values will remain the same and not be converted Factory Reset This feature will return the display to the factory default settings All records and input data will be deleted and not recoverable STEP 1 Press the Home button to enter the Main Menu STEP 2 Use the Up Down arrow buttons to scroll down to the Settings option STEP 3 Press Enter STEP 4 Sel...

Page 28: ...t is a good resource for looking up most codes STEP 1 Press the Home button to en ter the Main Menu STEP 2 Use the Up Down arrow but tons to scroll down to the Diagnostics option STEP 3 Press Enter STEP 4 Select Trouble Codes Press Enter STEP 5 Select Read DTCs Press Enter STEP 6 If a code is listed select the code to see a brief explanation of the issue Diagnostics Trouble Codes Manual Regen Inje...

Page 29: ...ile the truck is run ning Dodge Trucks however may require you to clear only when the key is on and the engine is not running STEP 1 Press the Home button to enter the Main Menu STEP 2 Use the Up Down arrow buttons to scroll down to the Diagnostics option Press Enter STEP 3 Select Trouble Codes Press Enter STEP 4 Select Clear DTCs Press Enter STEP 1 Press the Home button to enter the Main Menu STE...

Page 30: ...Do not connect any shop exhaust hoses or vents to the tail pipe Available only on specific Diesel Trucks Manual regeneration allows you to manually clear out the Diesel Particulate FIlter DPF Completeing a manual regeneration cycle will clear the soot mass in the filter and lower exhaust back pressure to improve exhaust flow STEP 1 Press the Home button to enter the Main Menu STEP 2 Use the Up Dow...

Page 31: ...t noise increased Exhaust Gas Tem perature EGT PASSIVE REGENERATION Passive regeneration occurs when the exhaust gas temperature EGT reaches an appropriate level in order to oxidize or burn soot to clean the DPF This method can happen as a result of normal engine operating conditions typically when the engine reaches an EGT high enough to burn off the soot i e heavy towing high load conditions etc...

Page 32: ...idual cylinder based on the variations in engine crankshaft speed These will change depending on if the transmission is int Neutral or Drive Injectors that read outside of the 4 0 in park neu tral or 6 0 in drive may be faulty STEP 1 Press the Home button to enter the Main Menu STEP 2 Use the Up Down arrow buttons to scroll down to the Diagnostics option STEP 3 Press Enter STEP 4 Select Injector B...

Page 33: ...auge screen If you suspect a faulty injector we recommend consulting a professional diesel mechanic who can verify the issue and also perform a cylinder power balance test to further diagnose Diagnostics Inj1BalRate Inj3BalRate Inj5BalRate Inj7BalRate Inj2BalRate Inj4BalRate Inj6BalRate Inj8BalRate 2 0 1 0 2 0 2 0 0 0 2 0 3 0 1 0 ...

Page 34: ...ress the Home button to enter the Main Menu STEP 2 Use the Up Down arrow buttons to scroll down to the Performance Testing op tion STEP 3 Press Enter STEP 4 Select either the 0 60 or Quarter Mile option STEP 5 Bring the vehicle to a complete stop STEP 6 Use the drag strip style light tree on the left of the screen to know when to begin accelerating Once you have reached 60 mph or a quarter mile th...

Page 35: ... option STEP 3 Press Enter STEP 4 Scroll down and select the Vehicle Weight option STEP 5 Use the Up Down buttons to enter the correct weight Press Enter STEP 6 Press the back button to return to the main menu Select the Perfor mance Tests option Press Enter STEP 7 Select the Horsepower option Bring the vehicle to a complete stop STEP 8 Follow the on screen instructions Press any button to stop th...

Page 36: ...ording session will begin If the indicator light is red there is currently a recorded file associated with that run STEP 1 Press the Home button to enter the Main Menu STEP 2 Use the Up Down arrow buttons to scroll down to the Data Logging option Press Enter STEP 3 Select one of the 5 Data Run options This will turn the run On or Off NOTE Only one run can be turned on at a time STEP 4 Select the H...

Page 37: ... click the MyStyle icon on your desktop STEP 2 Connect the display using the supplied USB cable When a display is plugged in an image of the display will appear with a 9 digit number STEP 3 Click the image of your display STEP 4 Select Data Logs STEP 5 Click the Save File As button and save the file STEP 6 Locate the saved file on your computer and open it The file will be saved as a CSV file and ...

Page 38: ...the Up Down arrow buttons to scroll down to the Records option Press Enter STEP 3 Scroll through the list to view all records STEP 4 While an individual record is highlighted you can clear it by pressing the Enter button STEP 5 If you want to clear all records at the same time highlight the Clear All option and press the Enter button Main Menu Screen Layout Records Data Logging Performance Testing...

Page 39: ...l as its serial number Vehicle Info Displays important information about your vehicle that is used by technical support to trouble shoot issues Contact Info Shows our website company address the technical support email address and the technical support phone number Tech Support Tools This menu should only be used when requested by Edge Products Technical Sup port personnel The Help Menu contains u...

Page 40: ... Screen Layout Records Data Logging Performance Testing Diagnostics Maintenance Manager Main Menu Maintenance Manager Maintenance Mgr On Maintenance Items Odometer 12500 Alert Threshold 100 The Maintenance Manager calculates the odometer value of your vehicle using the vehicle speed and time Since this option is not going to always match your real dash odometer reading you will need to periodicall...

Page 41: ...w buttons to scroll down to the Odometer option STEP 5 Press Enter STEP 6 Use the arrow buttons to highlight each number then press Enter to select it STEP 7 Once the correct Odometer value has been entered highlight the Done button and press Enter Main Menu Screen Layout Records Data Logging Performance Testing Diagnostics Maintenance Manager Maintenance Manager Maintenance Mgr On Maintenance Ite...

Page 42: ...uttons to scroll down to the Main tenance Manager option STEP 3 Press Enter STEP 4 Use the Up Down arrows to highlight the Alert Threshold option STEP 5 Press Enter STEP 6 Use the Up Down arrow buttons to adjust the threshold value STEP 7 Press the Enter button to save the value and return to the Maintenance Manager screen Main Menu Screen Layout Records Data Logging Performance Testing Diagnostic...

Page 43: ...the mile age for the Next Service Enter the interval in miles in which you would like the item to alert you In this example you will be Alerted every 3000 miles to change your Air Filter NOTE Refer to your vehicle user manual to determine what interval is recom mended for each Maintenance Item Based on the Odometer value you previously input and the Interval value above the Service Mileage that wi...

Page 44: ...d should be calcu lated and entered regularly This can be manually calculated by dividing the distance travelled by how much fuel you have used Distance Fuel Fuel Economy Some vehicles have their own Fuel Economy average that is displayed in cab and may be used instead of a manual calculation The Clear Fuel Average option clears the calculated average displayed in the Mileage Average PID Mileage C...

Page 45: ...n of this manual to display one or both Mileage Coach PIDs on the main gauge screen Mileage Average displays the calculated average MPG or L 100km and is up dated continuously while driving The average is calculated only when the PID is being displayed on the main Gauge Screen This value will typically change more during start stop driving and less on the highway Mileage Instantaneous shows a cons...

Page 46: ...ve tunes on the fly NOTE Your current level will be displayed in the level indicator box 5 custom levels 1 5 are usable with this feature Smarty POD If you have a Smarty device for an 03 09 Dodge Diesel Truck with the Power On Demand option enabled you have the option to adjust the Smarty levels with your Insight Follow these in structions to turn this option on or off using your insight STEP 1 Pr...

Page 47: ...wer levels using the UP DOWN arrows An additional adapter kit may be purchased allowing you to con nect an Insight to a non OBDII equipped vehicle This kit works along with our EAS system giving you the ability to install and monitor multiple sensors For more information on how to install and operate this function ality refer to the EAS User Manual ...

Page 48: ...ed or travel time incurred in diagnosis for defects removal or reinstallation of this product or any other contingent expenses If the BUYER sends back a failed unit that is out of warranty and chooses to buy a refurbished unit the refurbished unit will only carry a 90 day warranty If the BUYER purchases a new unit at a predetermined discounted rate it will have the standard 1 year warranty Under n...

Page 49: ... hicle and you take it in for warranty repair the dealer must honor your war ranty unless whatever modifications you have added to your vehicle actually caused the problem in question However the reality is that many dealer ships have been known to void warranties on vehicles that use aftermarket products as a matter of policy This applies in particular to those aftermarket products that produce h...

Page 50: ...grated Controller Module IDM Ignition Driver Module ISC Idle Speed Control ITS Idle Tracking Switch IVS Idle Validation Switch Diesel KAM Keep Alive Memory KOEO Key On Engine Off KOER Key On Engine Running KS Knock Sensor LOAD Engine Load LOS Limited Operation Strategy LPD Line Pressure Desired LUS Lock up Solenoid MAF Mass Airflow MAFV Mass Airflow Sensor Voltage MAP Manifold Absolute Pressure MA...

Page 51: ...d by a blown OBDii Cigarette Lighter Fuse Replace fuse and test unit again On Star Unable to receive monthly On Star e mail reports Having the display plugged into your OBDii port may disturb On Star while gathering information for their reports Unfortunately there is no real solution for this issue You could try and call On Star to see when they gather their re ports and unplug your device during...

Page 52: ...ons not found in the user guide call Edge Products Technical Support 888 360 EDGE 3343 6 00 am 6 00 pm MST To expedite your support call please have your Vehicle Information Part Number and Serial Number ready prior to calling Technical Support ...

Reviews: