


Page 2
GBxCart RW Manual
Revision 7
How to Use
1.
Before inserting the cartridge, select the correct voltage for your cartridge using the switch (GB/GBC use 5V while
GBA uses 3.3V) and connect the USB cable to ensure the correct voltage LED lights up and then unplug the device. If
the device isn’t automatically detected, you will need to open up Device manager, find the “USB 2.0 Serial” device
and update the driver using the files in the \Drivers folder.
2.
Insert your cartridge to the device and connect the USB cable.
3.
For the GUI interface, follow “using the GUI Program” steps or for the console program follow “using the Console
Program” steps.
4.
When changing cartridges, always unplug the USB cable from the device and follow step 1 again.
Using the GUI Program
1.
Download and Install Microsoft Visual C++ Redistributable Packages for Visual Studio 2015 -
https://www.microsoft.com/en-us/download/details.aspx?id=53840
2.
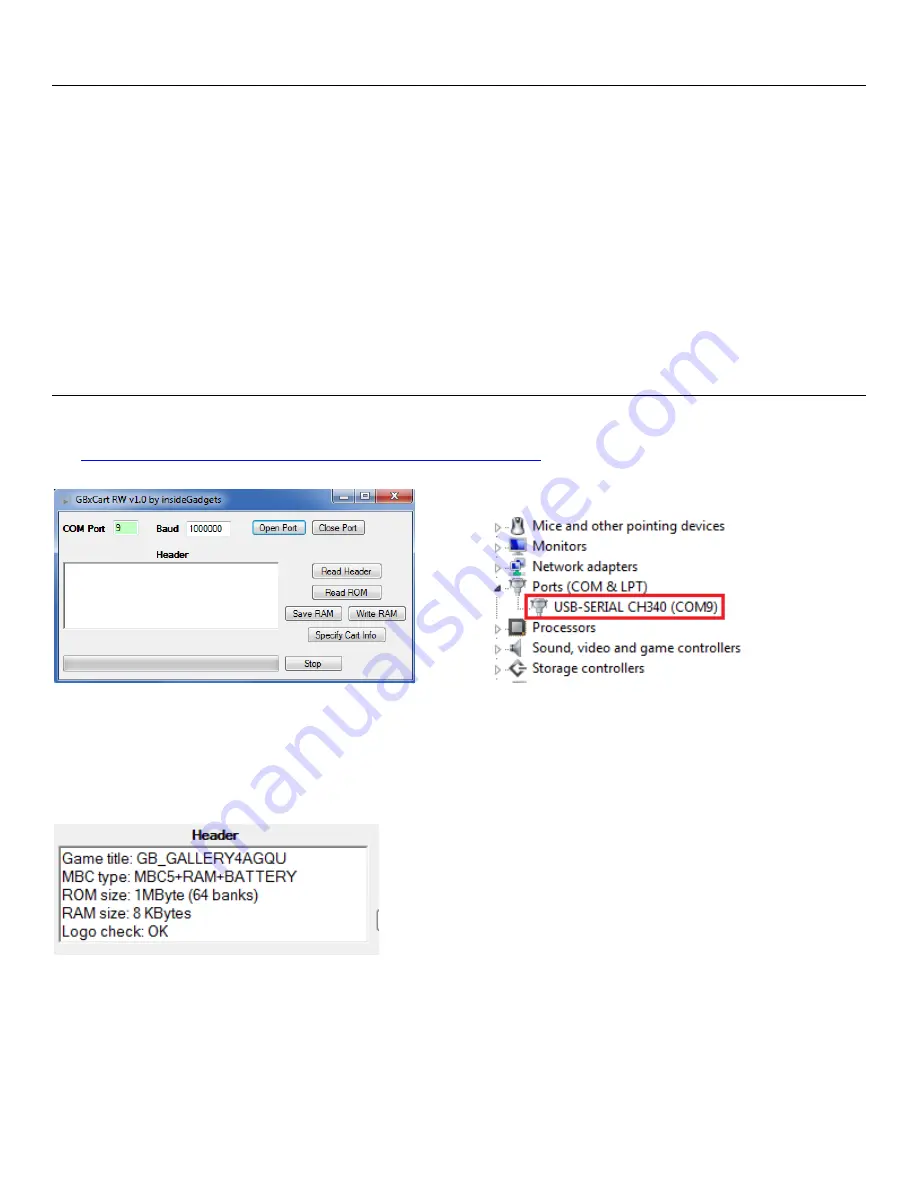
Open \Interface_Programs\GBxCart_RW_vx.x_GUI_Interface\GBxCart_RW.exe and change the COM port to match
the COM port your operating system has assigned the device, this can be found in device manager.
3.
Click the Open Port button; if the COM port text box turns green then it has successfully connected. If it turns red,
please double check the COM port and try again. Once the port is successfully opened, the port number and baud
rate will be remembered for next time.
4.
Press the Read Header button and the cartridge information should show up. (GBA carts take 4 seconds as tests are
being performed to determine the ROM and SRAM/Flash/EEPROM sizes). Make sure that the “Logo check” comes
back as OK otherwise the cartridge may not be read correctly and you will have to disconnect the device, remove
and re-insert the cartridge.


