


— 13 —
Section IV
PROGRAMMING THE ENCODER
Computer Requirements
Software provided with the Model 703 RDS encoder runs
under the Microsoft Windows® 2000, XP and Vista operating
systems. This single software program actually serves sev-
eral encoder models. The computer communicates with the
703 encoder using the
Universal Serial Bus
(USB).
NOTE:
It is very important to install the software from the
CD-ROM before connecting the Model 703 to the computer.
Be sure to observe this sequence to ensure proper opera-
tion.
Installing the Software
1.
If upgrading from an earlier installation of the Model
703 encoder, first use the
Add or Remove Programs
(
Pro-
grams and Features
under Vista) utility under the Win-
dows®
Control Panel
to fully remove any previous version
of Model 703 software.
2.
Insert the software CD in the computer. The program
does incorporate an autorun utility, but if the installa-
tion routine does not automatically begin, click on:
Start
,
then select:
Run
and manually type:
D:setup.exe
into the
box. (This assumes that the
D:
drive is your CD drive.)
NOTE:
This installation makes use of the Microsoft .NET
Framework, which should already be resident on any up-
to-date PC. In the event that this is not the case, the se-
tup procedure will prompt you to install .NET at this
time. .NET installation files are included on the installa-
tion CD, but if installation is being made from files
downloaded from the Inovonics Website, .NET must be
downloaded (at no charge) from the Microsoft down-
loads page: www.microsoft.com/downloads.
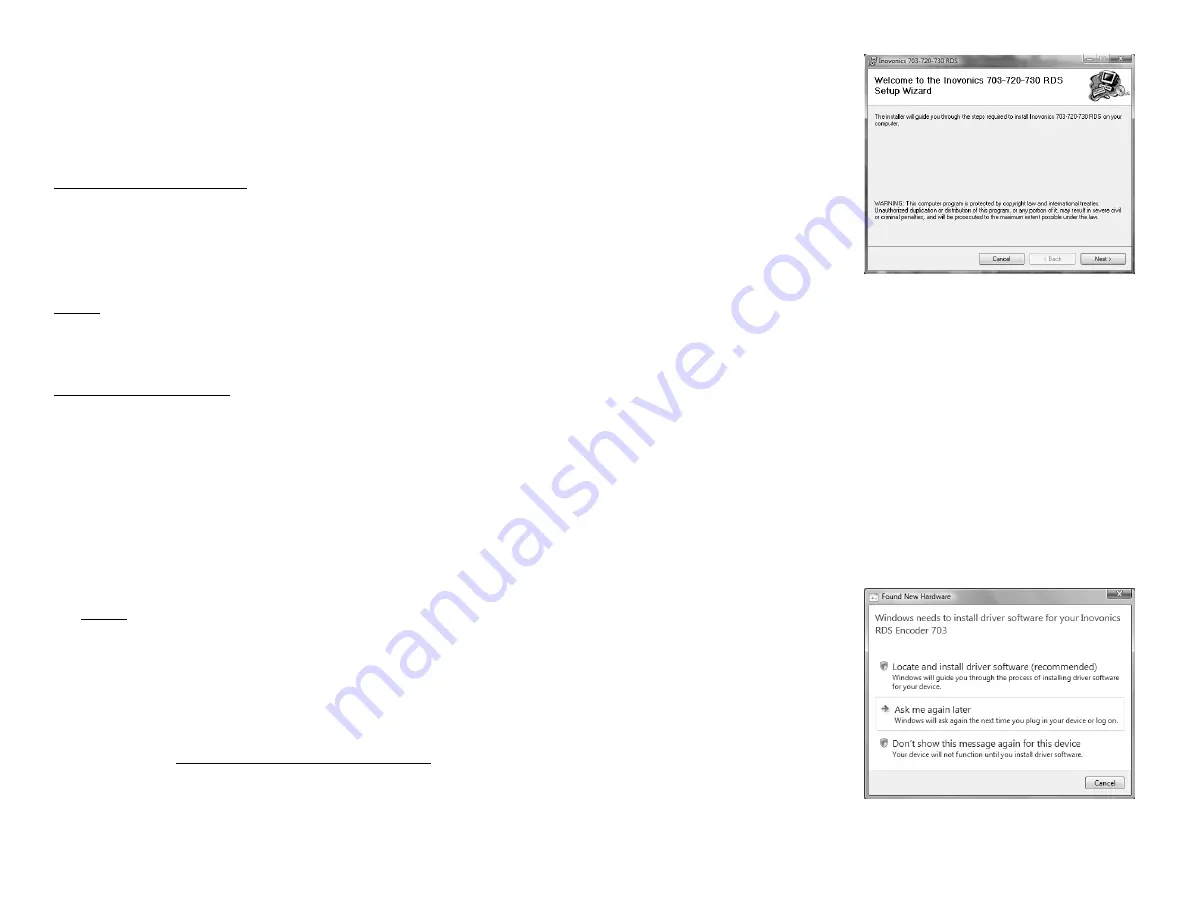
At this point you should have the Setup Wizard shown at
the top of the next page on your computer.
— 14 —
3.
Click:
Next>
to begin
the software installa-
tion. You will be pre-
sented with various
options, but unless
you have a reason
(and the know-how!)
for doing otherwise,
simply continue to
click:
Next>
and, fi-
nally:
Install>
. This
will put the Model
703 program in your
Program Files directory and create a desktop icon.
4.
The final installation screen will prompt you to check for
any updates to Microsoft’s .NET Framework. Although
the setup CD contains the required .NET files, it is im-
portant to have any recent Microsoft updates to .NET.
These normally come as part of the usual Windows® up-
dating process.
5.
Next, apply power to the Model 703 encoder. The front-
panel LCD screen should light-up and display the default
menu screen. When the encoder is not connected to a
stereo generator, a flashing
NO PILOT LOCK
alarm begins
to flash after 10 seconds. This alarm may be reset for
10 seconds by pressing either front-panel button, but
the alarm does not interrupt the programming process
and may simply be disregarded.
6.
Using the USB inter-
connect cable sup-
plied, connect the
Model 703 encoder to
the computer. This
should bring up a
Found New Hardware
screen. Some ver-
sions of Windows®
may require you to
first click on a notice
in the Taskbar area.
7.
Allow Windows® to locate and install the driver, re-
inserting the installation CD-ROM if directed. The re-


