background image

                                                                                          User Manual 


19


Field 

Description 

Next 

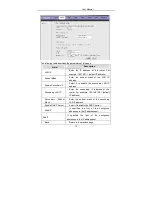
Go to the next page. 


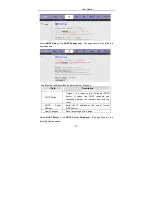
After setting, click 

Next

. The page shown in the following figure appears. 


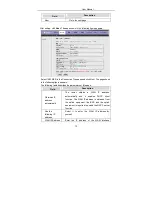
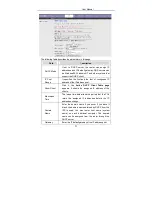
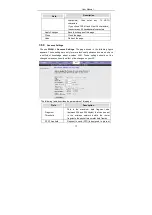
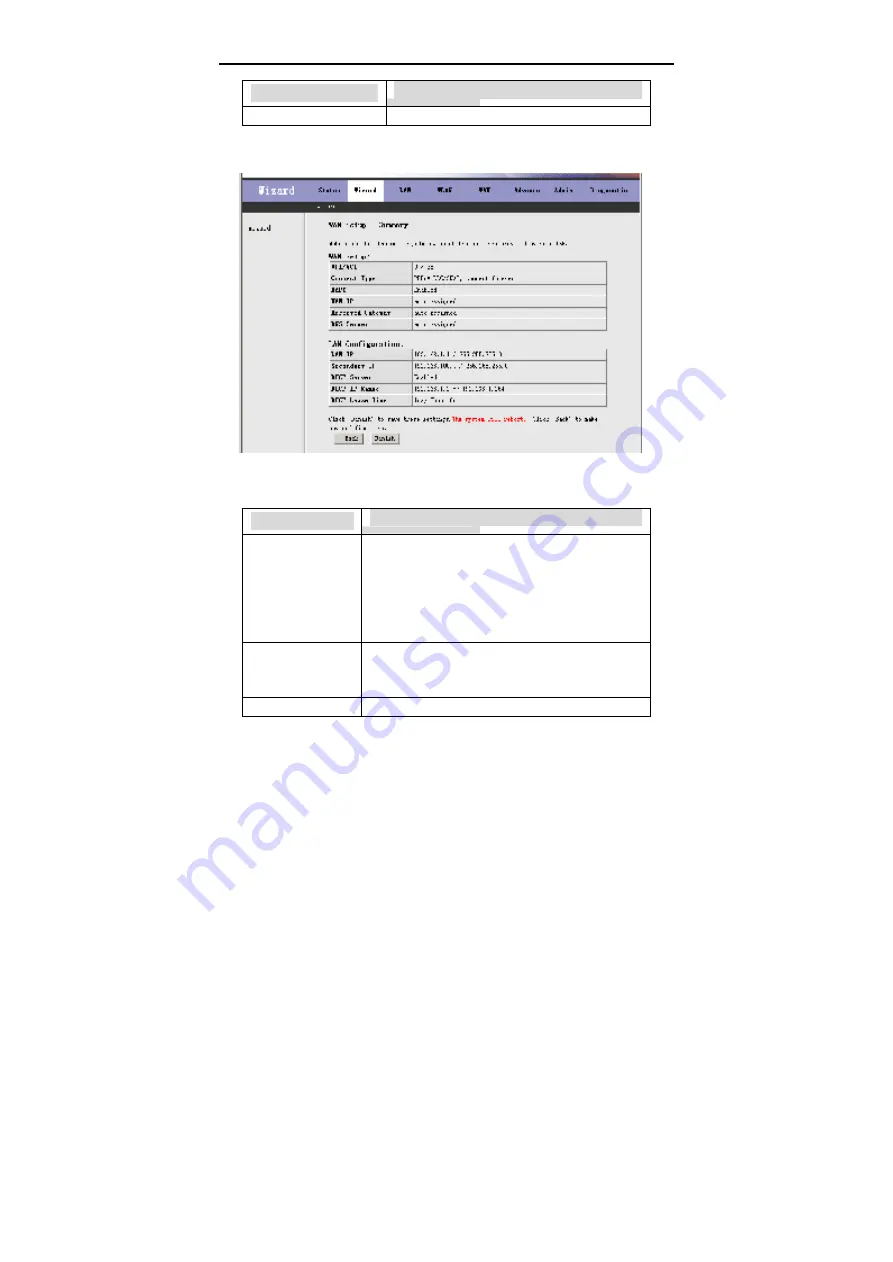
Select 1483 MER in the Connection Type page and click Next. The page shown 

in the following figure appears.       

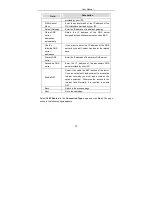
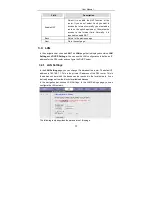
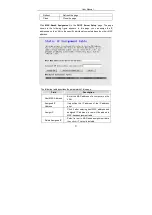
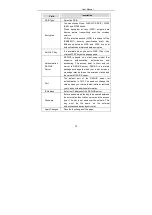
The following table describes the parameters of this page. 

Field 

Description 

Obtain an IP 

address 

automatically 

The  router  obtains  a  WAN  IP  address 

automatically  and  it  enables  DHCP  client 

function.  The WAN  IP  address  is  obtained  from 

the  uplink  equipment  like  BAS  and  the  uplink 

equipment is required to enable the DHCP server 

function. 

Use the 

following IP 

address 

Select  it  to  enter  the  WAN  IP  address  by 

yourself. 

WAN IP Address 

Enter  the  IP  address  of  the  WAN  interface 

Summary of Contents for W3400

Page 1: ...W3400 Four port ADSL 2 Wireless Router User manual ...

Page 2: ...User Manual ii ...

Page 3: ...the Web Configurator 9 3 1 Access the Router 9 3 2 Status 10 3 2 1 System 10 3 2 2 LAN 11 3 2 3 WLAN 11 3 2 4 WAN 11 3 2 5 Port Mapping 12 3 2 6 Statistic 12 3 2 7 ARP Table 14 3 3 Wizard 14 3 3 1 Wizard 14 3 4 LAN 22 3 4 1 LAN Settings 22 3 4 2 DHCP Settings 23 3 5 WLAN 28 3 5 1 Basic Settings 28 3 5 2 Security 28 3 5 3 Advance Settings 32 3 5 4 Access Control 32 3 5 5 WPS 34 ...

Page 4: ...7 4 Routing 46 3 7 5 IP QOS 47 3 7 6 Anti dos 48 3 7 7 Port Mapping 49 3 7 8 Other 50 3 8 Admin 53 3 8 1 Access Control 53 3 8 2 Commit Reboot 53 3 8 3 Password 54 3 8 4 Backup Restore 55 3 8 5 Upgrade Fireware 55 3 8 6 Time Zone 56 3 8 7 System Log 57 3 8 8 SNMP 58 3 8 9 TR069 58 3 8 10 ACL 59 3 9 Diagnostic 60 3 9 1 Ping 60 3 9 2 ATM Loopback 60 3 9 3 ADSL 61 3 9 4 Diagnostic 61 ...

Page 5: ...ides high performance access to Internet downstream up to 24Mbps and upstream up to 1Mbps Computers on the LAN side can share the Internet access through the Ethernet interface or wireless access point These local computers can communicate and share resources and files with each other when the Gaw9 5U6 4 is connected to the Internet with DSL line This device can provide high access performance app...

Page 6: ...User Manual 2 Security NAT IP filtering password authentication and denial of service DoS Compatible with IEEE 802 11b and IEEE 802 11g ...

Page 7: ...lash 2 M Feature and Technical Spec Protocol Feature RFC 1483 Bridge IEEE 802 1D transparent bridging Bridge Filtering RFC 1483 Router RIP 1 2 supported DHCP RFC1541 Server Relay Network Address Translation NAT Network Address Port Translation NAPT DNS relay IGMP v1 and v2 ADSL Feature Support ANSI T1 413 Issue2 Support ITU G 992 1 G dmt Annex A Support ITU G 992 2 G lite Annex A Support ITU G 992...

Page 8: ...t 11 5 5 2 1 Mbps DSSS CCK 802 11g compliant 54 48 36 24 18 12 9 6 Mbps OFDM Operating Channel 802 11b g 11 Ch 1 11 N America default Frequency Range 802 11 b g 2 412 2 462 GHz N America default Transmit Output Power 802 11b 16 5 dBm Normal Temp Range 802 11g 14 5 dBm Normal Temp Range Transmission Distance 300 meters outdoors 100 meters indoors coverage area varying depending on the actual enviro...

Page 9: ...s initializing the DSL line Link Green Off The DSL link is down On The device has a PPP PPPoA or PPPoE connection Blinks The device is receiving or sending data on WAN Green Off The device does not have a PPP PPPoA or PPPoE connection Internet Red On PPPoA or PPPoE is failed On The device has successful Ethernet connections Blinks The device is receiving or sending data on LAN Ethernet 1 2 3 4 Gre...

Page 10: ...To restore factory defaults keep the device powered on and push a paper clip into the hole Press down the button over 5 seconds and then release POWER Interface that connects to the power adapter 12 V DC 1 A Ethernet 1 2 3 4 Ethernet RJ 45 interfaces that connect to the Ethernet interface of the computer or Ethernet devices USB Connect to the USB device interface of the PC for USB Ethernet connect...

Page 11: ... supports the following features Various line modes External PPPoE dial up access Internal PPPoE and PPPoA dial up access Leased line mode Zero installation PPP bridge mode ZIPB 1483B 1483R and MER access Multiple PVCs eight at most and these PVCs can be isolated from each other A single PVC with multiple sessions Multiple PVCs with multiple sessions binding of ports with PVCs 802 1Q and 802 1P pr...

Page 12: ...atus display PAP and CHAP IP filter IP QoS Remote access control Line connection status test Remote management telnet and HTTP Backup and restoration of configuration file Ethernet supports crossover detection auto correction and polarity correction UPnP ...

Page 13: ...he device to the network card of the PC through an Ethernet line MDI MDIX Note Use twisted pair cables to connect the Hub or Switch Step 3 Plug one end of the power adapter to the wall outlet and connect the other end of it to the Power port of the device Figure 3 displays the application diagram for the connection of the device PC splitter and the telephone sets when no telephone set is placed be...

Page 14: ...r instead of the filter Installing a telephone directly before the splitter may lead to a failure of connection between the device and the central offices or failure Internet access or slow the connection speed If you really need to add a telephone set before the splitter you must add a microfilter before a telephone set Do not connect several telephones before the splitter Moreover do not connect...

Page 15: ...rst time Step 1 Open the Internet Explore IE browser and enter http 192 168 1 1 Step 2 In the LOGIN page shown in the following figure Enter the user name and password The user name and password of the super user are admin and admin The user name and password of the common user are user and user If you log in as the super user successfully the page shown in the following figure appears You can che...

Page 16: ...ange the most of the settings 3 2 Status In the navigation bar choose Status The Status page that is displayed contains System LAN WLAN WAN Port Mapping Statistic and ARP Table 3 2 1 System Choose Status System The page that is displayed shows the current status and some basic settings of the device ...

Page 17: ...ant to configure the LAN network refer to the chapter 3 4 1 LAN Settings 3 2 3 WLAN Choose Status WLAN The page that is displayed shows some basic wirless LAN settings of the device 3 2 4 WAN Choose Status WAN The page that is displayed shows some basic WAN settings of the device In the WAN page you can view basic status of WAN default gateway DNS server If you want to configure the WAN network re...

Page 18: ...mapping relation and the status of port mapping 3 2 6 Statistic Choose Status Statistic The Statistic page that is displayed contains Traffic Statistic and DSL Statistic 3 2 6 1 Traffic Statistic Choose Traffic Statistic In the Traffic Statistic page you can view the statistics of each network port ...

Page 19: ...User Manual 13 3 2 6 2 DSL Statistic Choose DSL Statistic In the Statistic ADSL page you can view the ADSL line statistics downstream rate upstream rate and other information ...

Page 20: ...n subscribing to a broadband service you should be aware of the method by which you are connected to the Internet Your physical WAN device can be either PPP ADSL or both The technical information about the properties of your Internet connection is provided by your Internet service provider ISP For example your ISP should inform you whether you are connected to the Internet using a static or dynami...

Page 21: ...al channel identifier The virtual channel between two points in an ATM network ranging from 32 to 65535 0 to 31 is reserved for local management of ATM traffic Enter the correct VPI and VCI and Click Next The page shown in the following figure appears In the Connection Type page you can select the WAN connection type and the encapsulation mode ...

Page 22: ... SNAP or VC Mux Back Return to the previous page Next Go to the next page Select PPPoA or PPPoE in the Connection Type page and click Next The page shown in the following figure appears The following table describes the parameters of this page Field Description Obtain an IP address automatically The dynamic IP address is not fixed Your ISP assigns the different one each time Use the following IP a...

Page 23: ...xt Go to the next page Click Next The page shown in the following figure appears The following table describes the parameters of this page Field Description PPP Username PPP Password The username and password apply to PPPoE and PPPoA encapsulation only Make sure that you have entered the correct username and password PPP Connection Type You can choose Continuous Connect on Demand or Manual Back Re...

Page 24: ...nable the secondary LAN IP address Secondary LAN IP Enter the secondary IP address of the router For example 192 168 100 1 default IP address Secondary Subnet Mask Enter the subnet mask of the secondary LAN IP address Enable DHCP Server Select it to enable the DHCP server Start IP It specifies the first of the contiguous addresses in the IP address pool End IP It specifies the last of the contiguo...

Page 25: ...ble describes the parameters of this page Field Description Obtain an IP address automatically The router obtains a WAN IP address automatically and it enables DHCP client function The WAN IP address is obtained from the uplink equipment like BAS and the uplink equipment is required to enable the DHCP server function Use the following IP address Select it to enter the WAN IP address by yourself WA...

Page 26: ...r by yourself select it and enter the related data Primary DNS server Enter the IP address of the primary DNS server Secondary DNS server Enter the IP address of the secondary DNS server provided by your ISP Enable NAT Select it to enable the NAT function of the router If you do not select it and you want to access the Internet normally you must add a route on the uplink equipment Otherwise the ac...

Page 27: ...ovided by your ISP WAN Subnet Mask Enter the subnet mask of the IP address of the WAN interface provided by your ISP Obtain DNS server addresses automatically Obtain the IP address of the DNS server assigned by the uplink equipment such as BAS Use the following DNS server addresses If you want to enter the IP address of the DNS server by yourself select it and enter the related data Primary DNS se...

Page 28: ...d contains LAN Settings and DHCP Settings You can use the LAN configuration to define an IP address for the DSL router and configure the DHCP server 3 4 1 LAN Settings In the LAN Setting page you can change IP address of the router The default IP address is 192 168 1 1 This is the private IP address of the DSL router This is the address under which the device can be reached in the local network It...

Page 29: ...tch to listen in on the IGMP conversation between hosts and routers by processing the layer 3 IGMP packets sent in a multicast network Apply Changes Save the settings of this page 3 4 2 DHCP Settings Dynamic host configuration protocol DHCP allows the individual PC to obain the TCP IP configuration from the centralized DHCP server You can configure this router as a DHCP server or disable it The DH...

Page 30: ... Description DHCP Relay Select it the router acts a surrogate DHCP server It relays the DHCP requests and reponses between the remote server and the client DHCP Server Address Enter the IP address of the actual remote DHCP server Apply Changes Save the settings of this page Select DHCP Server in the DHCP Server Setup page the page shown in the following figure appears ...

Page 31: ...pool Show Client Click it the Active DHCP Client Table page appears It shows the assigned IP address of the clients Max Lease Time The lease time determines the period that the PCs retain the assigned IP addresses before the IP addresses change Domain Name Enter the domain name if you know If you leave it blank the domain name obtained by DHCP from the ISP is used You must enter host name system n...

Page 32: ... can view the IP address assigned to each DHCP client The following table describes the parameters in this page Field Description IP Address It displays the IP address relative to the MAC address MAC Address It displays the MAC address of the computer Every Ethernet device has a unique MAC address The MAC address is assigned at the factory and it consists of six pairs of hexadecimal character For ...

Page 33: ...s based on their MAC address The following table describes the parameters of this page Field Description Host MAC Address Enter the MAC address of a computer on the LAN Assigned IP Address It specifies the IP address of the IP address pool Assign IP Click it after entering host MAC address and assigned IP address a row will be added in MAC base assignment table Delete Assigned IP Select a row in M...

Page 34: ...rds communicating in a pear to pear network or as complex as a number of computers with wireless LAN cards communicating through access points which bridge network traffic to wired LAN 3 5 1 Basic Settings Choose WLAN Basic Settings The page shown in the following figure appears In this page you can configure the parameters for wireless LAN clients that may connect to your access point The followi...

Page 35: ...gion and you should use a different channel from an adjacent AP to reduce the interference Interference and degrading performance occurs when radio signal from diffirent APs overlap Select a channel from the drop down list box Apply Changes Save the settings of this page 3 5 2 Security Choose WLAN Security The page shown in the following figure appears Wireless security is vital to your network It...

Page 36: ...t supports authentication authorization and accounting The access point is client and the server is RADIUS server RADIUS is a simple package exchange in which your router acts as a message relay between the wireless station and the network RADIUS server Port The default port of the RADIUS server for authentication is 1812 You need not change this value unless your network administrator instructs y...

Page 37: ...hose 128 bit you can choose ASCII 13 characters or Hex 26 characters Default Tx Key Select the default encryption key Encryption Key 1 to 4 The Encryption keys are used to encrypt the data Both router and wireless stations must use the same encryption key for data transmission If you chose 64 bit and ASCII 5 characters then enter any 5 ASCII characters If you chose 64 bit and Hex 10 characters the...

Page 38: ...igure appears These settings are only for more technically advanced users who have a sufficient knowledge about wireless LAN These settings should not be changed unless you know the effect of the changes on your AP The following table describes the parameters of this page Field Description Fragment Threshold This is the maximum data fragment size between 256 and 2346bytes that can be sent in the w...

Page 39: ...reach the RTS size Apply Changes Save the changes of this page 3 5 4 Access Control Choose WLAN Access Control The page shown in the following figure appears In this page you can configure the wireless access control The following table describes the parameters of this page Field Description Wireless Access Control Mode You can choose disable allow listed and deny listed Select allow listed only t...

Page 40: ...outer Delete Delete the row you select in the current access control list Delete All Delete all rows in the current access control list Reset Click it to begin configuring the current access control list afresh 3 5 5 WPS Choose WLAN WPS The page shown in the following figure appears This page allows you to change the setting for Wi Fi protected setup WPS WPS function helps your wireless client aut...

Page 41: ... the access point 3 5 6 MBSSID Choose WLAN MBSSID The page shown in the following figure appears In this page you can configure the vitual SSID The following table describes the parameters of this page Field Description SSID The SSID is a unique name to identify the router in the wireless LAN Apply Save the settings of this page Reset Refresh the page 3 6 WAN ...

Page 42: ...ng table describes the parameters of this page Field Description Current ATM VC Table This table shows the existed PVCs It shows the interface name channel mode VPI VCI encapsulation mode local IP address remote IP address etc The maximum item of this table is eight VPI The virtual path between two points in an ATM network ranging from 0 to 255 VCI The virtual channel between two points in an ATM ...
Page 43: ... ISP has provided to you Type You can choose continuous connect on demand and manual Idle Time min If select connect on demand you need to enter the idle timeout time Within the preset minutes if the router does not detect the flow of the user continuously the router automatically disconnects the PPPOE connection WAN IP Settings Type You can choose fixed IP and use DHCP If select fixed IP you shou...

Page 44: ...TM VC table then modify the parameters of this PVC When you finish click it to apply the change of this PVC Delete Select a PVC in the current ATM VC table and click it to delete this PVC Undo Click it to begin configuring this page afresh Click it the PPP Interface Modify page appears You can modify the PVCs parameters Click in the PPPoE mode The page shown in the following figure appears In this...

Page 45: ...l 39 3 6 2 ATM Settings Choose WAN ATM Settings The page shown in the following figure appears In this page you can configure the parameters of the ATM for your ADSL router including QoS type PCR CDVT SCR and MBS ...

Page 46: ... in the following figure appears You can select the DSL modulation Normally the user needs to remain this factory default settings The router supports these modulations G Dmt G lite T1 413 ADSL2 ADSL2 AnnexL and AnnexM The router negotiates the modulation mode with the DSLAM ...

Page 47: ... a DNS service translates the name into the corresponding IP address For example the domain name www example com might translate to 198 105 232 4 The DNS system has its own network If one DNS server does not know how to translate a particular domain name it asks another one and so on until the correct IP address is returned 3 7 1 1 DNS Server Choose DNS Server The page shown in the following figur...

Page 48: ... Reset Selected Refresh this page 3 7 1 2 DDNS Choose DDNS The page shown in the following figure appears This page is used to configure the dynamic DNS address from DynDNS org or TZO You can add or remove to configure dynamic DNS 3 7 2 Firewall Choose Advance Firewall The page shown in the following figure appears The page that is displayed contains IP Port Fileter MAC Filter and URL Blocking ...

Page 49: ...securing or restricting your local network Click Apply Changes to save the settings of this page Click Add to add a new rule of the IP port filter 3 7 2 2 MAC Filter Choose MAC Filter The page shown in the following figure appears Entries in this table are used to restrict certain types of data packets from your local network to Internet through the gateway These filters are helpful in securing or...

Page 50: ... Add to add a new rule of the MAC filter 3 7 2 3 URL Blocking Choose URL Blocking The page shown in the following figure appears This page is used to block a fully qualified domain name and filtered keyword such as www yahoo com You can add or delete FQDN and filtered keyword ...

Page 51: ...re appears This page is used to enable the servers in the local network Click Add to add a virtual server 3 7 3 2 DMZ Settings Choose DMZ Settings The page shown in the following figure appears A demilitarized zone is used to provide Internet services without sacrificing unauthorized access to its local private network Typically the DMZ host contains devices accessible to Internet traffic such as ...

Page 52: ...ge shown in the following figure appears The page that is displayed contains RIP and Static Route 3 7 4 1 RIP Choose RIP The page shown in the following figure appears Enable the RIP if you are using this device as a RIP enabled router to communicate with others with the Routing Information Protocol RIP This page is used to select the interfaces on your router that use RIP and the version of the p...

Page 53: ... Show Routes The table shown in the following figure appears The table shows a list of destination routes commonly accessed by your network 3 7 5 IP QOS Choose Advance IP QOS The page shown in the following figure appears Entries in this table are used to assign the precedence for each incoming packet based on physical LAN port TCP UDP port number and source destination IP address subnet masks ...

Page 54: ...wing figure appears 3 7 6 Anti dos Choose Advance Anti dos The page shown in the following figure appears Denial of service attack DoS Attack is a type of attack on a network that is designed to bring the network to its knees by flooding it with useless traffic In this page you can configure to prevent DoS attacks ...

Page 55: ...User Manual 49 Click Apply Changes to save the settings of this page 3 7 7 Port Mapping Choose Advance Port Mapping The page shown in the following figure appears ...

Page 56: ...ains IGMP Proxy UPnP Bridge and IP PassThrough 3 7 8 1 IGMP Proxy Choose IGMP Proxy The page shown in the following figure appears IGMP proxy enables the system to issue IGMP host messages on behalf of hosts that the system discovers through standard IGMP interfaces The system acts as a proxy for its hosts after you enable it ...

Page 57: ...ge is used to configure UPnP The system acts as a daemon after you enable it Click Apply Changes to save the settings of this page 3 7 8 3 Bridge Choose Bridge The page shown in the following figure appears This page is used to configure the bridge parameters You can change the settings or view some information on the bridge and its attached ports ...

Page 58: ... in the following figure appears This table shows a list of learned MAC addresses for this bridge 3 7 8 4 IP PassThrough Choose IP Pass Through The page shown in the following figure appears In this page you can enable and configure IP passthrough ...

Page 59: ...Control The page shown in the following page appears You can enable or disable the services which are used by the remote host For example if TELNET service is enabled and the port is 23 the remote host can access this router by telnet through the port 23 3 8 2 Commit Reboot Choose Admin Commit Reboot The page shown in the following page appears You can set the router reset to the default settings ...

Page 60: ...an add user account to access the web server of the ADSL router or change the password of the selected user account By default the super user name and password are admin and admin The common user name and password are user and user The following table describes the parameters of this page Field Description User Name You can choose admin or user from the drop down list box Old Password Enter the ol...

Page 61: ...e in progress The following table describes the parameters of this page Field Description Save Settings to File Click Save and select the path Then you can save the configuration file of the router Click Browse to select the configuration file Load Settings from File Click Upload to upload the configuration file 3 8 5 Upgrade Fireware Choose Admin Upgrade Fireware The page shown in the following p...

Page 62: ... Select the fireware file and click Upload to upgrade the fireware Reset Click it to refresh the fireware file 3 8 6 Time Zone Choose Admin Time Zone The page shown in the following page appears You can set the system time manually or get the system time from the time server The following table describes the parameters of this page Field Description ...

Page 63: ... the settings of this page Refresh Refresh the page 3 8 7 System Log Choose Admin System Log The page shown in the following page appears You can enable or disabled the system log function and view the system log The following table describes the parameters of this page Field Description System Log You can enable or disable the system log function Apply Changes Save the settings of this page Refre...

Page 64: ...rmation is sent to the host Community name read only The network administrators must use this password to read the information of this router Community name write only The network administrators must use this password to configure the information of the router Apply Changes Save the settings of this page Reset Click it to begin refreshing this page 3 8 9 TR069 Choose Admin TR069 The page shown in ...

Page 65: ...ess for access control list If ACL is enabled only the effective IP address in ACL can access the ADSL router The procedure for configuring the IP address for access control list is as follows Note If you select Enable in the ACL Capability field make sure tha there is at least one IP address is in ACL list before it takes effect ...

Page 66: ...c In the navigation bar choose Diagnostic The page that is displayed contains Ping ATM Loopback ADSL and Diagnostic 3 9 1 Ping Choose Diagnostic Ping The page shown in the following figure appears The following table describes the parameters in this page Field Description Host Address Enter the IP Address Go Click it to begin to ping the host address 3 9 2 ATM Loopback Choose Diagnostic ATM Loopba...

Page 67: ...gnostic ADSL The page shown in the following figure appears It is used for ADSL tone diagnostics Click Start to begin ADSL tone diagnostics 3 9 4 Diagnostic Choose Diagnostic Diagnostic The page shown in the following figure appears You can test the DSL connection ...

Page 68: ...User Manual 62 Click Run Diagnostic Test to begin testing ...

Page 69: ... a class B digital device pursuant to part 15 of the FCC Rules These limits are designed to provide reasonable protection against harmful interference in a residential installation This equipment generates uses and can radiate radio frequency energy and if not installed and used in accordance with the instructions may cause harmful interference to radio communications However there is no guarantee...

Page 70: ...r attachment Manufacturer and its authorized resellers or distributors will assume no liability for any damage or violation of government CAUTION To maintain compliance with FCC s RF exposure guidelines this equipment should be installed and operated with minimum distance 20cm between the radiator and your body Use on the supplied antenna Unauthorized antenna modification or attachments could dama...

Reviews: