background image

8

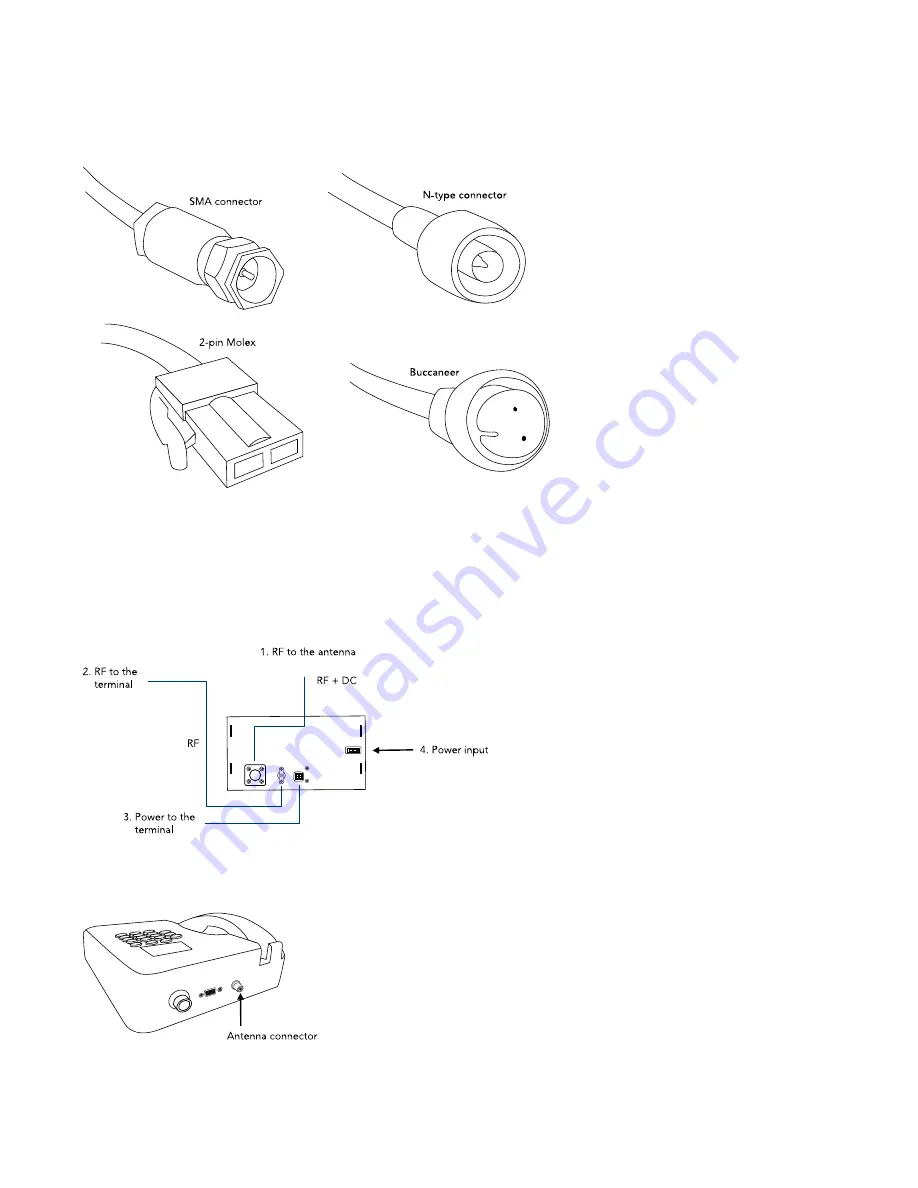
The following illustrations will help you identify each of the listed connector types:


If the distance between the components is less than the cable length supplied, do not 
cut the cables, as they are designed to match the signal transmitting and receiving 

capability of the components. Also, a shortened cable could affect voice quality. 

Note:

 Only use a cable of the type and length recommended to maintain the signal 

receiving capability of the terminal.

Attach the cables as follows:


1. RF cable from the antenna to the connection box.

2.   RF cable from the connection box to the 

antenna connector on the terminal (as shown 
left):


Summary of Contents for FleetPhone

Page 1: ...FleetPhone Installation guide The mobile satellite company...

Page 2: ...a to the antenna pole mount 4 x U clamps 2 x clamp brackets 8 x self locking nuts and 8 x washers to attach the pole mount to a suitable fixture Connection box Terminal with built in handset including...

Page 3: ...signed to withstand the rigid mechanical stress encountered on a ship The omni directional antenna transmits and receives signals to and from the satellite Installing the antenna To install the antenn...

Page 4: ...ces in the mast diameter can be compensated for simply by bending the U clamps slightly 9 Run the antenna cable to the below decks location of the connection box Installing the connection box The conn...

Page 5: ...wall mount the terminal 1 Choose a suitable location Note the following The terminal can be mounted vertically on a wall but must not be mounted overhead The wall surface should be flat and even Ensur...

Page 6: ...the inside of the pole mount to the RF connector on the connection box Connection box to 3m supplied SMA type at both ends One terminal connects to the connection box the other connects to the Antenn...

Page 7: ...o match the signal transmitting and receiving capability of the components Also a shortened cable could affect voice quality Note Only use a cable of the type and length recommended to maintain the si...

Page 8: ...to the DC Power connector on the terminal as shown left 4 Power cable from the connection box to the power supply Refer to the following diagram for guidance You are now ready to use FleetPhone Refer...

Page 9: ...T 23 5 to 24 5 dBK EIRP 5 to 6 dBW Terminal Type Integrated handset and voice terminal Dimensions 210mm x 210mm x 70mm 81 4 in x 81 4 in x 23 4 in Weight 1200g 2 6lbs Storage temperature 40 to 85 C 4...

Page 10: ...ndition If any cable is damaged replace it with a new one Disconnect the power cable from the power supply when you clean the connection box or terminal Potentially inflammable or explosive atmosphere...

Page 11: ...r terminal and connection box as the paint could obstruct the air vents or adapter jacks and prevent normal use Do not attempt to disassemble your product A broken warranty seal will void the warranty...

Page 12: ...rmity go to inmarsat com fleetphone Note that FleetPhone is not intended for the purposes of Safety GMDSS or official communications with maritime authorities For information re GMDSS compliant servic...

Page 13: ...damage of any kind including indirect or consequential loss arising from use of the information and all warranties and conditions whether express or implied by statute common law or otherwise are here...

Reviews: