background image

5. Signal Source Selection of Primary And Secondary picture:

a. Signal Source selection of Primary picture: press "P.SELECT" to select the primary picture, 

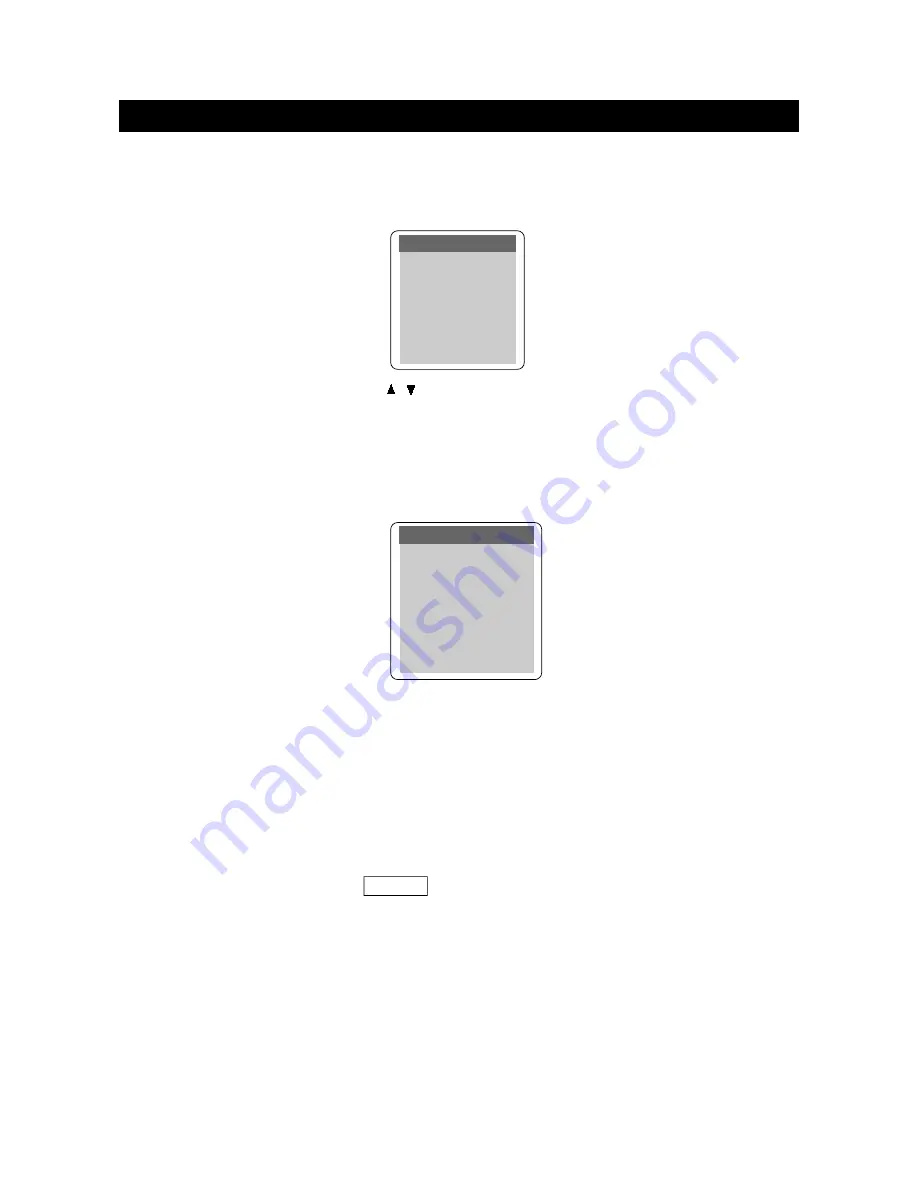
and the green frame appears; then press "VIDEO" to open the SIGNAL SOURCE menu:

(1) When the menu appears, press    /    to select the signal source, then press "OK" to validate.
(2) Press "TV" buttons on the remote control to select "TV" input signal source directly.
(3) Press "DVD/USB/CARD" to select "Inter DVD" input signal source directly.
b. Signal Source selection of secondary picture: press "P.SELECT" to select the secondary 

picture, and the green frame appears; then press "VIDEO" button to open the SIGNAL 
SOURCE menu:

The method to select the input signal source is the same as the " Signal Source selection 
of Primary picture ".

Note:

1) " HDMI/DVI " signal source cannot be selected in secondary picture. If the input signal source 

of the primary picture is "HDMI/DVI", you cannot shift the primary and the secondary picture 
regardless of the signal source of the secondary picture. 

2) When you select the multi-pictures functions at the first time turning on the unit, the signal 

source of the secondary picture is defaulted on "TV" mode.
a. Under PIP, POP and PBP mode: The TV program of the primary and the secondary picture 

can be selected by pressing  CH

/

. Also you can press number buttons directly to 

watch.

b. In POP3 and POP12 mode: Generally the TV program will be sequential displayed 

circularly in channel order when the secondary picture is playing TV program. (If you set the 
"POP scan mode" on " Sequential ", the TV program of the secondary picture will be 
displayed sequentially in channel order; If set on " Fixed ", only three or twelve fixed TV 
program displayed on the screen in displaying order.)

c. In POP3 and POP12 mode, only  TV  signal can be selected for secondary picture.

INSTRUCTIONS FOR MULTI-WINDOWS 

page49

INPUT SELECT

EXIT 
TV
INTER DVD 
VIDEO 1
VIDEO 2
VGA
HDMI/DVI

INPUT SELECT

EXIT 

TV 

INTER DVD

VIDEO 1

VIDEO 2

VGA

Summary of Contents for DB-4500

Page 1: ...32 16 9 AV TV PC MONITOR LCD COLOR TELEVISION DTV 322 DB 4500 ...

Page 2: ... THE POWER TURNING OFF THE POWER SIMPLE BUTTON OPERATIONS FOR CHANGING CHANNELS USING FLASHBACK ON THE REMOTE UNIT SIMPLE BUTTON OPERATION FOR CHANGING VOLUME SOUND SETTING MTS SAP STEREO MODE BASIC ADJUSTMENT SETTINGS PICTURE ADJUSTMENT AUDIO ADJUSTMENT PIP POP ADJUSTMENT SIZE ADJUSTMENT SLEEP ADJUSTMENT COLOR ADJUSTMENT PC MODE ADVANCED ADJUSTMENT SETTINGS WINDOW ADJUSTMENT INSTRUCTION FOR MULTI...

Page 3: ...OOM PLAY SELECT SUBTITLES PROGRAM PLAY SHUFFLE RANDOM PLAY MENU SETTING GENERAL SETUP AUDIO SETUP PASSWORD SETUP PREFERENCES MP3 OPERATIONS KODAK PICTURE CD PLAYBACK MEMORY CARD PLAY OPERATION TROUBLESHOOTING TECHNICAL SPECIFICATIONS 52 56 52 52 52 55 55 55 56 56 59 56 57 57 58 58 59 59 60 61 67 62 63 63 66 66 67 67 68 69 70 71 TABLE OF CONTENTS FOR DVD PLAYER ...

Page 4: ... and if not installed and used in accordance with the instructions may cause harmful interference to radio communications However there is no guarantee that interference will not occur in a particular installation If this equipment does not cause harmful interference to radio or television reception which can be determined by turning the equipment off and on the user is encourage to try to correct...

Page 5: ... them or objects from resting on them Check the cords at the plugs and product 8 Overloading Do not overload AC outlets or extension cords Overloading can cause fire or electric shock 9 Entering of objects and liquids Never insert an object into the product through vents or openings High voltage flows in the product and inserting an object can cause electric shock and or short internal parts For t...

Page 6: ... cart stand tripod or table Unstable installation is likely to make the product fall resulting in serious injuries as well as material damage Use only the cart stand tripod bracket or table specified by the manufacturer or sold with the apparatus 19 When a cart is used use caution when moving the cart apparatus combination to void injury from tip over 20 Ventilation The vents and other openings in...

Page 7: ...e provided with the product SUPPLIED ACCESSORIES page4 32 16 9 AV TV PC MONITOR LCD COLOR TELEVISION DTV 322 DB 4500 Power cord AV cables User guide Remote control It also include batteries 2 Warranty card QSG card Display connecting cable ...

Page 8: ...dow of the Display is under direct sunlight or strong lighting In such case change the angle of the lighting or Display or operate the remote control unit closer to the remote sensor window CAUTIONS REGARDING REMOTE CONTROL UNIT Use the remote control by pointing it towards the remote sensor on the TV Objects between the remote control and the sensor may disrupt operation Effective range is 20 fee...

Page 9: ... menu 4 CH Use to skip to the next previous channel 5 VOL Use to adjust the volume 6 Right Speaker 7 STANDBY Indicator 8 Power On Indicator 9 Remote Sensor 10 Left Speaker 11 LCD Display DISPLAY page6 FRONT VIEW TV VIDEO PC ON OFF CH CH VOL VOL TV MENU 1 2 3 4 5 11 10 9 7 8 6 REAR VIEW 1 2 3 1 DISPLAY INPUT terminal 2 EXTERNAL SPEAKER OUTPUT terminal 3 AC INPUT terminal ...

Page 10: ...n Press it to enter into input select menu 10 MENU Button Press it to enter into TV menu 11 VOL Button It can be used to adjust the volume Also it can be used as left right buttons when enter into TV menu 12 P Button It can be used to select TV channel Also it can be used as up down buttons when enter into TV menu and INPUT select menu 13 ENTER Button 14 PREV NEXT Button 15 STOP Button 16 PAUSE Bu...

Page 11: ...AV1 INPUT 6 HDMI DVI INPUT 7 RS 232C Terminal 8 DISPLAY OUTPUT RS 232C Terminal This terminal is used for upgrade Users may use relevant software to upgrade this unit by connecting this unit to PC with this terminal 9 Power Supply Cord 10 ANTENNA INPUT RF 11 OPTICAL DIGITAL AUDIO OUTPUT DVD 12 COAXIAL DIGITAL AUDIO OUTPUT DVD 13 5 1 CH AUDIO OUTPUT DVD 14 MIXED AUDIO OUTPUT L R DVD ...

Page 12: ...nge to DVD mode directly 3 TV Press to change to TV mode directly 4 Number Buttons Use to set the channel and to enter DVD chapter numbers 5 MTS SAP Use to select the MTS SAP stereo mode 6 VOL Use to adjust the volume 7 TV MENU Use to bring up the TV menu REMOTE CONTROL page9 1 2 3 4 5 6 7 8 9 10 11 12 13 14 15 16 17 18 19 20 21 22 23 24 25 26 27 28 29 30 31 32 33 34 35 36 37 38 ...

Page 13: ...E Use to shift DVD subtitle language 24 REPEAT Use to repeat the DVD playback 25 LANGUAGE Use to shift DVD audio language 26 ZOOM Use to zoom the DVD playback picture 27 SETUP Use to bring up the DVD setup menu 28 OSD Use to bring up the DVD on screen display 29 Use to begin pause the DVD playback 30 DVD MENU Use to bring up the DVD root menu 31 FLASH BACK HD SD In TV mode use to return to the pre...

Page 14: ...em To protect all equipment always turn off the AVC system before connecting CONNECT TO POWER USING THE ANTENNA INPUT Connect the antenna terminal from an antenna or cable satellite receiver to the antenna input terminal on the DB 4500 use the VIDEO button on the remote control to set the signal source to TV ...

Page 15: ...INPUT page12 Connect compatible AV equipment to the AVC system through the AV1 IN jacks on the back of AVC system Composite Video S Video Component Video and Audio input jacks To watch an image from this input terminal you need to select the input source 1 Select AV1 Input Setup in AV INPUT SETUP 2 Select VIDEO1 in INPUT SELECT You can use the AV1 INPUT terminal when connecting an HDTV tuner and D...

Page 16: ...E Use to shift DVD subtitle language 24 REPEAT Use to repeat the DVD playback 25 LANGUAGE Use to shift DVD audio language 26 ZOOM Use to zoom the DVD playback picture 27 SETUP Use to bring up the DVD setup menu 28 OSD Use to bring up the DVD on screen display 29 Use to begin pause the DVD playback 30 DVD MENU Use to bring up the DVD root menu 31 FLASH BACK HD SD In TV mode use to return to the pre...

Page 17: ...ont panel of DB 4500 use the VIDEO button on the remote control to set the signal source to VGA DTV 322 monitor s native resolution for computer use is 1366x768 Using the HDMI DVI connector Connect a PC computer to the DB 4500 through the HDMI DVI socket on the back panel and the Audio input jack for VGA on the front panel of DB 4500 use the VIDEO button on the remote control to set the signal sou...

Page 18: ...RONT SUBWOOFER MIXED A U D I O O U T 120V 60Hz HDMI DISPLAY R S 2 3 2 C I N P U T O U T P U T DV I DVD OUT TO DIGITAL AMPLIFIER When you connecting to the DVD output terminal you must select INTER DVD by pressing VIDEO on the remote control 1 When connecting to AV Receiver you can connect to the coaxial or the optical digital audio input 2 Meanwhile you must set the SPDIF to SPDIF RAW or SPDIF PCM...

Page 19: ... P U T O U T P U T DV I CENTER SPEAKER IN T GND 220V 50Hz CAUTION RISK OF ELECTRIC SHOCK DO NOT OPEN L R L R L R SPEAKER SYSTEMS L R REAR SURR CENTER FRONT SUBWOOFER OUT LINE OUT VIDEO OUT AUDIO IN DVD5 1 SL SR VIDEO IN C SW L R L R TUNER TAPE L R REAR SPEAKER R FRONT SPEAKER R SUBWOOFER ACTIVE FRONT SPEAKER L REAR SPEAKER L DVD OUT TO 5 1 CHANNEL AMPLIFIER Make sure the DOWNMIX is set to OFF afte...

Page 20: ...ed 3 Press POWER on the remote control you can turn on the power of the system TURN ON THE POWER 1 During the playback of the system press POWER on the remote control to turn off the power the system is in standby state and the STANDBY indicator on the AVC system and the DISPLAY unit lights up red 2 Press POWER on the AVC system to turn off the power of the AVC system 3 Press POWER to turn off the...

Page 21: ...ISPLAY unit is in standby state and the STANDBY indicator lights up red 3 Press POWER on the remote control you can turn on the power of the system TURN ON THE POWER 1 During the playback of the system press POWER on the remote control to turn off the power the system is in standby state and the STANDBY indicator on the AVC system and the DISPLAY unit lights up red 2 Press POWER on the AVC system ...

Page 22: ...us tuned channel Press FLASHBACK again to switch back to the currently tuned channel Select the channels directly by pressing the number buttons EXAMPLE To select a 1 digit channel e g channel 2 Press 2 To select a 2 digit channel e g channel 12 Press 1 followed by 2 USING FLASHBACK ON THE REMOTE UNIT NUMBER BUTTONS FLASHBACK ...

Page 23: ...ess MUTE to mute the current sound output WATCHING TV page20 1 Press MUTE to remove the sound 2 Press MUTE again to cancel the mute 1 Press VOL to increase the volume 2 Press VOL to decrease the volume SIMPLE BUTTON OPERATION FOR CHANGING VOLUME SOUND VOL MUTE TV VIDEO PC ON OFF CH CH VOL VOL TV MENU VOL ...

Page 24: ...N or SAP sound MAIN sound The normal program soundtrack either in mono or stereo SAP sound Listen to second language supplementary commentary and other information SAP is mono sound If stereo sound is difficult to hear Obtain a clearer sound by manually switching to fixed mono sound mode Note Once MONO mode is selected the sound remains mono even if the System receives a stereo broadcast You must ...

Page 25: ...right to adjust up down to select ok to return NORMAL BACKLIGHT Preset 1 Press to select Preset in Picture menu 2 Press to select the Preset among Personal Movies Sports Weak Signal and multimedia press OK to return to the Picture menu 3 Press TV MENU to exit Brightness 1 Press to select brightness in Picture menu 2 Press to enter the brightness menu Other Mode PC Mode Contrast 1 Press to select C...

Page 26: ...he horizontal position of the displayed image 3 Press OK to return and press TV MENU to exit Note Horizontal is not available in HDMI mode Backlight 1 Press to select Backlight in Picture menu 2 Press to select a backlight mode among Normal Bright and Dark 3 Press OK to return and press TV MENU to exit AUTO ADJUST PC Mode 1 Press to select Auto Adjust in Picture menu 2 Press to activate the Auto A...

Page 27: ...menu 2 Press to select a surround mode between Off and On press OK to return to the Audio menu 3 Press TV MENU to exit Equalizer Mode 1 Press to select Equalizer Mode in Audio menu 2 Press to select an equalizer mode among Personal Music Theater and News press OK to return to the Audio menu 3 Press TV MENU to exit Note Treble and Bass are available when the Equalizer Mode is set to personal Treble...

Page 28: ...D MPX TV Mode This function is to select a MPX mode 1 Press TV MENU to bring up the TV menu screen 2 Press to select MPX in Audio menu 3 Press to select a MPX mode When mono TV signal is received only mono is available Mono SAP mode Press to shift between mono and sap Stereo mode Press to shift between stereo and mono Stereo SAP mode Press to shift among mono stereo and sap 5 Press OK to return pr...

Page 29: ... a PIP POP PBP mode among Single PIP POP and PBP the picture above shows the items when PIP is selected press OK to return to the PIP POP menu 3 Press TV MENU to exit Transparency 1 Press to select Transparency in PIP POP menu 2 Press to enter the transparency menu 3 Press to adjust the transparency of the secondary picture press OK to return to the PIP POP menu 4 Press TV MENU to exit PIP Size 1 ...

Page 30: ...urce 1 Press to select Audio Source in PIP POP menu 2 Press to select the audio source between Primary and Secondary press OK to return to the PIP POP menu 3 Press TV MENU to exit When the PIP POP PBP mode is set to POP the following screen will be displayed POP Window 1 Press to select POP Window in PIP POP menu 2 Press to select the POP window mode among POP1 POP3 and POP12 press OK to return to...

Page 31: ...dio source between primary and secondary 1 Primary the audio source is from the primary audio 2 Secondary the audio source is from the secondary audio Note When POP WINDOW is set to POP3 POP12 audio source is not available only primary audio output A There will be two same sized pictures displayed on the screen when the PIP POP PBP mode is set to PBP B Audio Source 1 Press to select Audio Source i...

Page 32: ...2 Press to select Standard as the display mode or not press OK to return to the Size menu 3 Press TV MENU to exit Zoom 1 Press to select Zoom in Size menu 2 Press to select Zoom as the display mode or not press OK to return to the Size menu 3 Press TV MENU to exit 4 3 Aspect Ratio 1 Press to select 4 3 Aspect Ratio in Size menu 2 Press to select 4 3 Aspect Ratio as the display mode or not press OK...

Page 33: ... SIZE menu 2 Press to select Fill Aspect Ratio as the display mode or not 3 Press OK to return and press TV MENU to exit Full Screen 1 Press to select Full Screen in Size menu 2 Press to select Full Screen as the display mode or not press OK to return to the Size menu 3 Press TV MENU to exit 1 1 It shows that the image input will be the original signal aspect ratio 1 Press to select 1 1 in Size me...

Page 34: ...he user preset menu BASIC ADJUSTMENT SETTINGS page31 Use to set the sleep timer 1 Press the VIDEO button to select various signal modes 2 Press TV MENU to enter LCD menu 3 Press to select Sleep press to enter the sleep timer 4 Press to set the sleep timer among OFF 10 minute 20 minute 30 minute 60 minute 120 minute and 180 minute press OK to return to the LCD menu 5 Press TV MENU to exit SLEEP ADJ...

Page 35: ...press to increase the green Blue Press to decrease the blue press to increase the blue b Press OK to return to the user preset menu 5 Press OK to return to the color menu press TV MENU to exit COLOR ADJUSTMENT PC MODE BACK PIP POP PICTURE SIZE COLOR AUDIO SETUP RED PRESET NATURAL COLOR BACK RED 50 50 50 GREEN BLUE NORMAL COLOR USER PRESET BLUE PRESET left right to adjust up down to select ok to re...

Page 36: ...t Setup and then press to enter Setup menu 3 Press to select Channel Setup and then press to enter Channel Setup menu CHANNEL SETUP ONLY TV MODE OSD Display 1 Press to select OSD Display in OSD Settings menu 2 Press to adjust the OSD Display 3 Press OK to return to the Setup menu press TV MENU to exit BACK BACK PIP POP PICTURE SIZE SLEEP AUDIO SETUP FACTORY RESET OSD SETTINGS OSD TRANSPARENCY OSD ...

Page 37: ...mode between Cable and Antenna 3 Press OK to return to the Setup menu press TV MENU to exit TV Mode 3 This unit will search and memorize all channels viewable automatically in your area 4 The unit will skip to the first channel to play when the auto search ends AUTO SEARCHING 5 OK TO EXIT 4 Press OK to return to Channel Setup menu press TV MENU to exit LEFT RIGHT TO ADJUST MANUAL ADJUST 0000 Fine ...

Page 38: ...nnel skip function is on OFF the current channel skip function is off 4 EXAMPLE If the current channel is 8 and you have set the skip to ON when you exit the settings the channel 8 will be skipped when you select channel Press number 8 on the remote control directly if you want to watch the TV program of the channel 8 If you want to cancel the channel skip function of channel 8 select channel 8 an...

Page 39: ...ttings only Color settings only Current input settings All settings in Factory Reset menu and then press to confirm Position Settings Only a Press to select position settings only in factory reset menu b Press to confirm then the value of horizontal shift in picture menu will be reset Color Settings Only a Press to select Color settings only in factory reset menu b Press to confirm then Color Temp...

Page 40: ...V1 AUTO YPBPR SVIDEO 1 COMPOSITE 1 AV2 AUTO SVIDEO 2 COMPOSITE 2 PIP POP PICTURE SIZE COLOR AUDIO SETUP FACTORY RESET OSD SETTINGS AV INPUT SETUP left right to adjust up down to select ok to return AV1 Input Setup Use to select AV1 input source 1 Press to select AV1 Input Setup in AV Input Setup menu 2 Press to select an input source item AV1 Auto YPBPR SVIDEO1 Composite1 and press to set the item...

Page 41: ...OP SIZE SLEEP SETUP left right to adjust up down to select ok to return CLOSED CAPT CAPTION MODE OFF CC2 Closed Caption 1 Press to select Closed CAPT In Close Caption menu 2 Press to select the closed caption among OFF ON and CC mute Also you can press CC button on remote control to select OFF No caption appear ON The screen displays caption CC mute When you are enjoying TV program select CC mute ...

Page 42: ...to adjust up down to select ok to return ACCESS CODE 1 Press to select Access Code and then press to confirm it will be display as follows 2 Enter your 4 digit access code with number buttons Note The access code is automatically factory set to 3355 Once you enter the access code it will be display the following menu OSD SETTINGS CHANNEL SETUP FACTORY RESET AV INPUT SETUP CLOSE CAPTION PARENTAL CO...

Page 43: ... enter Parental Cont menu Parental control setting menu displays only when access code is set 4 Enter your 4 digit access code with number buttons when you enter into access code menu 5 Press to select Channel Lock then press to confirm its menu displays as follows 6 Press to set the Channel Lock to ON or OFF ON the function of Channel Control is on and the channel in which the TV program being pl...

Page 44: ... select Parental Cont and then press to enter Parental Cont menu Parental control setting menu displays only when access code is set 4 Enter your 4 digit access code with number buttons when you enter into access code menu 5 Press to select Block Control and then press to confirm its menu displays as follows 6 Press to set the Block Control to ON or OFF ON the function of Block Control is on and t...

Page 45: ... Press to select the desired item and then press to select ON or OFF If Block Control is not set to ON the settings made in movie rating will not work ON The rating you selected is blocked OFF Cancle the block 7 Press OK to return to the previous menu press TV MENU to exit Note If you select PG this will automatically block the higher ratings PG 13 R NC 17 and X OSD SETTINGS CHANNEL SETUP FACTORY ...

Page 46: ...ON OFF ON OFF ON OFF ON OFF TV Y All children TV Y7 Directed to older children TV G General audience TV PG Parental Guidance suggested TV 14 Parents strongly cautioned TV MA Mature audience only Rating Suggested age Content FV Fantasy Block All violence V Violence S Sexual situation L Adult language D Sexually suggestive dialog X X X X X X X X X X X X X X X X X X 7 Press to select the desired item...

Page 47: ...nter LCD menu 2 Press to select Setup and then press to enter Setup menu 3 Press to select Parental Cont and then press to enter Parental Cont menu Parental control setting menu displays only when access code is set 4 Enter your 4 digit access code with number buttons when you enter into access code menu 5 Press to select Change Code and then press to confirm its menu displays as follows OSD SETTI...

Page 48: ...automatically set to OFF No It will not clear the settings 7 Press OK to return to the previous menu press TV MENU to exit CLEAR ALL 1 Press TV MENU to enter LCD menu 2 Press to select Setup and then press to enter Setup menu 3 Press to select Parental Cont and then press to enter Parental Cont menu Parental control setting menu displays only when access code is set 4 Enter your 4 digit access cod...

Page 49: ...n if your actual display setting screen looks different from the windows below basic setup methods will be applied in most of the case 1 First click on Setting on the Windows Start menu While Setting is selected move the cursor to submenu Control panel Resolution VGA SVGA XGA WXGA 640 480 640 480 640 480 800 600 800 600 800 600 1024 768 1024 768 1024 768 1280 768 60 70 75 60 SXGA 1280 1024 60 60 7...

Page 50: ... displays 4 Navigate to the Setting tab on the display dialog box Set the Screen resolution to 1280 768 pixel 5 Select the screen refresh rate of your PC if the resolution is 1280 768 pixel the screen refresh rate 60Hz 2 Click on Control panel the control panel screen appears ...

Page 51: ...ft the primary and the secondary picture without selecting the primary or secondary picture b Under POP3 or POP 12 mode You must press P SELECT firstly to select the secondary picture the green frame appears then press SWAP to shift Note the input source of the primary picture must be TV 4 Main and Second Audio a Under PIP POP and PBP mode Press P SELECT to select the primary or the secondary pict...

Page 52: ...cture is HDMI DVI you cannot shift the primary and the secondary picture regardless of the signal source of the secondary picture 2 When you select the multi pictures functions at the first time turning on the unit the signal source of the secondary picture is defaulted on TV mode a Under PIP POP and PBP mode The TV program of the primary and the secondary picture can be selected by pressing CH Al...

Page 53: ...o select the following size standard zoom 4 3 wide and full screen Note In POP3 or POP12 mode press P SELECT to select one of the secondary picture and the green frame appears then press VIEW MODE to change the size of the secondary picture as required and the size of the other secondary pictures will be changed simultaneously INSTRUCTIONS FOR MULTI WINDOWS page50 ...

Page 54: ...up red press POWER Is the AC cord disconnected Has the main power been turned on External influences such as lightning static electricity may cause improper operation In this case operate the unit after first turning on the power of the Display and the AVC System or unplugging the AC cord and re plugging it in after 1 or 2 minutes Are batteries inserted with polarity e f aligned Are batteries worn...

Page 55: ...c according to the track numbers 5 Stop playback Press Play Discs CD 6 Press the button on the remote control to remove the disc and turn off the unit You have to push button twice to stop playback of a DVD disc Pause 1 Press to make playback pause 2 Press again to resume playback OSD The On Screen Display OSD contains many playback features To see the Display press the OSD button on the remote wh...

Page 56: ...splay 1 While the disc is playing press OSD on the remote to bring up the Display DVD 2 Press the or buttons to highlight the Chapter icon 3 Press the or buttons to go to the previous or next chapter Notes The chapter feature won t work if the disc isn t formatted with separate chapters You can also advance to the next chapter by pressing on the remote and go to the preceding chapter by pressing o...

Page 57: ...default mode for the Repeat feature is off There are three Repeat options All repeats the disc that is playing Title repeats the title that is playing Chapter repeats the chapter that is playing To Use Repeat 1 While a disc is playing press OSD on the remote to bring up the Display 2 Highlight the Repeat icon 3 Press the or buttons to scroll through the Repeat options until the Repeat option you w...

Page 58: ... to lower the volume VOLUME DVD CD DVD Menu Play Some DVDs have title menus and chapter menus Press PLAY the screen shows the menu Press or to skip to the next or previous page Select with number buttons or direction buttons Example select track 13 1 Press to enter the next menu 2 Press number buttons to select directly You can also select as follows 1 Press to select track 13 2 Press PLAY to star...

Page 59: ...umber buttons to select tracks after the unit finishes reading the disc 1 If the track number isn t over 10 just push buttons 1 10 Example push 8 to select track 8 The screen shows 2 If the track number is over 10 press 10 once and a button between 1 10 Example if you select track 12 press 10 once and button 2 The screen shows Select with Number Buttons CD TRACK08 20 00 00 TRACK12 20 00 00 AUDIO 1...

Page 60: ...ONO RIGHT MIXED MONO STEREO DVD CD CD MUTE A MODE A MODE A MODE A MODE 1 While disc is playing press to play in fast forward mode Each time you press the button the screen shows the following in order 2 While disc is playing press to play in fast reverse mode Each time you press the button the screen shows the following in order 3 Press PLAY to switch to normal play while in fast forward or fast r...

Page 61: ...ture 4 To resume the picture press ZOOM until the picture is in normal size 2X DVD 3X 2X 1 4 3X 4X 1 2 1 3 and ZOOM Repeat Play This function can be used to repeatedly play a title chapter track or a whole disc DVD CD You can repeat a title or chapter 1 To repeat a chapter Press REPEAT the screen will show 2 To repeat a title Press REPEAT twice the screen will show 3 To repeat all Press REPEAT thi...

Page 62: ...itle and chapter number you entered appears in the box For example Enter Chapter 1 in Title 8 the screen shows 3 The cursor jumps to the next spot in the program list section Make sure the box is highlighted and enter your next track 4 Continue adding title and chapter until your program is complete You can play your program by highlighting START and press PLAY Note If you want to program more tha...

Page 63: ...Y to go to next page Program 11 20 in the same way 1 10 were programmed 5 To remove program playback press the STOP button during the program play PROGRAM TRACK 01 20 01 _ _ 06 _ _ 02 _ _ 07 _ _ 03 _ _ 08 _ _ 04 _ _ 09 _ _ 05 _ _ 10 _ _ EXIT NEXT PROGRAM TRACK 01 20 01 08 06 _ _ 02 _ _ 07 _ _ 03 _ _ 08 _ _ 04 _ _ 09 _ _ 05 _ _ 10 _ _ EXIT START NEXT CD page60 PLAY DISCS IN VARIOUS WAYS 1 Press PLA...

Page 64: ...up Menu Main page General Setup Audio Setup Preferences Password Setup Exit Setup Go To General Setup Page SETUP Press PLAY to confirm your selection Set Dual Mono in Dolby Digital Setup to Left Mono The sereen shows Press direction buttons to select Left Mono The screen shows The screen shows Press direction buttons or to highlight Dolby Digital Setup and press PLAY to enter Dolby Digital Setup P...

Page 65: ...ral Setup Audio Setup Preferences Password Setup Exit Setup Go To Audio setup Page Dolby Digital Setup Dual Mono L Stereo Left Mono Right Mono Mixed Mono D R C Audio Setup TV DISPLAY 1 NORMAL PS This is selected when the unit is connected to a normal TV Wide screen images are shown on the screen but with some parts cut automatically 2 NORMAL LB This is selected when the unit is connected to a norm...

Page 66: ... where the power is off and play from the point when you turn on the unit again ON This function is on and works OFF This function is off and does not work SPEAKER SETUP You can use this setup menu to select your speaker type and to turn them on or off The setting structure is Lt Rt The output signal of a disc recorded with multi channel soundtrack will be downmixed to left and right channels STER...

Page 67: ... it is set to MIXED MONO the function only works when the DVD being played is 5 1 channel D R C This is selected to adjust linear compression rate to obtain the different compression results of the signals 3D PROCESSING The setting structure is CHANNEL EQUALIZER This option will help you to select graphic equalizer patterns according to the genre of the music being played The setting structure is ...

Page 68: ... following options will be turned off MODE MUSIC This is mainly used when CD discs or other stereo music are played MOVIE This is generally used when movies with Dolby Surround Sound track are played PRO LOGIC Normal PRO LOGIC decoding function for playing Dolby Surround Sound discs AUTO The DVD player selects the above modes according to the discs being played NOTE Only when MODE is set to MUSIC ...

Page 69: ...ut OFF Use to turn the above function off REVERB MODE Use to select a Reverb Mode which you want The setting structure is PASSWORD MODE ON The password function is on and PARENTAL is dim and cannot be selected OFF The password is locked PARENTAL can be selected PASSWORD CHANGE Select this to adapt the code the screen shows Password Setup Enter a password according to the screen Note The password i...

Page 70: ...ve 13 wave 14 wave 15 00 00 00 00 001 012 FOLDER CD01 CD02 CD03 CD04 CD05 CD06 CD02 Preference Page Audio ENG English French Spanish Chinese Japanese Subtitle ENG English French Spanish Chinese Japanese Off Disc Menu ENG English French Spanish Chinese Japanese Parental 08 1 KID 2 G 3 PG 4 PG 13 5 PGR 6 R 7 NC 17 8 ADULT Default Reset Main Page LANGUAGE SELECTION If a language mentioned above is re...

Page 71: ...ed to fit the TV screen and the slide show will start If you desire to display an image indefinitely press the PAUSE key To view the Next or Previous picture press NEXT or PREVIOUS keys To resume the slideshow press the PLAY key IMPORTANT NOTE Quality of pictures displayed on the screen is highly dependent on the viewing device A Kodak Picture CD has the size and shape of a regular CD You can orde...

Page 72: ...d to CARD play 3 The operation of MEMORY CARD are the same as MP3 operation NOTE According to the content of the MEMORY CARD the display picture will be different 6 4 M B DIGITAL CARD MMC SD Memory Stick card DVD CARD 00 00 00 00 001 012 FOLDER MP3 JPG D SD MEMORY CARD MMC SD Memory Stick card can memory MP3 songs and digital pictures How to select MEMORY CARD to play 1 Turn on the power of the di...

Page 73: ... protection technology must be authorized by Macrovision Corporation and is intended for home and other limited viewing uses only unless otherwise authorized by Macrovision Corporation Reverse engineering or disassembly is prohibited Disc cannot be played There is no disc in the unit Put the disc on the disc tray properly with the label side up Clean the disc Moisture has condensed in the unit Rem...

Page 74: ...og audio Video out Power Consumption AVC SYSTEM DIMENSION mm Power supply 0 2V 0 5V PANEL RESOLUTION VIEWING ANGLE H V CONTRAST RATIO BRIGHTNESS cd m2 EFFECTIVE PIXEL RATE WITH STAND mm WITHOUT STAND mm TV STANDARD TUNING SYSTEM FREQUENCY RANGE CATV AV IN COMPONENT MONITOR OUT PC IN HDMI DVI IN ANTENNA IN LCD DIMENSION TV FUNCTION TERMINALS INPUT POWER SOUND OUTPUT POWER CONSUMPTION 32 WIDE TFT LC...

Reviews: