


User Manual for V2.8
–
2/21/2020
11
3.3 STEP 3. Prepare RX (Receiver) Unit for Inspection
During an acoustic inspection for a pipe segment, the RX component receives the sound signal generated by
the TX component. Based on the characteristics of the received signal, it assesses the condition of the pipe
segment between the TX location and the RX location. After correctly deploying the RX, the steps for
operating the RX are as follows:
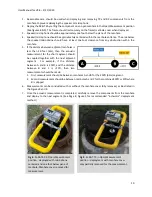
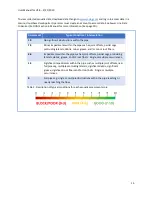
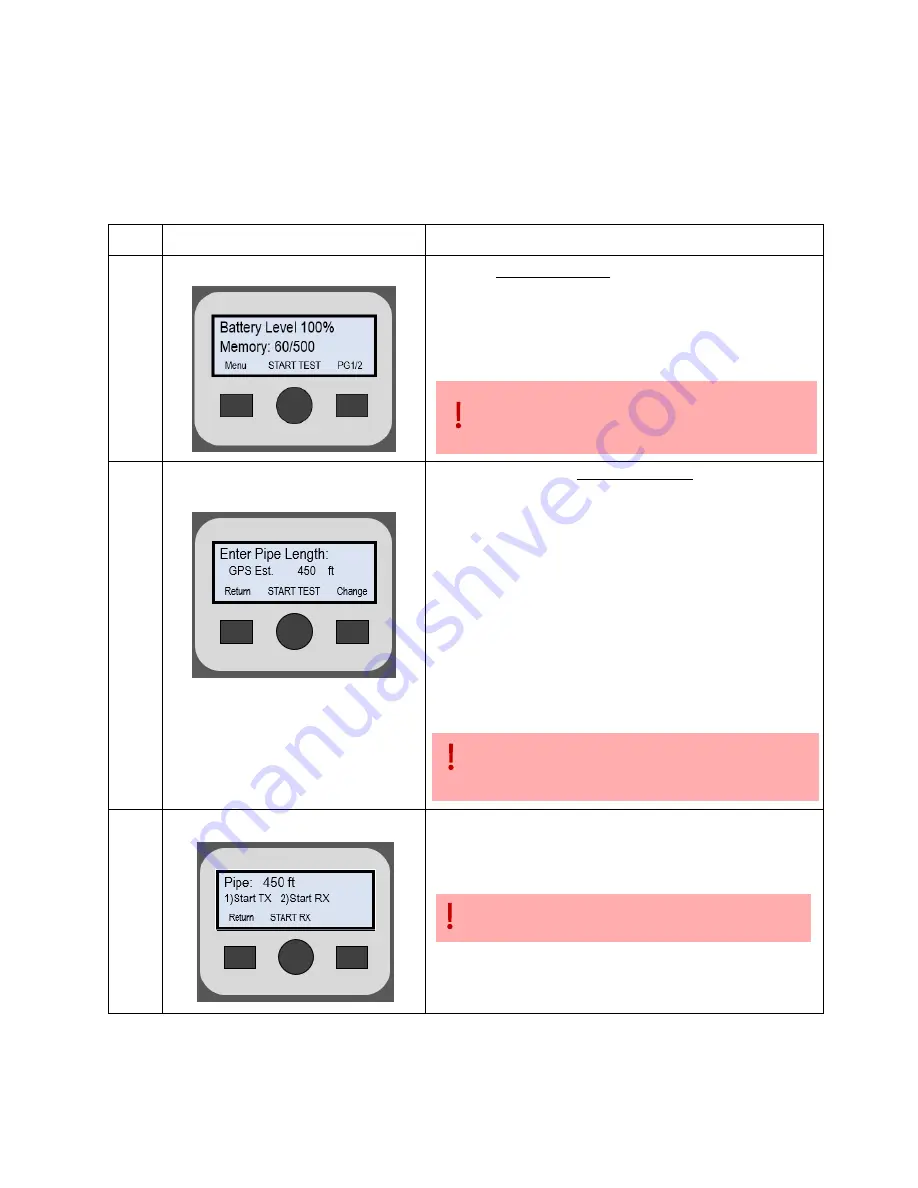
Ref #
User Display
Description
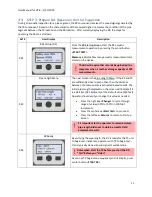
RX1
RX Startup (1/2)
From the RX Startup Screen, start the RX acoustic
measurement operation by pressing the center button
<START TEST>
.
Memory
indicates how many acoustic measurements are
stored on the device.
The RX will require that records be uploaded to a
computer when it reaches storage capacity at 500
measurements.
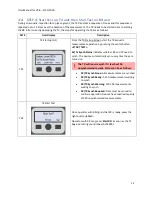
RX2
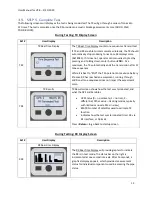
Pipe Length Menu
The next screen is the Pipe Length Menu. If the RX and TX
are sufficiently close to each other, then the distance
between the components is estimated based on GPS. The
initial pipe length displayed on the screen will indicate if it
is a GPS Est. (GPS Estimate) or the Default value (350 feet).
Operator should verify or change this value as needed.
•
Press the right key
<Change>
to cycle through
range of values (50ft to 750ft) in 100-foot
increments.
•
Press the center key
<Start Test>
to proceed.
•
Press the left key
<Return>
to return to Startup
Screen.
It is important for the operator to record accurate
pipe length distances to obtain accurate field
assessment results
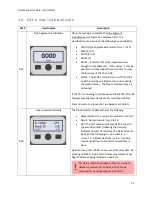
RX3
RX Ready
By verifying the pipe length, the RX is ready for the TX unit
to begin test. Indicate to operator with TX to begin test
–
this is typically done via hand signal or walkie talkie.
Remember: Start the TX before you start the RX.
“Yell” before you “Listen”
As soon as TX begins tone sequence (end of Step 4), press
center button <
START RX
>.


