H a n g t h e L i t e P r o o n t h e C e i l i n g
8
Hang the LitePro on the Ceiling
1
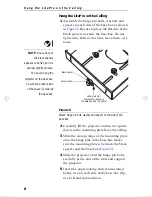
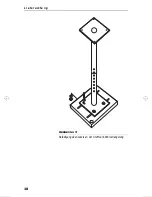
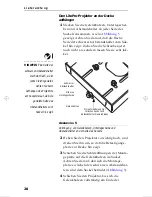
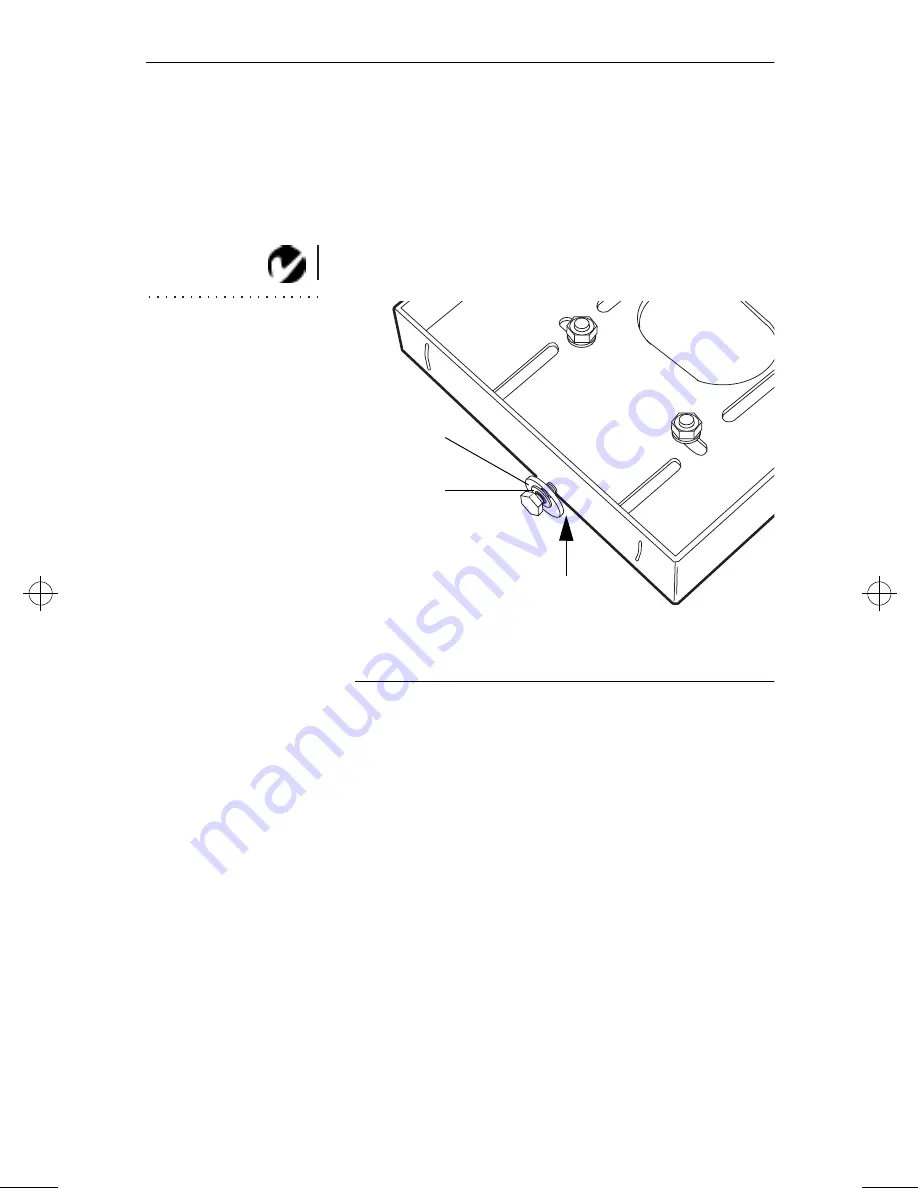
Assemble the hinge pin bolts, washers and
spacers to each side of the base box as shown
in
Figure 5
. Be sure to place the flat side of the
black spacers towards the base box. Do not
tighten the bolts at this time, leave them very
loose.
NOTE: One surface of
the black spacers
appears to be flat, but it is
actually slightly concave.
When you hang the
projector on the base box,
be sure the concave side
of the spacer is towards
the base box.
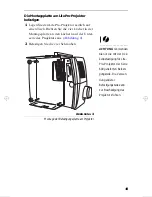
F
IGURE
5
Attach hinge pin bolt, washer and spacer to the side of the
base box
2
Carefully lift the projector and turn it upside
down so the mounting plate faces the ceiling.
3
Slide the slot openings of the mounting plate
onto the hinge pins in the base box. Make
sure the mounting plate is between the black
spacers and the base box (
Figure 5
).
4
Slide the projector until the hinge pin bolts
rest fully at the end of the slots and support
the projector.
5
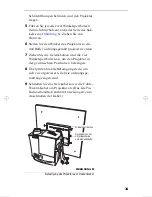
Insert the angle locking bolts (6mm slotted
bolts), two on each side of the base box (Fig-
ure 6). Hand-tighten them.
black spacer
silver washer
slide projector
bracket here between
the base box and the spacer
010-0132-02-eng-ger.fm Page 8 Monday, March 31, 1997 11:23 AM
Summary of Contents for LP610
Page 14: ......


