


user guide
8 of 38
002-25230 Rev. *F
2022-03-17
CYPRESS™ Programmer
GUI user guide
Getting Started
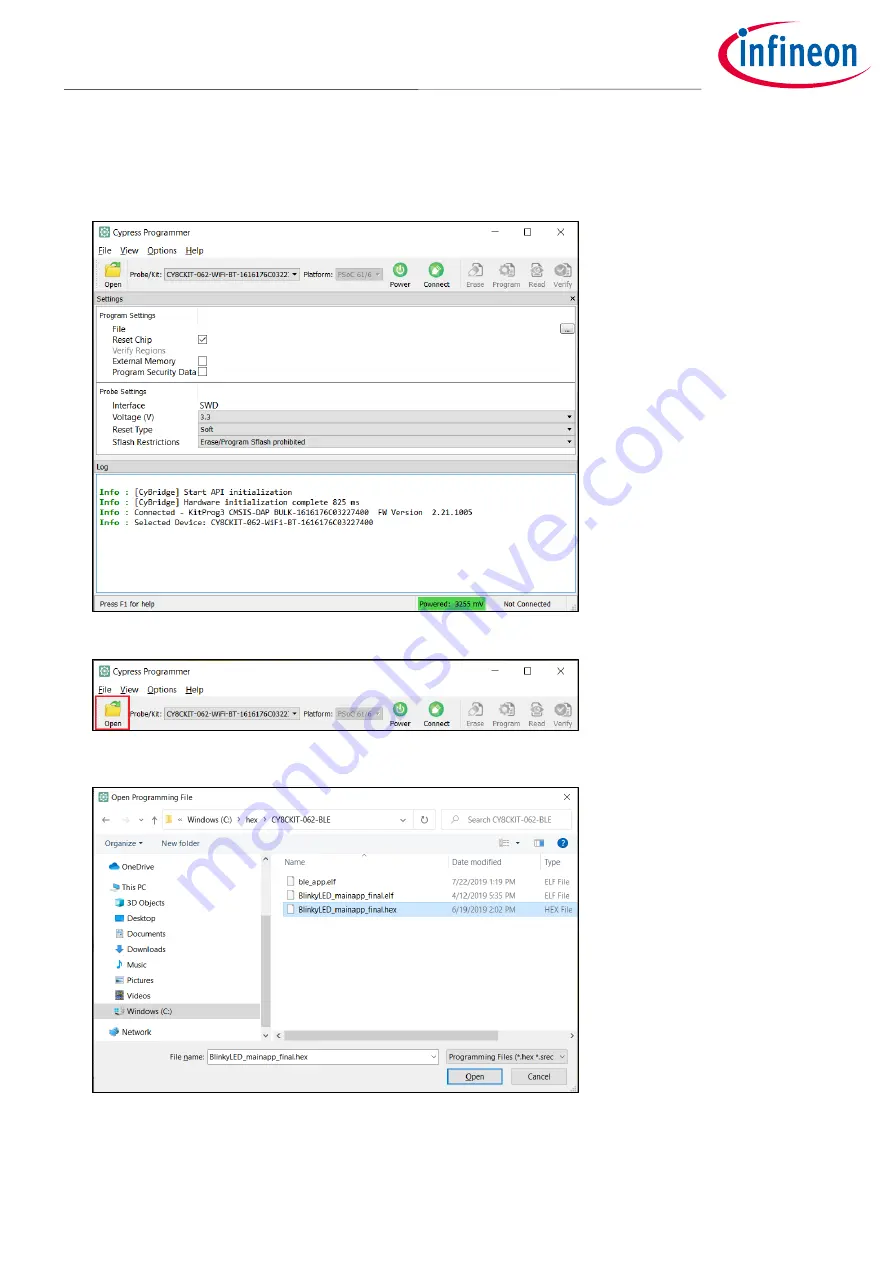
3.2
Load Programming File
1.
Connect the device to the host computer. Select the device name in the
Probe/Kit
drop-down, and CYP will
display information under
Probe Settings
(if the
Settings
section is viewable).
2.
Click
Open
.
On the Open Programming File dialog, navigate to the location of the HEX, SREC, ELF, or BIN file to load,
select it, and click
Open
.


