background image


2    -    PM - Copy 1600T for iR1600 / iR2000


Installation

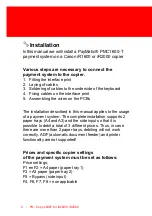
In this manual we will install a PayMatic® PMC1600-T
payment system on a Canon iR1600 or iR2000 copier

Various steps are necessary to connect the
payment system to the copier.

1. Fitting the interface print
2. Laying of cables
3. Soldering of cables to the underside of the keyboard
4. Fixing cables on the interface print
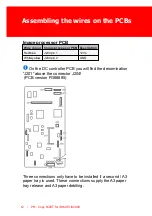
5. Assembling the wires on the PCBs

The installation described in this manual applies to the usage
of a payment system. The complete installation supports 2
paper trays (A4 and A3) and the side input so that it is
possible to debit a total of 3 different prices. Thus, in case
there are more than 2 paper trays, debiting will not work
correctly. ADF (automatic document feeder) and printer
functionality are not supported!

Prices and specific copier settings
of the payment system must be set as follows:

Price settings;
F1 en F2 = A4 paper (paper tray 1) 
F3 = A3 paper (paper tray 2)
F5 = Bypass (side input)
F4, F6, F7, F8 = non applicable

Summary of Contents for PM - Copy 1600T for iR1600

Page 1: ...2019 Inepro B V All rights reserved Installation Manual PM Copy 1600T for iR1600 iR2000 PM Copy 1600T for iR1600 iR2000...

Page 2: ......

Page 3: ...or iR1600 iR2000 This manual contains information on how to do that please read it carefully Due to continuous product improvements this manual is subject to changes without notice We strongly recomme...

Page 4: ...uthor assume no responsibility for errors or omissions or for damages resulting from the use of information contained in this document or from the use of programs and source code that may accompany it...

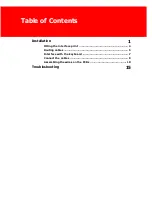
Page 5: ...Table of Contents Installation 1 4 Fitting the interface print 5 Routing cables 7 Interface with the keyboard 9 Connect the cables 10 A ssembling the wires on the PCBs Troubleshooting 15...

Page 6: ......

Page 7: ...ice contains materials which can be recy cled and then reused A t the end of life specialized companies can dismantle the dev ice to materials which can be reused in order to recy cle and reuse For ex...

Page 8: ......

Page 9: ...I Installation Part...

Page 10: ...n the PCBs The installation described in this manual applies to the usage of a payment system The complete installation supports 2 paper trays A4 and A3 and the side input so that it is possible to de...

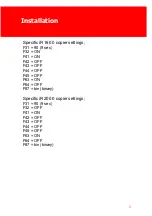
Page 11: ...0 copier settings F31 90 9 sec F32 ON F41 ON F42 OFF F43 OFF F44 OFF F45 OFF F63 ON F64 OFF F87 bin binary Specific iR2000 copier settings F31 90 9 sec F32 OFF F41 ON F42 OFF F43 OFF F44 OFF F45 OFF F...

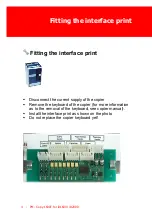
Page 12: ...ting the interface print Disconnect the current supply of the copier Remove the keyboard of the copier for more information as to the removal of the keyboard see copier manual Install the interface pr...

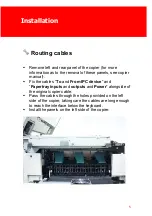
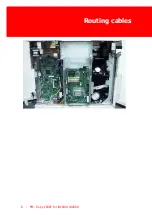
Page 13: ...er manual Fix the cables To and From IPC device and Papertray inputs and outputs and Power alongside of the original copier cable Pass the cables through the holes provided on the left side of the cop...

Page 14: ...Routing cables 6 PM Copy 1600T for iR1600 iR2000...

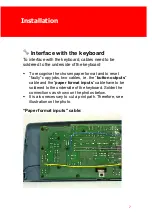
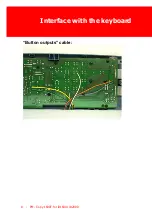
Page 15: ...ise the chosen paper format and to reset faulty copy jobs two cables i e the button outputs cable and the paper format inputs cable have to be soldered to the underside of the keyboard Solder the conn...

Page 16: ...Interface with the keyboard 8 PM Copy 1600T for iR1600 iR2000 Button outputs cable...

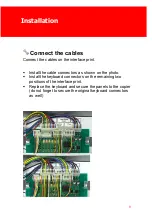
Page 17: ...ce print Install the cable connectors as shown on the photo Install the keyboard connectors on the remaining two positions of the interface print Replace the keyboard and secure the panels to the copi...

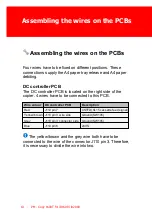
Page 18: ...troller PCB is located on the right side of the copier 4 wires have to be connected to this PCB Wire colour DC controller PCB Description Red J110 pin 7 CSTFD SL15 cassette feed signal Yellow brow n J...

Page 19: ...06 pin 11 MPDF SL101 MF feed signal White J108 pin 1 w ire side 5VS MF paper sensor PS105 Dark brow n J108 pin 1 connector side 5VS MF paper sensor PS105 The white and the brown wire both have to be c...

Page 20: ...escription Red blue J204 pin 1 12Vs White yellow J204 pin 2 GND On the DC controller PCB you will find the denomination J201 above the connector J204 PCB version FG68885 Three connections only have to...

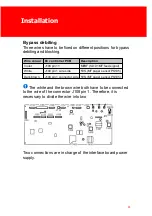
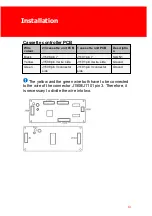
Page 21: ...1508 pin 7 J1101 pin 7 SLON 1 Yellow J1508 pin 3 w ire side J1101 pin 3 w ire side Ground Green J1508 pin 3 connector side J1101 pin 3 connector side Ground The yellow and the green wire both have to...

Page 22: ......

Page 23: ...II Troubleshooting Part...

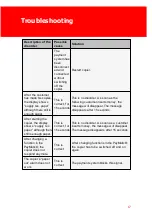
Page 24: ...ing of the green w ire under the keyboard A3 is not debited Wiring error Check the black w ire is connected to J1508 pin 7 Check the blue w ire is connected to J110 pin 6 Check the soldering of the gr...

Page 25: ...sage w ill disappear The message disappears after 15 seconds After starting the copier the display show s supply rec paper although there still is enough paper This is correct for 15 seconds This is n...

Page 26: ...18 PM Copy 1600T for iR1600 iR2000 This page has intentionally been left blank...

Page 27: ...Troubleshooting 19 This page has intentionally been left blank...

Page 28: ......

Reviews: