9
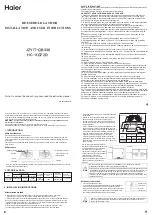
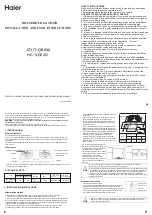
Fast boil function (Booster)
This function, only present on some cooking zones, makes it possible to exploit the hob’s maximum power (for example to bring water to the boil very quickly).
To activate the function, press the “+” button until “P” appears on the display. After 10 minutes’ use of the booster function, the appliance automatically sets
the zone to level 9.
CLEANING
WARNING
• Do not use steam cleaners.
• Before cleaning, make sure the cooking zones are switched off and that the residual heat indicator (“H”) is not
displayed.
IMPORTANT: Do not use abrasive sponges or scouring pads. Their use could eventually ruin the glass.
• After each use, clean the hob (when it is cool) to remove any deposits and stains due to food residuals.
• Sugar or foods with a high sugar content damage the hob and must be immediately removed.
• Salt, sugar and sand could scratch the glass surface.
•
Use a soft cloth, absorbent kitchen paper or a specific hob cleaner (follow the Manufacturer’s instructions).
• Liquid splillages on the cooking zones may make pan vibrate or move
• Dry the hob thoroughly after cleaning it.
TROUBLESHOOTING GUIDE
• Read and follow the instructions given in the section “Instructions for use”.
• Check that the electricity supply has not been shut off.
• Dry the hob thoroughly after cleaning it.
• If, when the hob is switched on, alphanumeric codes appear on the display, consult the following table for instructions.
• If the hob cannot be switched off after using it, disconnect it from the power supply.
ERROR CODE
DESCRIPTION
POSSIBLE CAUSES
ERROR ELIMINATION
C81, C82
The control panel switches off
because of excessively high
temperatures.
The internal temperature of
electronic parts is too high.
Wait for the hob to cool down before
using it again.
F42 or F43
The connection voltage is wrong.
The sensor detects a discrepancy
between the appliance voltage and
that of the mains supply.
Disconnect the hob from the mains
and check the electrical connection.
F12, F21, F25, F36, F37, F40, F47,
F56, F58, F60
Call the After-Sales Service and specify the error code
NOISES MADE BY THE HOB
Induction hobs can make whistling or crackling sounds during normal operation, these actually come from the pots and pans as a result of the characteristics
of the bottoms (for example, bottoms made of several layers of material, or uneven bottoms). These noises vary depending on the pots and pans used and the
amount of food they contain, and are not indicative of a defect of any kind.
In addition, the induction hob is equipped with an internal cooling system to control the temperature of electronic parts; as a result, during operation and
for several minutes after the hob has been switched off, the noise of the cooling fan will be audible. This is perfectly normal and indeed essential for proper
functioning of the appliance.
AFTER-SALES SERVICE
Before contacting the After-sales Service:
1. See if you can solve the problem yourself with the help of the “Troubleshooting guide”.
2. Switch the appliance off and then on again it to see if the problem has been eliminated.
If the problem persists after the above checks, contact the nearest After-Sales Service.
Always specify:
• a brief description of the fault;
• the product type and exact model;
• the Service number (the number after the word Service on the rating plate), located under the appliance (on the metal plate);
• your full address;
• your telephone number.
If any repairs are required, contact an
authorised After-Sales Service Centre
(to ensure the use of original spare parts and correct repairs). Spare parts are
available for 10 years.