2. Mounting the rescue parachute
The Emotion² has got a deployment bag with integrated release handle. Out of this reason you have to find out the right
size of the deployment bag before mounting the rescue parachute.
Therefore you need to know the volume of the rescue parachute. If it is not shown in the parachute manual, you can
alternatively determine the volume of the rescue parachute by checking it’s weight.
As a rule of thumb multiply the weight by 3. For example: 1500 gr x 3 = 4500 ccm Volumen
You have the choice of two deployment bag sizes for the Emotion². Only an original deployment bag is allowed to be
used:
Container size Medium
from 3000 ccm to 6300 ccm
Container size Large
from 5000 ccm to 8500 ccm
Volumes of the Independence rescue parachutes which are compatible with the Emotion²:
Piccolo EVO:
3700 ccm = M
Joker M:
6800 ccm = L
Annular 20 EVO:
4500 ccm = M
Joker L:
7500 ccm = L
Annular 22 EVO:
5000 ccm = M or L
Smart L:
5000 ccm = M or L
Annular 24 EVO:
5500 ccm = M or L
Evo Cross 100:
4500 ccm = M
Annular 20 “Classic”:
5300 ccm = M or L
Evo Cross 120:
5200 ccm = M or L
Annular 22 “Classic”:
6250 ccm = M or L
Evo Cross 160:
5700 ccm = M or L
Annular 24 “Classic”:
7150 ccm = L
2.1. Placing the rescue parachute into the innercontainer:
After you have choosen the right size the rescue parachute is to be placed into the deployment bag. The steps of packing
until you have reached the shown status below, has to be done according the rescue parachute manual!
The following guide shows the assembling of an Annular Evo. Other systems have to be build in the same way
analogously. Please check if there are special remarks in your parachute manual!
Steerable systems (expample Rogallo systems) can be installed in the Emotion² only with explicit approval of the rescue
parachute manufacturer!
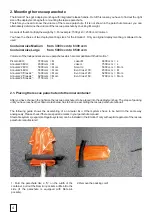
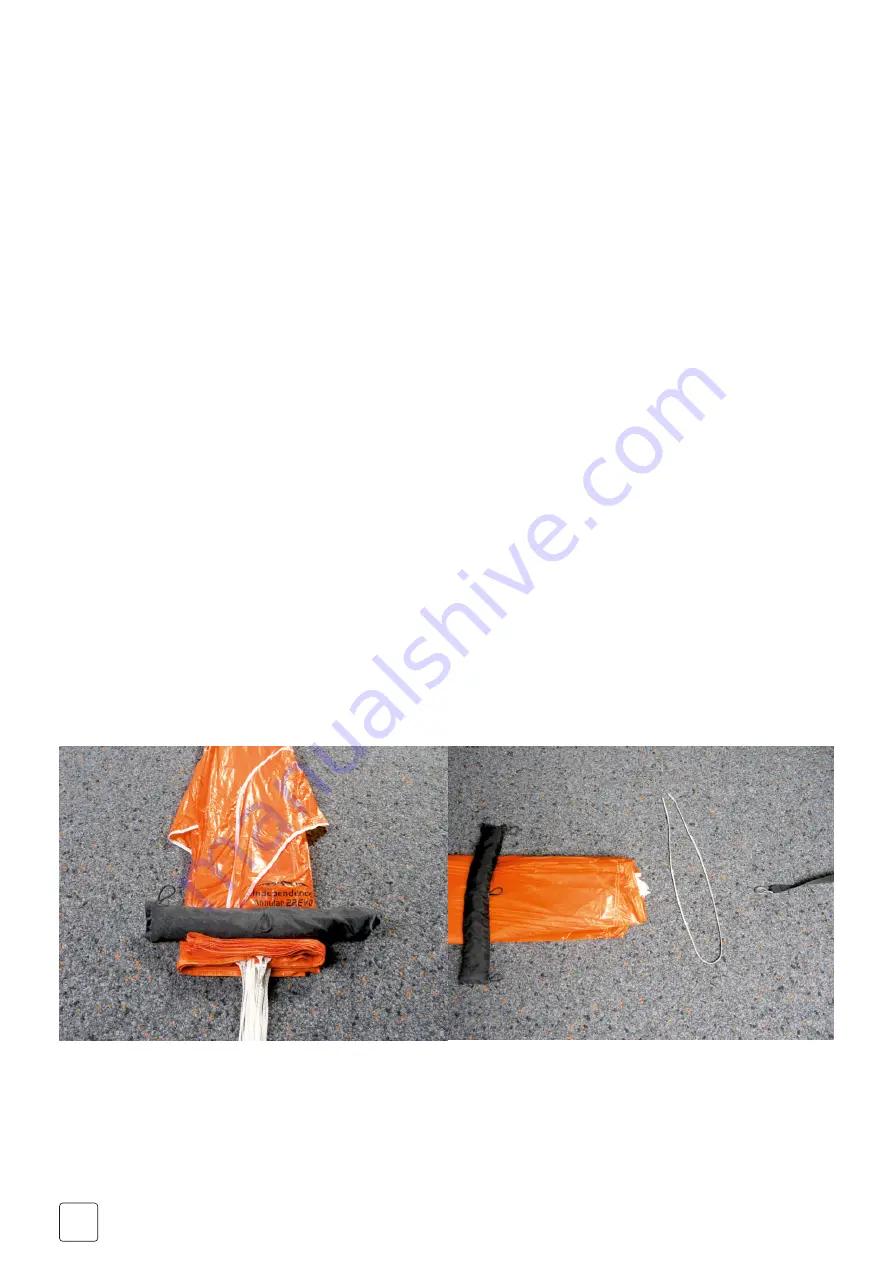
2. Remove the packing cord!
1. Fold the parachute like a “S” on the width of the
container, pull out the Ram-Air-pockets a little bit to the
side (if the parachute is equipped with Ram-Air-
pockets).
4
3a. Fold the canopy in small S-folds and place it in the
deployment bag. Bundle the lines in 3x3 “8-folds”. Do not
bundle the last 60 cm of lines.
Placing in deployment bag option a)
Placing in deployment bag option b)
3b. Fold the canopy in big, horizontal S-folds (stack
pack). Bundle the lines in 3x3 “8-folds”. Do not bundle the
last 60 cm of lines.
Both options are technically equivalent and can alternatively be used.
Attention: new rubber bands must be used for line bundles and container with every re-pack!
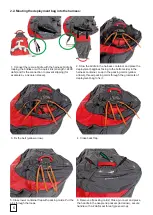
4. Close the deployment bag with the lines. First the
right flap with the upper and lower flap.
Depending of the rescue system size the inner or outer
grommets can be used to adjust the deployment bag
volume.
5. Close the left flap. Also here you can adjust the
deployment bag volume by using the inner or outer
grommets.
First close the middle, then the outside!
5

