background image


- 6 - 


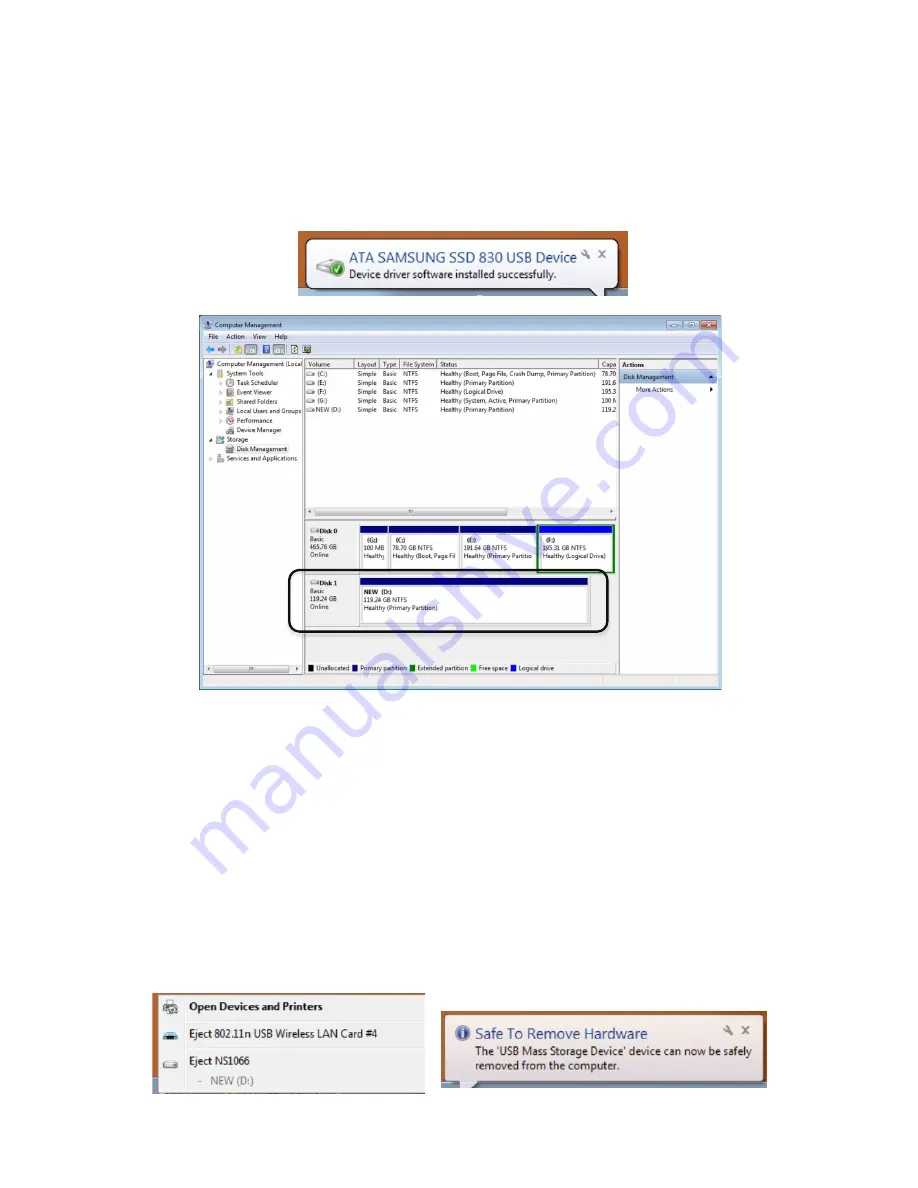
d.  Now the USB data cable may be connected, one USB-A plug shall be plugged 

into the device, the other into a free USB interface of the PC. If the operating 
system has found the new storage medium, a Plug & Play symbol will show up 
in the status bar. In the data storage manager, too, the drive shall show up a 
operative. 


IV. 

Instruction for the removal of drives


Please note: Before the removal of the data storage device, please stop all data access 
and transfer to the device, so that the storage can be normally removed. Forced removal 
may lead to damage or loss of crucial data. To prevent any data loss, please strictly follow 
the steps for removal below! 

a.  Removal  from  Windows  systems:  Right  click  on  the  hardware  or  USB  device 

removal symbol in the status bar, click on the periphery to be removed. When 
the  system  notification  reading  “the  device  can  now  be  safely  removed.”   
shows up, you can remove the data storage. 


Summary of Contents for FEU3NS-1E

Page 1: ...w w w i n a t e c k c o m FEU3NS 1E ...

Page 2: ...ty 2 5 drives always were received in a positive way by computer enthusiasts Portable drive enclosures in this way became the most important choice for users regarding solutions for storage mediums The stability of a storage medium directly influences the safety and life span of data and drives To accommodate these factors Inateck developed and introduced a new enclosure named FEU3NS 1 supporting ...

Page 3: ... 3 Scheme image of the enclosure LED indicator for power and transfer status USB3 0 interface Power switch ON OFF www inateck de ON OFF www inateck de ...

Page 4: ...9 5mm supported Hot Plug Plug Play Supported Licences CE FCC Measurements 137mm length x 85mm width x 17mm height Operation environment Storage 40 to 70 C Operation 5 to 55 C Supported operating systems Windows2000 XP Vista 7 8 Mac 9 0 or above III Hard drive installation steps a Please move the cover into the arrow direction indicated below When being clear of the clamps please lift the cover to ...

Page 5: ...ward in the indicated direction to establish a connection to the SATA interface of the enclosure c Please realign and lower the cover oriented on the position of the clip slots move it forward in the indicated direction to close the enclosure The installation is now completed Push Push Put Down Put Down ...

Page 6: ...ives Please note Before the removal of the data storage device please stop all data access and transfer to the device so that the storage can be normally removed Forced removal may lead to damageor loss of crucial data To prevent any data loss please strictly follow the steps for removal below a Removal from Windows systems Right click on the hardware or USB device removal symbol in the status bar...

Page 7: ...rive to be removed so that the drive can be detached safely b Removal from Macintosh systems Please choose the symbol for Portable drives devices choose the menu function Remove from the drop down menu by right clicking onto the symbol You may also drag the Portable device to the rubbish bin Now the device can be safely removed ...

Page 8: ...a foam sticker for 7 mm thickness hard drives You should attach the sticker to the original one inside the lid before you insert the hard drive Foam Extra Foam Stick Align and attach it onto the top of the original sticky pad inside the lid ...

Page 9: ......

Page 10: ......

Reviews: