SMITH MACHINE ASSEMBLY INSTRUCTION
Tools Required Assembling the Machine: Two Adjustable Wrenches and Allen
Wrenches
NOTE: It is strongly recommended two or more people assemble this machine to
avoid possible injury.
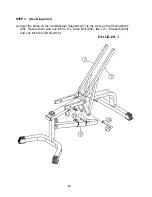
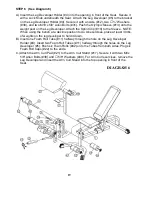
STEP 1 (See Diagram 1)
A.) Attach the Rear Base Frame (#3) to the Left Base Frame (#1). Secure it with two
M10 x 3” Carriage Bolts (#66), one Bracket (#7), two
∅
¾” Washers (#5), and two
M10 Aircraft Nuts (#6). DO NOT tighten all the nuts and bolts yet. Only finger-
tighten for now.
B.) Repeat the above procedure to attach the Right Base Frame (#2).
C.) Attach the Front Vertical Beam (#9) to the bracket on the Left Base Frame (#1).
Secure it with two M10 x 2 ¾” Carriage Bolts (#11),
∅
¾” Washers (#5), and M10
Aircraft Nuts (#6). Repeat the same procedure to install the other side.
D.) Attach the Guide Rod (#16) to the circular clamp on the Left Base Frame (#1).
Secure the M8 x 3/8” Allen Screw (#60) with an Allen wrench. Repeat the same
procedure for the other side.
E.) Attach the Rear Vertical Beam (#8) and Lat Bar Base (#10) to the Rear Base
Frame (#3). Secure it with two M10 x 3” Carriage Bolts (#66),
∅
¾” Washers (#5)
and M10 Aircraft Nuts (#6).
4


