background image


Introduction


Image Engineering 

CAL1


Seite 

3

 von 

10


1  INTRODUCTION 

Important information: Read the manual carefully before using the device.  

Inappropriate utilization may cause damages to the device, to the DUT (device under test) 
and/or other components of your setup.  

Keep these instructions in a safe place and pass them to any future user.  

1.1  Conformity 

We, Image Engineering GmbH & Co. KG, hereby declare, that the CAL1 corresponds to the 
essential requirements of the following EC directive in its current version:  

  Electromagnetic Compatibility - 2014/30/EU 

  RoHS 2 - 2011/65/EU 

  Low Voltage - 2014/35/EU 

1.2  Intended use 

The integrating sphere is designed as a calibration light source, based on iQ-LED technology. It 
includes a micro spectrometer and is controlled with the iQ-LED control software or via dip 
switches when not connected to a PC.  

  Only suitable for indoor use. 

  Place your system in a dry and constant tempered environment without any interfering 

light. 

  The optimal ambient temperature range is 22 to 26 degrees Celsius. The maximum 

ambient temperature range is 18 to 28 degree Celsius.  

  The optimal system temperature range, displayed in the software user interface, is 

between 35 and 50 degrees Celsius. The system has internal temperature 

management, if there is any error regarding the internal temperature, you will get a 

warning message and the system will automatically shut off to avoid any damage.


1.2.1  Departing from described setup 

The following steps must be performed in the correct chronology to allow a frictionless 
commissioning. Departing from the chronology may lead to an incorrect working device.  

1.  Install the iQ-LED software 

2.  Connect CAL1 to power and via USB to the PC  

3.  Switch CAL1 on; the system drivers will now be installed 

4.  After drivers are installed completely, start the software 

1.2.2  USB connection 

Only appropriate USB connection allows error-free operation of CAL1. Use delivered USB 
cables. If you need to extend the USB connection to longer distances, please check if powered 
hubs/repeaters are necessary.  

Summary of Contents for CAL1

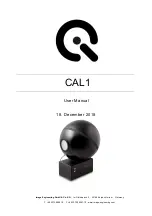
Page 1: ...Image Engineering GmbH Co KG Im Gleisdreieck 5 50169 Kerpen Horrem Germany T 49 2273 99991 0 F 49 2273 99991 10 www image engineering com CAL1 User Manual 18 December 2018 ...

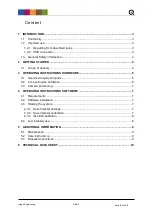
Page 2: ...TRUCTIONS HARDWARE 5 3 1 Overview display and ports 5 3 2 Connecting the hardware 6 3 3 Camera positioning 7 4 OPERATING INSTRUCTIONS SOFTWARE 7 4 1 Requirements 7 4 2 Software installation 7 4 3 Starting the system 7 4 3 1 Spectrometer settings 7 4 3 2 Spectrometer calibration 7 4 3 3 iQ LED calibration 8 4 4 Low intensity use 8 5 ADDITIONAL INFORMATION 9 5 1 Maintenance 9 5 2 Care instructions 9...

Page 3: ...ronment without any interfering light The optimal ambient temperature range is 22 to 26 degrees Celsius The maximum ambient temperature range is 18 to 28 degree Celsius The optimal system temperature range displayed in the software user interface is between 35 and 50 degrees Celsius The system has internal temperature management if there is any error regarding the internal temperature you will get...

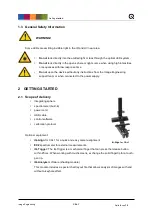
Page 4: ... team or when connected to the power supply 2 GETTING STARTED 2 1 Scope of delivery integrating sphere spectrometer built in power cord USB cable control software calibration protocol Optional equipment iQ Align for CAL1 for a quick and easy camera alignment EX2 spectrometer for external measurements iQ Trigger The iQ Trigger is a mechanical finger that can press the release button within 25 ms Wh...

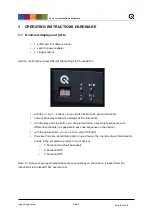
Page 5: ... storage of the illuminants with the play and stop button you can start and stop a saved light sequence with different illuminants it is possible to save one sequence on the device with the power button you can turn on and off the light there are three pre stored illuminants on your device the intensity of each illuminant is shown in the acceptance protocol of your device o 1 illuminant A default ...

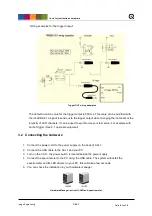
Page 6: ...d to synchronize your test setup For example with an iQ Trigger See 2 1 optional equipment 3 2 Connecting the hardware 1 Connect the power cord to the power supply on the back of CAL1 2 Connect the USB cable to the CAL1 and your PC 3 Turn on the CAL1 the power switch is located beside the power supply 4 Connect the spectrometer to the PC using the USB cable The system will install the spectrometer...

Page 7: ...sktop Follow the iQ LED software manual to control the CAL1 NOTE The iQ LED devices can only operate with high precision when setup and calibration are performed correctly Consult the iQ LED software manual for a comprehensive description and read it carefully 4 3 1 Spectrometer settings The iQ LED software see iQ LED software manual automatically generates the best spectrometer settings for you l...

Page 8: ... LED control software During the first 500 600 working hours we recommend performing a spectral calibration every 50 operating hours After the first 500 600 operating hours a calibration of every 150 working hours suffices Other factors that indicate the need for a spectral calibration unsatisfactory illuminant generation the aberration of the intensity values or a spectral curve that does not fit...

Page 9: ...d to bridge the time gap while your spectrometer is recalibrated Please contact us for conditions and procedure 5 2 Care instructions Do not touch scratch or pollute the diffusor If there is any dust on the diffusor clean it with an air blower Do not remove the fiber from the spectrometer Otherwise the calibration is invalid and the spectrometer has to be recalibrated Only store and transport the ...

Page 10: ...ical data sheet Image Engineering CAL1 Seite 10 von 10 6 TECHNICAL DATA SHEET See annex for the technical data sheet It can also be downloaded from the website of Image Engineering www image engineering com ...

Reviews: