background image

WideTEK WT42 / WT48


8.2 Language 


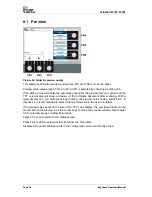
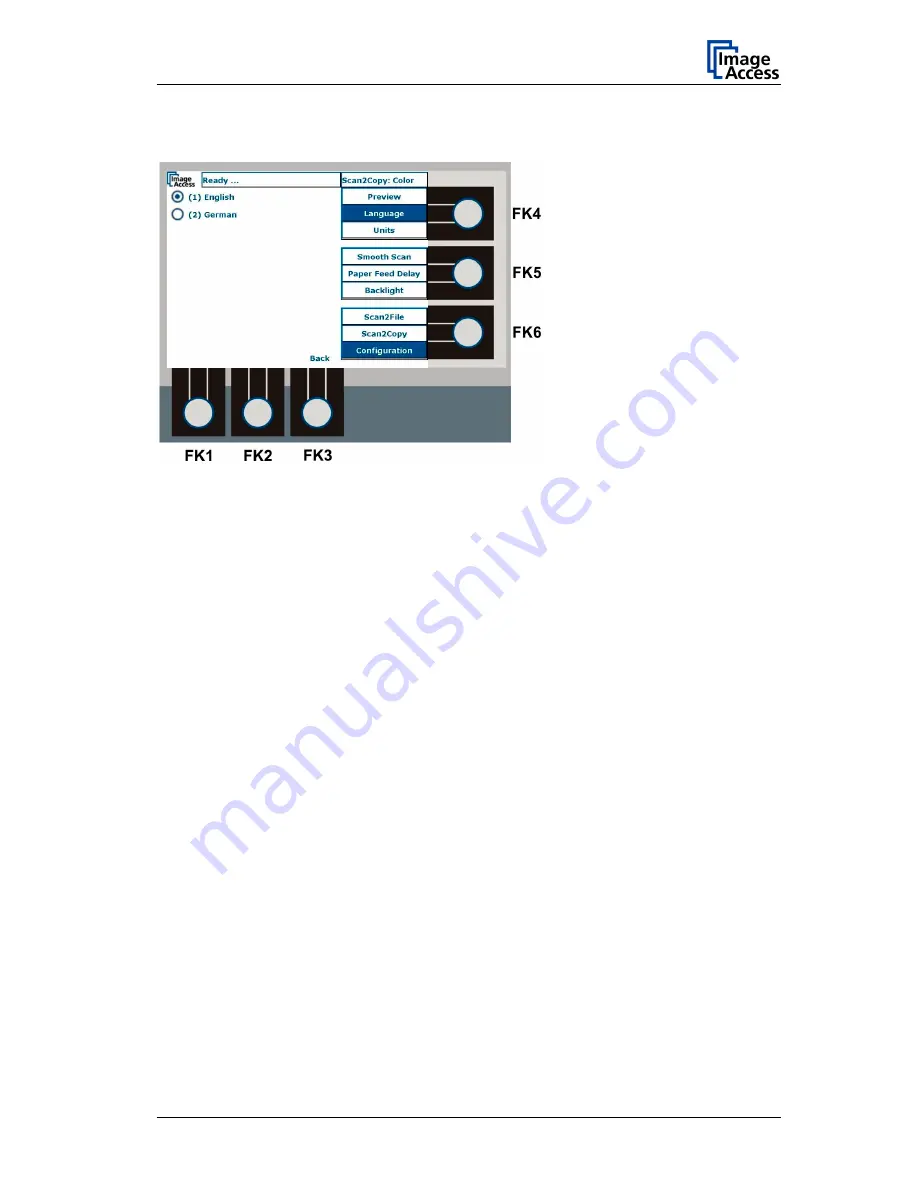
Picture 53: Language selector 

Use the corresponding keys of the numeric keypad to select the desired language. 

After selecting the language, all menu text changes immediately. 

Press FK3 once to return to the status screen. 

Press FK4 or FK5 to select another item from the menu lists. 


Keyboard Operation Manual 

Page 53 

Summary of Contents for WideTEK WT42

Page 1: ...W Wi id de eT TE EK K W WT T4 42 2 W WT T4 48 8 Keyboard Operation Manual...

Page 2: ...For your notes File WT48_Keyboard_en doc...

Page 3: ...s of the text WideTEK WT42 WT48 Keyboard Operation Manual Version C May 2005 Valid for devices with software version 4 00 Printed in Germany All rights reserved Copying in any form including electroni...

Page 4: ...13 3 2 TFT Color Display with Function Keys 14 3 3 Cursor Keys with ENTER button 15 3 4 Numeric Keypad 16 3 4 1 Decimal point 17 3 4 2 CLEAR button 17 4 The Status Screen Information 18 4 1 Status Inf...

Page 5: ...ion of directories for scanned images 25 6 2 Key Function Overview 25 6 3 Setting General Parameters 26 6 3 1 Brightness 26 6 3 2 Contrast 27 6 3 3 Gamma color mode Color and Gray 27 6 3 4 Invert with...

Page 6: ...lor Mode 41 7 4 2 Document 41 7 4 3 Print 43 7 4 4 Sharpness 45 7 4 5 Margins 46 7 4 6 Mirror 47 7 4 7 Config 1 Printer available with Postscript PJL and HP Designjet printer 48 7 4 8 Config 2 Printer...

Page 7: ...1 Document width displayed in Document Size Auto 19 Picture 12 Setup mode screen 21 Picture 13 Status message after saving new values 23 Picture 14 Scan2File status screen 25 Picture 15 Brightness sli...

Page 8: ...lution 44 Picture 42 Sharpness slider 45 Picture 43 Margins available with AUTO document size 46 Picture 44 Margins available with fixed formats 46 Picture 45 Mirror function 47 Picture 46 Configurati...

Page 9: ...wide TFT color display the current settings are displayed while using the scanner The keyboard and display can be shifted on the scanner housing to provide the most favorable viewing angle for each op...

Page 10: ...TFT color display shows the start screen during the start up sequence of the WideTEK WT42 WT48 scanner The four sections are START STOP buttons TFT color display with function keys below and right be...

Page 11: ...During the startup sequence the hardware and the software of the scanner is tested internally At the end of the start sequence the TFT color display shows the animated S2N start screen and the green...

Page 12: ...uence has completed the TFT color display switches to the S2N start screen and displays the SYSTEM START message Picture 3 S2N start screen The S2N SYSTEM START screen is followed by the setup mode sc...

Page 13: ...ree seconds to switch the device from setup mode to stand by mode Release the STOP button when the TFT color display switches off The green LED blinks while the internal system terminates all function...

Page 14: ...screens may vary Typical uses of the function keys FK1 FK2 These keys are used to move a slider which is displayed on the TFT Sliders are displayed when a range of values is available FK3 If the stat...

Page 15: ...scanner 1 Before scanning a document The document to be scanned is inserted The upper button will transport the document forward in scanning direction The lower button will transport the document reve...

Page 16: ...a valid value is entered in the fields pressing the decimal point will move the cursor to the next field to the right Numeric keypad in Operating mode The numeric keys are used to select an item from...

Page 17: ...splay See Picture 9 Picture 9 Slider for brightness setting If the accelerator function is off pressing FK1 or FK2 moves the slider one unit to the left or to the right If the accelerator function is...

Page 18: ...is ready to accept settings such as scan mode document size resolution and many more ERROR xxx Error messages The error messages contain an error number xxx or a normal text message 4 2 Scan Mode The...

Page 19: ...tonal green channel Photo Photo green channel 4 3 2 Document Size This section shows the maximum document width The selectable document widths are DIN A5 DIN A0 36 inch 42 inch optional 48 inch option...

Page 20: ...TFT color display the image can be scrolled using the four cursor keys up down left right Refer to chapter 3 3 4 3 4 Scan Resolution This section shows the selected scan resolution 4 3 5 Print Resolu...

Page 21: ...g Setup Mode Press and hold the STOP button then while holding the STOP button press the START button The green LED will start flashing rapidly indicating the start sequence has begun The start sequen...

Page 22: ...er setting a new valid value pressing the decimal point button in the numeric keypad moves the active field position to the next field to the right After entering a valid value the function keys FK1 a...

Page 23: ...s is also possible after saving new values Resetting the values is not possible after leaving the setup mode 5 6 Saving New Values The ENTER button saves the changes for IP address subnet mask and gat...

Page 24: ...witches off The green LED blinks while the internal system terminates all functions If the green LED lights continuously the device is in stand by mode To exit the setup mode press and hold the red ST...

Page 25: ...T48 Installation and Setup Manual chapter 10 6 5 FTP Upload 6 2 Key Function Overview The function keys FK1 and FK2 control the slider FK3 switches to the scan mode selection and configuration menu FK...

Page 26: ...itepoint 6 3 1 Brightness Picture 15 Brightness slider Brightness values range from 0 to 255 Use FK5 to select Brightness as indicated above the slider The slider position and the decimal value show t...

Page 27: ...t of ten Selecting another parameter with the FK5 key turns the accelerator function off 6 3 3 Gamma color mode Color and Gray Picture 17 Gamma slider Gamma value range 1 0 to 2 5 Use FK5 to select Ga...

Page 28: ...accelerator function is active the slider moves with an increment of ten Selecting another parameter with the FK5 key turns the accelerator function off 6 3 6 Whitepoint Picture 20 Whitepoint slider...

Page 29: ...ection menu Press FK3 to open the selection menu Picture 21 Scan2File Color Modes menu Note the number next to the desired color and use the corresponding key of the numeric keypad to select the color...

Page 30: ...gth depends on the combination of color mode resolution and the size of memory installed in the WideTEK WT42 WT48 The available document widths depend on the options installed in the WideTEK WT42 WT48...

Page 31: ...e corresponding keys of the numeric keypad to select the desired resolution Press FK4 to select another item from the menu list Press FK5 or FK6 to select an item from the other menu lists Press FK3 o...

Page 32: ...ider is moved with FK1 and FK2 The PNM data format provides raw image data of the scanned document The TIFF data format has a G4 compression option which reduces the resulting image size The compressi...

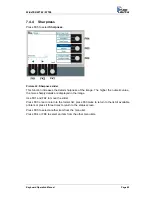
Page 33: ...increases the detail sharpness The higher the numeric value the more sharply details appear in the image Press FK5 to select another item from the menu list Press FK4 or FK6 to select an item from th...

Page 34: ...mm The four margins and the symmetry are only available with document size AUTO selected If a fixed format is selected only upper margin and lower margin settings are available The other menu items ar...

Page 35: ...orizontal Use the corresponding keys of the numeric keypad to select the mirror function Press FK5 to select another item from the menu list Press FK4 or FK6 to select an item from the other menu list...

Page 36: ...nction has two settings off and on Use the corresponding keys of the numeric keypad to select the integration of an ICC profile Press FK4 or FK5 to select an item from the other menu lists Press FK3 o...

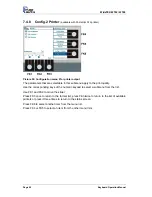
Page 37: ...corresponding keys of the numeric keypad to select a printer type After selecting the desired printer type a mask opens to select the IP address of the printer This is necessary to locate the printer...

Page 38: ...ype Picture 32 Color Modes in Scan2Copy Use the corresponding keys of the numeric keypad to select one of the six color modes for scanning documents Continue with other settings selected with FK4 to F...

Page 39: ...slider FK3 switches to the scan mode selection and configuration menu FK5 selects the most frequently used parameters The title and scale of the slider changes according to the selected parameter FK6...

Page 40: ...ntrast Invers Blackpoint Whitepoint Refer to chapters 6 3 1 through 6 3 6 for detailed information 7 4 Scan2Copy Parameter Menu Press FK3 to select the parameter menu Initially the display shows the l...

Page 41: ...or FK6 to select an item from the other menu lists Press FK3 once to return to the printer selection menu press FK3 twice to return to the status screen 7 4 2 Document Picture 34 Document parameters...

Page 42: ...ess FK5 or FK6 to select an item from the other menu lists Picture 35 Scan2Copy Document Size 7 4 2 2 Resolution Use the corresponding keys of the numeric keypad to select the desired scan resolution...

Page 43: ...Picture 38 7 4 3 1 Paper Format Picture 39 Paper formats for output Use the corresponding keys of the numeric keypad to select the desired scan resolution Press FK3 once to return to the former list...

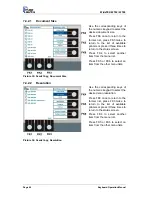
Page 44: ...an item from the other menu lists Picture 40 Print quality slider 7 4 3 3 Resolution Use the corresponding keys of the numeric keypad to select the desired print resolution Press FK3 once to return to...

Page 45: ...e sharply details are displayed in the image Use FK1 and FK2 to move the slider Press FK3 once to return to the former list press FK3 twice to return to the list of available printers or press it thre...

Page 46: ...e only available with document size AUTO selected If a fixed format is selected only upper and lower margin are available The other menu items are grayed as illustrated in Picture 44 Picture 44 Margin...

Page 47: ...o select the mirror function Press FK3 once to return to the former list press FK3 twice to return to the list of available printers or press it three times to return to the status screen Press FK5 to...

Page 48: ...ess FK6 to select another item from the menu list Press FK4 or FK5 to select an item from the other menu lists 7 4 7 1 Paper source Use the corresponding keys of the numeric keypad to select the paper...

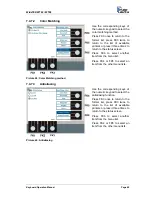
Page 49: ...ist Press FK4 or FK5 to select an item from the other menu lists Picture 48 Color Matching method 7 4 7 3 Antialiasing Use the corresponding keys of the numeric keypad to select the antialiasing funct...

Page 50: ...corresponding keys of the numeric keypad to select a submenu from the list Use FK1 and FK2 to move the slider Press FK3 once to return to the former list press FK3 twice to return to the list of avail...

Page 51: ...ure 51 Configuration menu initial screen Use the corresponding keys of the numeric keypad to switch the stitching function on or off Press FK3 once to return to the status screen The menus beside FK4...

Page 52: ...a large document e g a narrow but long drawing the preview only shows a small strip In this case it is recommended to select a fixed preview scale to see more details If the preview size exceeds the s...

Page 53: ...responding keys of the numeric keypad to select the desired language After selecting the language all menu text changes immediately Press FK3 once to return to the status screen Press FK4 or FK5 to se...

Page 54: ...setting has two values millimeters and inches Use the corresponding keys of the numeric keypad to select the desired unit of measurement Press FK3 once to return to the status screen Press FK4 or FK5...

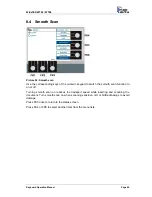
Page 55: ...ction to on or off Turning smooth scan on reduces the transport speed while inserting and scanning the document Turn smooth scan on when scanning sensitive old or brittle drawings to avoid damage Pres...

Page 56: ...aper transport directly The document s width is detected and the document is moved back to the start position The paper feed delay time helps the user to position the document correctly along the tran...

Page 57: ...e from 0 to 100 Use FK1 and FK2 to move the slider Using backlight illumination is recommended while scanning translucent documents The back light lamp increases the contrast between background and in...

Reviews: