background image

iLive

8

iPod and iPhone

FM Radio

1.  Press the POWER button to 

turn the bar speaker on.

2.  Press the SOURCE button (iPod button on 

the remote) to switch to iPhone/iPod mode.

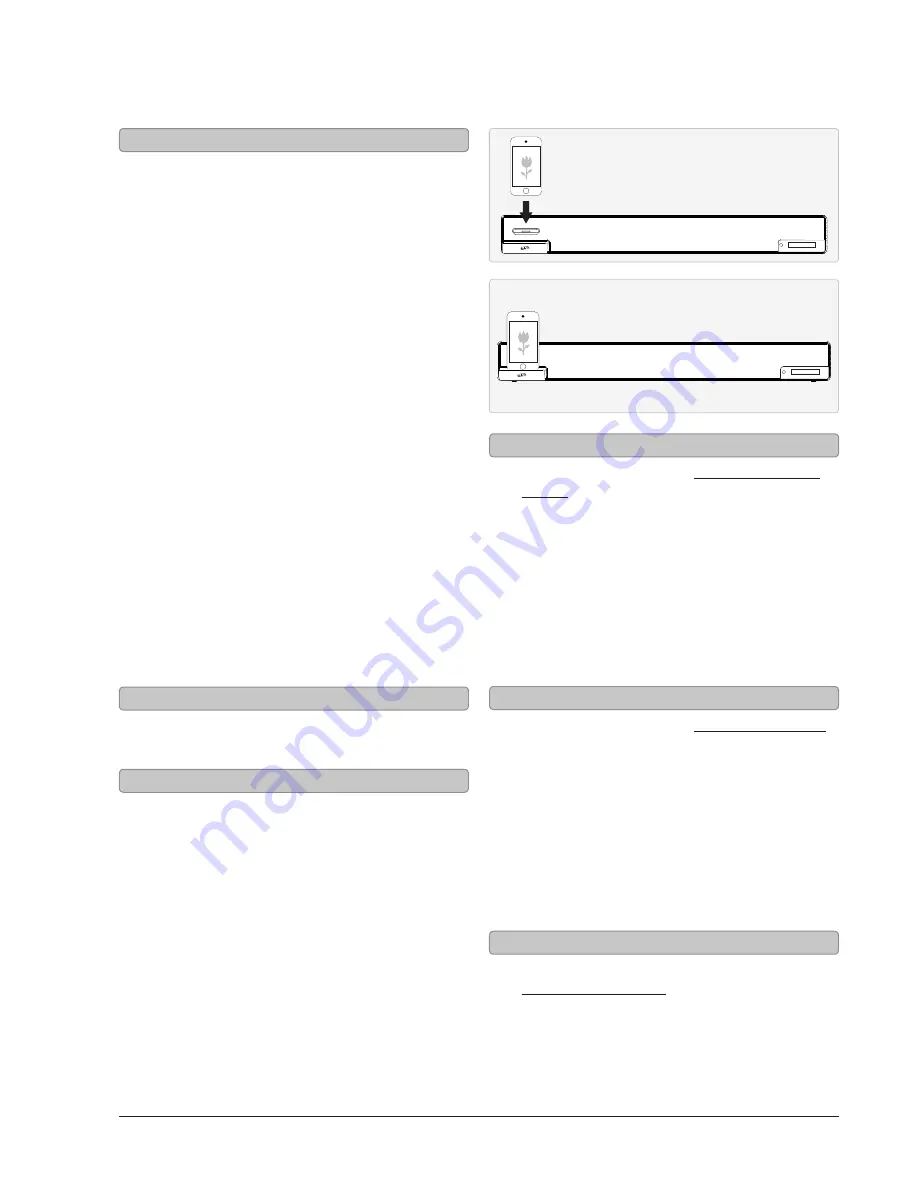
3.  Press the iPod DRAWER button to open the 

MOTORIZED DOCK FOR iPhone/iPod

4.  Locate the numbered bracket that fits the 

iPhone/iPod model that will be docked.

Each included bracket has a number on it, 

indicating which iPhone/iPod model that bracket 

is compatible with. See the separate bracket 

chart page to identify which bracket is needed.

5.  Snap the bracket into place over the iPhone/

iPod connector in the motorized dock.

6.  Connect the iPhone or iPod to the connector 

inside the Dock for iPhone/iPod.

When the speaker is plugged in, using AC power, 

the docked iPhone or iPod will charge.
After docking an iPod or iPhone, the bar speaker will 

automatically switch to composite video output mode.

1.  Follow the instructions for Docking an iPod or 

iPhone.

2.  Press the PLAY/PAUSE button to begin playing 

music from the docked iPhone or iPod.

Adjust the built-in FM Wire Antenna to improve FM 

radio reception. 

1.  Press the POWER button to 

turn the bar speaker on.

2.  Press the SOURCE button to 

switch to Tuner mode.

3.  Press the TUN/SKIP buttons on the 

remote to tune the FM radio.

1.  Follow the instructions for 

Saving a Radio Station.

2.  Press the MEMORY buttons on the remote 

to cycle through saved radio stations.

1.  Follow the instructions for Tuning the FM Radio.
2.  After tuning to the desired station, 

press the MEM button.

3.  Press the MENU UP or MENU DN buttons 

on the remote to select a preset.

4.  Press the MEM button to save the current 

radio station to the selected preset.

Up to 20 stations can be saved to 

the bar speaker’s memory.

Docking an iPod or iPhone

Playing a Docked iPod or iPhone

FM Antenna

Tuning the FM Radio

Listening to a Saved Radio Station

Saving a Radio Station

Summary of Contents for ITP231B

Page 1: ...USER S GUIDE V 1242 0406 11 For the most up to date version of this User s Guide go to www ilive net ITP231B 2 1 Speaker Bar for Any TV...

Page 2: ...ges or modifications to this unit not expressly approved by the party responsible for compliance could void the user s authority to operate the equipment WARNING Do not place the unit on top of any so...

Page 3: ...ral finish protect your furniture with a cloth or other protective material WARNING Changes or modifications to this unit not expressly approved by the party responsible for compliance could void the...

Page 4: ...t Component video output Subwoofer output Advanced remote control 37 length Wall mountable Treble bass controls 5 EQ presets Digital clock Wake to iPod iPhone or radio Gradual wake Sleep timer AC powe...

Page 5: ...nt Safety Instructions 3 2 1 Speaker Bar for Any TV 4 Setup 4 Table of Contents 5 Introduction 6 iPod and iPhone 8 FM Radio 8 Clock Alarm and Sleep Timer 9 Audio Inputs and Subwoofer Output 9 Basic Co...

Page 6: ...one or iPod iPod DRAWER Press to open and close the iPod docking drawer LINE INPUT 3 5mm Use to connect an MP3 player or other audio source to the bar speaker RCA AUDIO INPUT AC POWER CABLE RESET Pres...

Page 7: ...iPod SOURCE Press to switch between iPod Tuner Line and AV modes NUMBER KEYPAD REPEAT Press to repeat a single track or entire album on a docked iPhone or iPod TREBLE With the EQ set to FLAT press to...

Page 8: ...ly switch to composite video output mode 1 Follow the instructions for Docking an iPod or iPhone 2 Press the PLAY PAUSE button to begin playing music from the docked iPhone or iPod Adjust the built in...

Page 9: ...itch to the desired alarm source 8 Wait 5 seconds to finish setting the alarm 9 ALARM will appear on the display when the alarm is set 10 Press the ALARM button to cancel the alarm Setting the Clock S...

Page 10: ...Use the native controls on the connected video device to control video that runs through the bar speaker 1 Connect an RCA cable included to the COMPOSITE VIDEO OUTPUT and a television 2 Adjust the co...

Page 11: ...l If they re not adjust the marks as needed to make them level 6 After you ve double checked your markings drill through the top hole on both mounting brackets directly into the marks you ve made on t...

Page 12: ...it the support section at www ilive net Para transferir esta gu a de usuario en ingl s espa ol o franc s visite la secci n de la ayuda en www ilive net Pour t l charger ce guide de l utilisateur en an...

Reviews: