background image

Warnings and Precautions ................................................................................2

Important Safety Instructions .............................................................................3

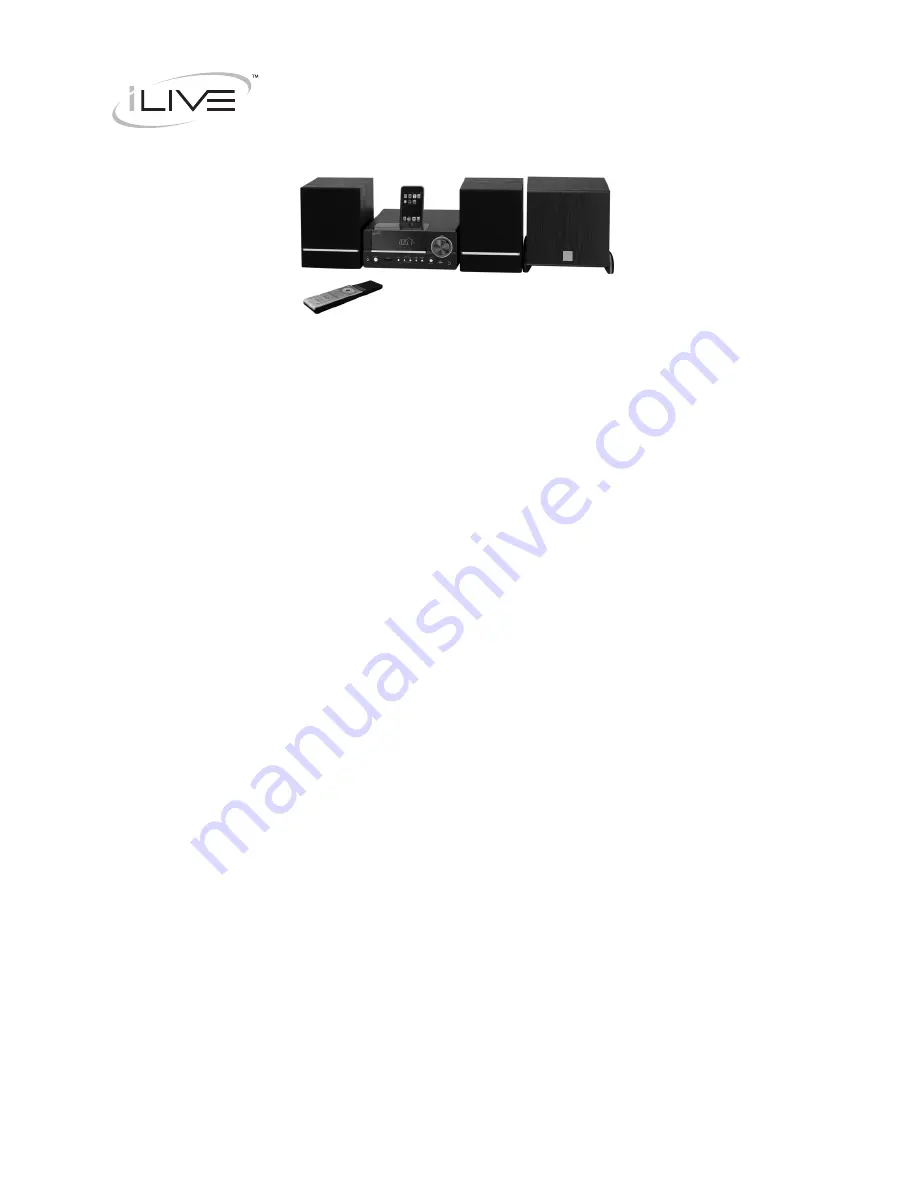
In the Box & Features ........................................................................................4

Powering the Unit & Changing the Remote Battery ..........................................5

Docking an iPod ................................................................................................6

Playing an iPod..................................................................................................7

Playing a DVD or CD & Programming a DVD ...................................................8

SD Card Slot, USB Drive & Programming a CD, USB, or SD card ...................9

Tuning the AM/FM Radio, Saving Radio Station, & Setting the Clock .............10

Using the Composite Video Output .................................................................11

Using the Component Input .............................................................................12

Using the Line Inputs, Stereo RCA Inputs, & Coaxial Digital Output ...............13

Location of Controls & Control Definitions ................................................. 14-23

Service Information..........................................................................................24

INSTRUCTION MANUAL

IH818B

Contents

Summary of Contents for IH818B

Page 1: ...r CD Programming a DVD 8 SD Card Slot USB Drive Programming a CD USB or SD card 9 Tuning the AM FM Radio Saving Radio Station Setting the Clock 10 Using the Composite Video Output 11 Using the Component Input 12 Using the Line Inputs Stereo RCA Inputs Coaxial Digital Output 13 Location of Controls Control Definitions 14 23 Service Information 24 INSTRUCTION MANUAL IH818B Contents ...

Page 2: ...or equivalent battery WARNING The remote control s button cell battery contains mercury Do not put in the trash instead recycle or dispose of as hazardous waste WARNING Lithium ion batteries like all rechargeable batteries are recyclable and should be recycled or disposed of in normal household waste Contact your local government for disposal or recycling practices in your area They should never b...

Page 3: ... Manual for replacement or resetting of protective device If replacement of the plug is required be sure the service technician has used a replacement plug specified by the manufacturer that has the same overload protection as the original plug 15 Outdoor Antenna Grounding If an outside antenna is connected to the receiver be sure the antenna system is grounded so as to provide some protection aga...

Page 4: ...rges docked iPod AM FM stereo radio with digital tuning Station memory presets Digital clock PAL NTSC converter Multi language on screen display Line input mini phono 3 5mm Stereo RCA outputs Subwoofer output Stereo headphone jack Progressive scan output S Video output Component output Composite video output USB connection Coaxial digital output Full function remote control AC power Includes Remot...

Page 5: ... cover off in the direction of the arrow above the word Open 2 Replace the old battery with an equivalent new battery AAA Batteries WARNING Danger of explosion if the remote control s batteries are incorrectly installed Replace only with the same or equivalent battery AAA AAA AC 120V 60Hz ...

Page 6: ...mpatible with See the separate bracket chart page to identify which bracket is needed 2 Snap the Bracket into place over the iPod connector in the Docking Station All Brackets will only fit one way onto the Dock 3 Connect the iPod to the iPod connector inside the Docking Station Once an iPod is connected to the Docking Station the unit will play and charge the docked iPod ...

Page 7: ...rough individual tracks 6 Press the Chapter Album or Playlists Buttons on the remote to navigate through the chapters albums or playlists on a docked iPod 7 Press the Directional Buttons Select Button and Menu Button on the remote to navigate the iPod s menu and make selections 8 Press the Repeat Button to turn the repeat option on the docked iPod off or on Press the Repeat Button once to repeat t...

Page 8: ...ns to search through individual tracks on the CD or chapters on a DVD Programming a DVD 1 With a DVD loaded in the unit press the Program Button on the remote 2 Use the Directional Buttons on the remote to move through the titles chapters and options 3 Press the Select Button on the remote control to select a title then a chapter Re peat this step until the desired DVD titles and chapters are prog...

Page 9: ...Buttons on the remote to view the different options High light the USB option and press the Select Button 4 To view or listen to files from the connected USB thumb drive highlight the de sired file using the Directional Buttons then press the Select Button Programming a CD USB thumb drive or SD card 1 Load a CD USB thumb drive or SD card into the unit and switch the correspond ing function 2 Use t...

Page 10: ... Search Tuning Buttons to switch between saved radio stations Saving Stations to the Unit s Memory 1 After Tuning the AM FM Radio to the desired station press the Memory Button 2 Set the station to a number using the Number Keypad 3 Press the Memory Button to save the station 4 Press the Memory Buttons to search through the saved stations Setting the Clock 1 With the power off press the Clock Butt...

Page 11: ... Yellow to Yellow 1 Connect the RCA Cable to the RCAAudio Outputs and RCA Composite Video Output on the unit and to the audio video inputs on the Television 2 Turn the unit on by pressing the Standby Button 3 Change the television to the correct audio video input setting 4 Audio and video played through the unit will now be seen and heard on the con nected television ...

Page 12: ...able to the RCAAudio Outputs on the unit to the audio inputs on a Television 3 Turn the unit on by pressing the Standby Button 4 Change the Video Out setting on the unit to Component for Y Cb Cr connections or P Scan for Y Pb Pr connections See The Setup Menu on page 14 15 5 Change the television to the correct video input setting 6 Video and audio played through the unit will now be seen on the c...

Page 13: ...Turn the unit on by pressing the Standby Button 3 Press the Function Button to switch the unit to aux mode 4 Change the MP3 player to the correct audio output setting if necessary 5 Audio played through the connected MP3 player will now be heard through the unit Please note if the Line Input is connected the Stereo RCA Inputs will not work ...

Page 14: ...llow 1 Connect a stereo RCA cable not included to the Stereo RCA Inputs on the unit and the stereo RCA outputs on a television or sound system 2 Turn the unit on by pressing the Standby Button 3 Press the Function Button to switch the unit to Aux mode 4 Audio played through the connected television or sound system will now be heard through the unit Television or Sound System ...

Page 15: ... Yellow 1 Connect a coaxial cable not included to the Digital Coaxial Output on the unit and the coaxial audio input on a surround sound system 2 Turn the unit on by pressing the Standby Button 3 Change the stereo system to the correct audio input setting 4 Audio played through the unit will now be heard on the connected television or stereo system Surround Sound Stereo System ...

Page 16: ...s are written in The Subtitle setting is dependent on the DVD s language offerings Audio Use the Audio setting to select the audio language of the DVD The Audio setting is dependent on the DVD s language offerings DVD Menu Use the DVD Menu setting to select the written language on the DVD s main menu The DVD Menu setting is dependent on the DVD in the player In DVD mode press the Setup Button to d...

Page 17: ...advanced setting that takes advantage of the Composite Video Outputs P Scan Component Video Out The P Scan Progressive Scan setting is an advanced setting that takes advantage of the Component Video Outputs and produces a higher quality image output Press the Video button on the remote control to cycle through S Video YUV and P Scan Audio Digital Output Off The Off setting is used when the Digital...

Page 18: ...Location of Controls 5 4 6 1 3 2 11 12 7 8 10 9 ...

Page 19: ...et of earbuds or headphones to the unit 5 Standby Button Press the Standby Button to turn the unit off and on 6 SD Card Slot Use the SD Card Slot to insert an SD card and access files stored on that SD card 7 Volume Dial Use the Volume Dial to adjust the volume of the audio output from the unit 8 Line Input mini phono 3 5mm Use the Line Input to connect an MP3 player to the unit 9 USB Connection U...

Page 20: ...Location of Controls 14 15 17 18 24 23 22 21 20 13 19 16 ...

Page 21: ... Subwoofer Connection Use the Subwoofer Connection to connect the included subwoofer to the unit 18 Speaker Connections Use the Speaker Connections to connect the included speakers to the unit 19 S Video Output Use the S Video Output connection to send a higher quality standard video signal to the TV Requires an S Video cable not included 20 Composite Video Output Use the Video Output connection t...

Page 22: ...Location of Controls 28 29 31 33 35 37 39 34 32 36 38 30 27 26 25 ...

Page 23: ...nu The unit must be connected to a television or monitor via one of the video outputs in order to see the setup menu 32 Directional Buttons Use the Directional Buttons to navigate through a docked iPod and system menus 33 Bass Buttons Press the Bass Buttons to adjust the level of bass output from the unit 34 Search Buttons Press the Search Buttons to search forwards or backwards through an individ...

Page 24: ... 41 43 44 56 55 46 47 48 49 51 52 54 45 40 42 53 50 Location of Controls ...

Page 25: ...n to mute the audio output of the unit 48 Auto Scan Button Press the Auto Scan Button to automatically scan for available AM or FM radio stations 49 Memory Button Press the Memory Button to save a radio station to the unit s memory 50 Playlist Buttons Press the Playlist Buttons to cycle through the playlists on a docked iPod 51 Tuning Buttons Press the Tuning Buttons to tune the AM or FM radio 52 ...

Page 26: ... 59 61 63 65 66 57 58 60 62 64 Location of Controls ...

Page 27: ... Press the button a third time to cancel this function 61 Angle Button The Angle Button works with compatible DVDs to adjust to alternate angles while watch ing 62 Audio Button Press the Audio Button to adjust the DVD s audio language 63 Zoom Button Press the Zoom Button to zoom in and out while playing a DVD 64 Clear Button In program mode press the Clear Button to clear stored tracks 65 GOTO But...

Page 28: ... 2116 Carr Street St Louis MO 63106 Phone 1 314 621 2881 Fax 1 314 588 1805 Email customerservice ilive net Website www ilive net To download this Instruction Man ual in English Spanish or French visit the Support section at www ilive net Para descargar este manual de instrucción en inglés español o francés visite la sección de la ayu da en www ilive net Pour télécharger ce manuel d instruction en...

Reviews: