background image

12

Plugging in for NBN or Fibre 

Smart wiring

Some newer homes have internal smart wiring, allowing your NBN Connection Box to be plugged into a 
patch panel in one room, and your modem to be plugged into the corresponding port on a patch panel 
in another room.

NBN Connection 
Box / Fibre Unit

Ethernet Cable

Power Button

Power Cable

Ethernet Cable

Power Socket

Plug into your 
computer’s 
Ethernet Port 

(optional)

Handset for 
Netphone 

(optional)

Summary of Contents for TGIINet-1

Page 1: ...Technicolor modem TGIINet 1 Quick Setup Guide iinet net au nb n i i n e t n e t a u n b n i i n e t n e t a u n b n i i n e t n e t a u n b n ...

Page 2: ...This guide will tell you everything you need to know about setting up your home network including internet WiFi and Netphone VoIP Welcome ...

Page 3: ...which type of internet service you have ADSL or VDSL Broadband See page 6 Naked broadband See page 10 NBN Fibre See page 12 Netphone See page 20 Need some WiFi tips To customise your default WiFi network name and password turn to page 16 For tips on how to connect to the WiFi see page 22 ...

Page 4: ...PSTN For use with Home Phone services xDSL only USB 1 and 2 Plug in a USB drive to share files via home network or a 3G modem to route mobile broadband as WiFi Ethernet 1 4 Connect computers or laptops with an Ethernet cable WAN For use with NBN Fibre or other fibre services Power port Power button Reset button Hold for 5 8 seconds to factory reset ...

Page 5: ...orange WPS connection in progress Green Connection successful Red Connection failed Phone Green Netphone enabled Flashing Call in progress Wireless button Turn WiFi broadcasting on off WAN Green DSL or WAN port connection Flashing Connection activity Internet Green Internet connection Red Connection failed Flashing Connection activity Ethernet Green Ethernet connection Flashing Connection activity...

Page 6: ...INE PHONE Line Filter You only need to use the line filter if you have ADSL and you need to plug the modem and a handset for Home Phone into the same wall socket Phone Cable optional Phone Cable Line Filter Cable Phone Handset Handset for Netphone optional Plug into your computer s Ethernet Port optional ...

Page 7: ...nect WiFi enabled computers tablets or smartphones to your modem s WiFi network using the details on the Default Wireless Settings card found in the box 5 Alternatively use the yellow tipped Ethernet cable to connect a computer s Ethernet port to any of the yellow LAN ports 6 Let your modem rest for 10 15 minutes In most cases it will retrieve your settings and get online automatically Try viewing...

Page 8: ... dashboard Enter the following details WAN Interfaces ADSL WAN Type PPP over Ethernet Username Your broadband username include any domain com au Password Your broadband password case sensitive VPI Number 8 VCI Number 35 4 If you have iiNet Netphone VoIP enter your VoIP details on the next page otherwise click I don t have VoIP You can set up VoIP from other providers later with the steps on page 2...

Page 9: ...rd on the dashboard Enter the following details WAN Interfaces VDSL WAN Type PPP over Ethernet Username Your broadband username include any domain com au Password Your broadband password case sensitive 4 If you have iiNet Netphone VoIP enter your VoIP details on the next page otherwise click I don t have VoIP You can set up VoIP from other providers later with the steps on page 20 5 Click Next and...

Page 10: ...10 Plugging in for Naked broadband Power Cable Plug into your computer s Ethernet Port optional Phone socket Ethernet Cable Power Button Phone Cable Power Socket Handset for Netphone optional ...

Page 11: ...sing the Power button 4 You can connect WiFi enabled computers tablets or smartphones to your modem s WiFi network using the details on the Default Wireless Settings card found in the box 5 Alternatively use the yellow tipped Ethernet cable to connect a computer s Ethernet port to any of the yellow LAN ports 6 Let your modem rest for 10 15 minutes It should retrieve your settings and get online au...

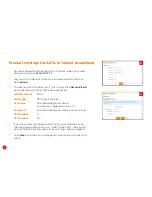
Page 12: ...n Box to be plugged into a patch panel in one room and your modem to be plugged into the corresponding port on a patch panel in another room NBN Connection Box Fibre Unit Ethernet Cable Power Button Power Cable Ethernet Cable Power Socket Plug into your computer s Ethernet Port optional Handset for Netphone optional ...

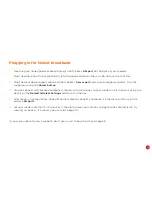
Page 13: ...e into the modem s Power port and an available power outlet Turn the modem on using the Power button 4 You can connect WiFi enabled computers tablets or smartphones to your modem s WiFi network using the details on the Default Wireless Settings card found in the box 5 Alternatively use the yellow tipped Ethernet cable to connect a computer s Ethernet port to any of the yellow LAN ports 6 Let your ...

Page 14: ... details WAN Interfaces Ethernet WAN Type Dynamic IP Address Note South Brisbane Places Victoria and some OptiComm Fibre services will need WAN Type PPP over Ethernet instead You will also need to enter your broadband username and password 4 If you have iiNet Netphone VoIP enter your VoIP details on the next page otherwise click I don t have VoIP You can set up VoIP from other providers later with...

Page 15: ...15 ...

Page 16: ...We recommend leaving the default WiFi settings unchanged after connecting once your device will remember the settings for you Connection advice can be found on page 22 3 If you want you can change the WiFi settings during steps 3 and 4 of the Setup Wizard or by clicking the Wireless option on the http 10 1 1 1 dashboard 4 Wireless 2 4GHz WiFi must be turned ON to broadcast WiFi If you turn SSID Br...

Page 17: ...always set a password for your WiFi network and only share it with people you trust 5 Change your SSID Broadcast name as desired This is the name of your WiFi network that you ll need to connect to 6 Security Key Type should be set to WPA WPA2 PSK You can then change your Security Key WiFi password as desired ...

Page 18: ...odem settings Default username admin Default password admin To keep the defaults simply retype admin in all the text boxes If you do set a custom username and or password you should write it down and keep it somewhere safe TIP If you ever forget your custom login details you can factory reset the modem to return it to the default admin settings However you will also lose all other custom settings ...

Page 19: ...ites and all the other joys of the internet If you have a Netphone VoIP service please see page 20 for setup instructions If you can t view websites or you have any other trouble please contact our friendly Support Team using the information on the back cover of this guide ...

Page 20: ...e Global page underneath SIP Network click the Edit button to the right of the existing SIP Network entry Edit to the following settings SIP Domain Your VoIP provider s SIP domain Primary Registrar Your VoIP provider s SIP server Primary RegistrarPort 5060 Primary Proxy Your VoIP provider s SIP server Primary ProxyPort 5060 Expire time 3600 You ll find a list of iiNet Group VoIP settings on the ne...

Page 21: ... ACT NSW NT QLD SA TAS VIC or WA Setting up VoIP 3 Select the Phone Numbers tab and then click Create New entering the following settings Username Your VoIP number no spaces or brackets URI Your VoIP number no spaces or brackets Password Your VoIP password case sensitive Display Name Your VoIP number no spaces or brackets SIP Network SIP Network Port FXS 4 Click the Apply button to the right to sa...

Page 22: ...dem to turn on WPS search mode The Status light on the modem will flash WPS Setup Please see your Default Wireless Settings card or learn how to customise your WiFi settings on page 16 3 Turn on WPS search mode on your device If you re not sure how to do this please consult the device s user manual 4 The modem and device should establish a connection to each other automatically Your modem also has...

Page 23: ...of available networks and click Connect 3 Enter your WiFi password and then click OK WINDOWS 8 1 In Desktop view click the Network icon in the bottom right hand corner of the screen 2 Select your WiFi network from the list of available networks 3 Make sure Connect Automatically is ticked and then click Connect 4 Enter your WiFi password and then click OK ...

Page 24: ... click Connect 4 Enter your WiFi password and then click Connect ANDROID OS Android OS may vary Consult your device s support website if these steps don t work for you 1 Tap the Apps icon on the home screen and then tap Settings 2 Tap Wi Fi and make sure theWiFi switch is set to ON 3 Select your WiFi network from the list of available networks 4 Enter your WiFi password and then tap Connect ...

Page 25: ... Fi On 3 Select your WiFi network from the list of available networks 4 Enter your WiFi password and then click Join iPHONE iPAD iOS 1 Tap the Settings icon on the home screen and then tap Wi Fi 2 Make sure the WiFi switch is set to ON 3 Select your WiFi network from the list of available networks 4 Enter your WiFi password and then tap Join ...

Page 26: ...nt is not returned to us with all cables accessories and components within 21 days of you receiving the replacement equipment and return freight bag you will be charged the full price for the purchase of the equipment that we sent to you plus any shipping costs relating to the prepaid satchel that was sent to you You will also still be charged for the original equipment and if the original equipme...

Page 27: ... for a major failure and compensation for any other reasonably foreseeable loss or damage You are also entitled to have the goods repaired or replaced if the goods fail to be of acceptable quality and the failure does not amount to a major failure 1 10 This warranty is given by iiNet Limited ACN 068 628 937 of 1 502 Hay Street Subiaco WA 6008 You can contact us on 13 22 58 or via email to support ...

Page 28: ...staff for a hand Westnet Support Available 24 7 1300 786 068 support westnet com au Internode Support 7am Midnight CST 7 days 1300 788 233 support internode on net Adam Support 8am 10pm CST Mon Fri 9am 5pm CST Weekends 1300 002 326 support adam com au iiNet Support Available 24 7 13 22 58 support iinet net au Support ...

Reviews: