background image

Connecting the Unit to Power Source

Connect the AC adaptor cable plug into the DC jack on the back of the system, then plug the AC adaptor into the wall 
outlet. 

Charging the Internal Battery

The iDL48 has an internal rechargeable Lithium-ion battery which should last the life of the unit. Charge the battery fully 
for first time use. Please allow at least 6 hours to fully charge the unit for first time use.
1. Make sure the AC adaptor is properly connected  to the unit and plugged into a working power source.
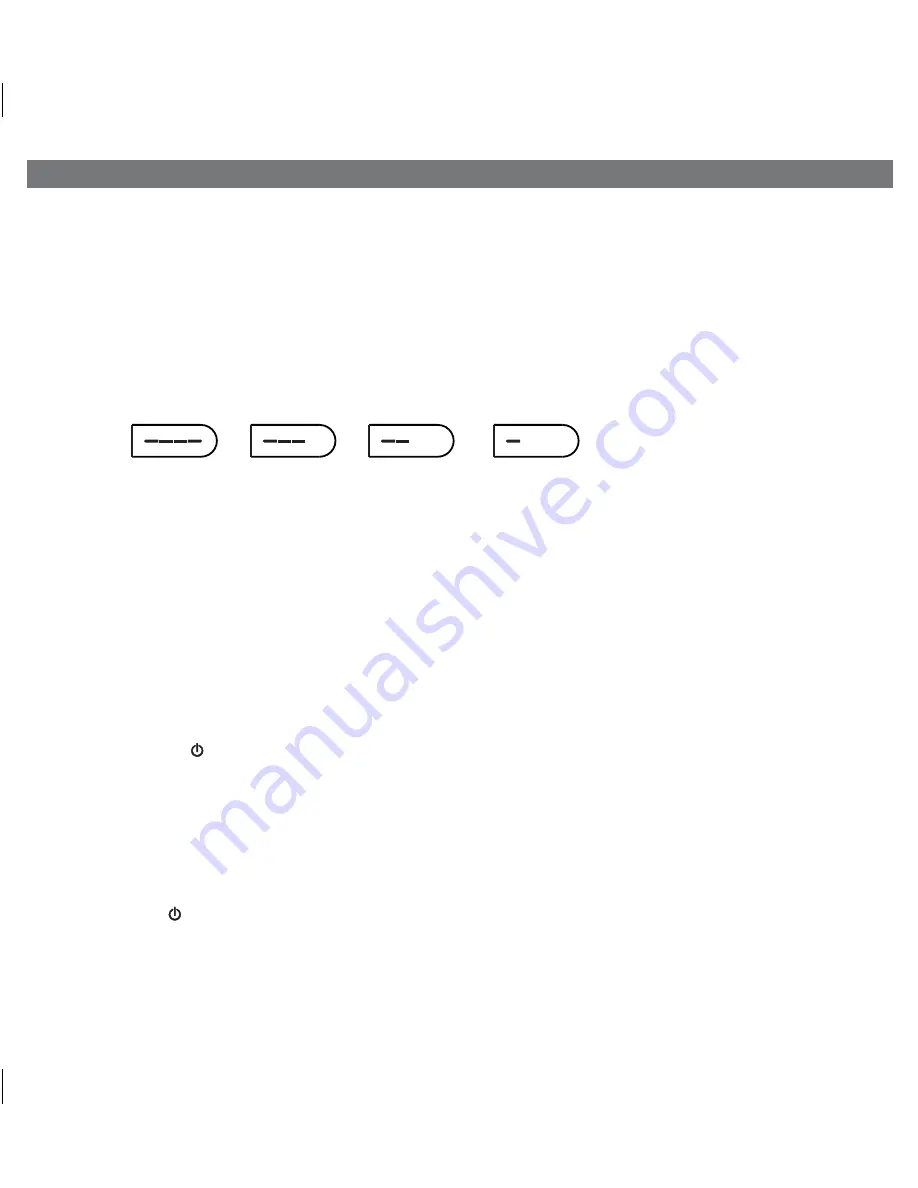
2. The internal battery will charge. While the battery is charging, the blue LED battery indicator lights will cycle to the right.
3. When the battery is fully charged, all 4 battery indicators will remain lit while the unit is powered on. As the battery runs

down, the lights will go out (see below). 

Fully charged           75-50% charge     50-25% charge      25-5% charge

When there is no battery indicator light, the battery is dead and needs to be charged. NOTE: Even if the battery is dead, 
the unit will still operate while connected to AC power.

Charging your iPad, iPhone or iPod

1. The unit must be connected to an AC power source to charge your iPad, iPhone or iPod, whether docked in the

Lightning connecter or connected to the USB port on the back of the unit. 

The unit will not charge these devices

when operating on the internal battery.

2. Open the stand and gently dock your iPhone 5, iPad mini, iPad 4th generation and iPod touch 5th generation. Note

that older devices cannot dock to the unit, but must be connected to the USB port using the sync cable that came with
it.

Your device will begin charging and while docked or connected via USB will continue until fully charged.

Turning the Unit ON or OFF and Selecting Modes

Press and release the      

Power/Mode


Button

 on the unit at any time as needed to turn the unit ON and to cycle through 

the three play modes. 
A. 

Lightning dock mode

: the Power/Mode indicator light is BLUE and the device docked in the Lightning dock will play.

B. 

USB mode

: the Power/Mode indicator light is GREEN and the device connected to the USB port will play.

C. 

Aux-in mode

: the Power/Mode indicator light is RED and the aux-in mode is activated (press play on the device to 

play it).

 Note that a docked iPad, iPhone or iPod (or one connected to the USB port) will continue to charge when the unit is turned 
off as long as the AC adaptor is plugged in. 

Press and hold

 the     

Power/Mode


Button

 to turn the unit off.

TIP: You can also turn the unit ON automatically by docking a playing device or connecting one to the USB port, and turn 
the unit OFF by disconnecting a playing device from the dock OR USB port.

Using the Unit

3

P6

Summary of Contents for iHome iDL48

Page 1: ...Dual Charging Portable Rechargeable Speaker System Questions For latest instructions visit www ihome com support iDL48 IB_US version Size 178 x 178 mm 12 pages Printing color Black Mat l 100gsm WF paper Apr 8 13 6 ...

Page 2: ... been tested and found to comply with the limits for a Class B digital device pursuant to Part 15 of the FCC Rules These limits are designed to provide reasonable protection against harmful interference in a residential installation This equipment generates uses and can radiate radio frequency energy and if not installed and used in accordance with the instructions may cause harmful interference t...

Page 3: ... solid wastes since they contain toxic substances Always dispose of used batteries electronics in accordance with the prevailing community regulations that apply to the disposal of batteries electronics If there are no local regulations concerning battery electronics disposal please dispose of the device in a waste bin for electronic devices Many electronics retailers now recycle batteries and oth...

Page 4: ...e Indicator Raise Volume Button Power Mode Button Power Mode Indicator light Back Panel Bottom Panel Top Panel 6 DC Jack Aux in Jack Reset Port USB Charging and Playing Port Rubberized backrest Flexible Lightning connector for iPad iPhone iPod 12V 3 5A ...

Page 5: ...rst opening the stand and popping up the backrest doing so could damage the unit and or your device Stand Back rest 3 docking your iPad iPhone iPod in the Lightning connector dock Gently dock your Lightning compatible iPad iPhone or iPod onto the Lightning dock on top of the unit The iPad iPhone or iPod will charge while docked Use the controls on your device to play your iPad iPhone or iPod The L...

Page 6: ...he USB port on the back of the unit The unit will not charge these devices when operating on the internal battery 2 Open the stand and gently dock your iPhone 5 iPad mini iPad 4th generation and iPod touch 5th generation Note that older devices cannot dock to the unit but must be connected to the USB port using the sync cable that came with it Your device will begin charging and while docked or co...

Page 7: ...de indicator glows GREEN 2 Use the controls on your iPad iPhone or iPod to pause and play audio and to navigate tracks and menus 3 Press the or Button to adjust the volume level on the unit 4 Press and hold the Power Mode Button to turn the unit off Playing Devices Using the Aux in Jack 1 Connect a 3 5mm audio cable to the headphone jack or aux out jack on your audio device and connect the other e...

Page 8: ... unit should be cleaned only as recommended See the Maintenance section of this manual for cleaning instructions 7 Objects and Liquid Entry Care should be taken so that objects do not fall and liquids are not spilled into any openings or vents located on the product 8 Attachments Do not use attachments not recommended by the product manufacturer 9 Lightning and Power Surge Protection Unplug the un...

Page 9: ...nd check for obstruction in the dock or USB port and on your iPad iPhone iPod Replace in dock OR USB port Check that USB cables are connected Your iPad iPhone iPod software is too old Upgrade software on your iPad iPhone iPod via iTunes on your computer iPad iPhone iPod is locked up plays but no sound comes out Check the volume setting Make sure your iPad iPhone iPod is working properly before doc...

Page 10: ...rned and the return authorization number No unit can be processed without a return authorization number 4 Write the return authorization number on the side of the shipping package and send the unit prepaid and insured to the Factory Service Center address authorized by SDI Customer Service Disclaimer of Warranty NOTE This warranty is valid only if the product is used for the purpose for which it w...

Reviews: