Quick Start
2
6
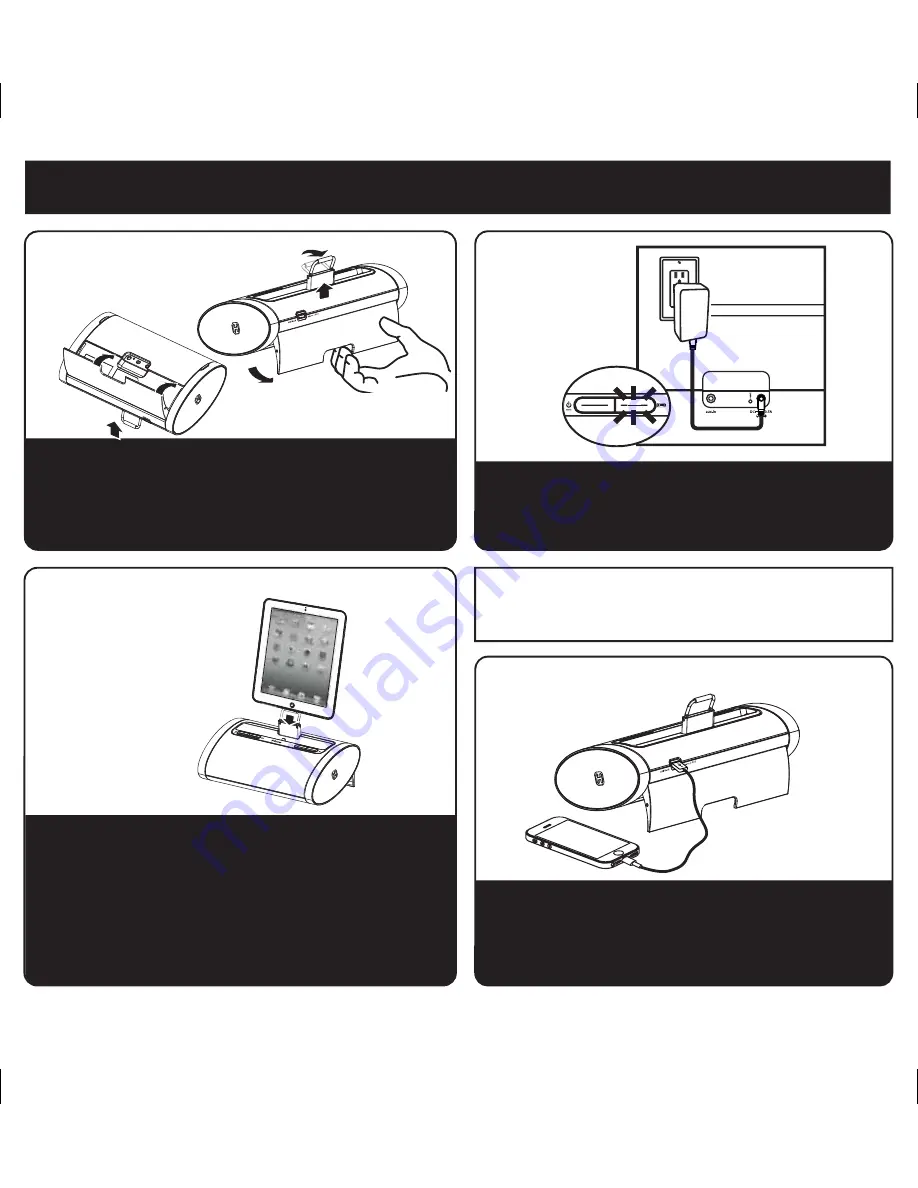
1: stand
Gently pull backwards on the indent of the stand located
on the rear of the unit and pull it into place for support mode.
The retractable backrest will pop up to support a docked
device. Pull up the metal bar. To close the stand, simply
press back into place. Don’t forget to fold down the metal
bar.
2: power
Attach AC adaptor cable to DC jack on bottom of the unit
and plug the other end into a wall socket. A row of 4 blue
LED indicators will light up indicating the unit has power and
has begun charging the internal battery.
OPEN
CLOSE
RESETRESET
TESTTEST
DO NOT
dock an iPad, iPhone or iPod without first
opening the stand and popping up the backrest,
doing so could damage the unit and/or your device.
Stand
Back rest
3: docking your
iPad/iPhone/iPod
in the Lightning
connector dock
Gently dock your Lightning compatible iPad, iPhone or iPod
onto the Lightning dock on top of the unit. The iPad, iPhone
or iPod will charge while docked. Use the controls on your
device to play your iPad, iPhone or iPod. The Lightning dock
is NOT compatible with iPhone 4 and older iPod models. To
play and charge these devices, connect them to the USB port
using the cable that came with the device.
4: connecting devices to the USB port
To play and charge iPhone 4 and other iOS devices, connect
them to the USB port on back of the unit using the cable
that came with the device. Use the controls on your device
to navigate and play your iPad, iPhone or iPod.


